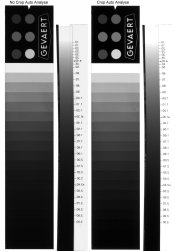
I leave the gamma at 2.2 and the auto exposure in the middle because I don't know what else to do.

I;ve got enough troubles with scanning without introducing more unknowns.
Maybe some else could explain gamma and the other setting. I just don't know.
OK, lets see if I can navigate the gamma minefield without making too many errors! Bear with me as I tend to ramble all over the place and I am going to generalize, so it's going to no doubt drive some people crazy with my fast and loose analogies...
The scanner sensor itself has a Gamma of "1" or unity, a lot like a piece of film with a latent image upon it. It only sees the scene it totality from brightest to darkest within it's ability to resolve.
Until you develop the film or electronically impose a LUT or Image Transform Matrix upon the Raw Scan, it will remain a "1".
Put the film in developer or impose a LUT on the raw data and you impose a Gamma upon the signal or the latent image via development and the relationships between the values will be redefined by compaction or expansion.
Traditional "normal" film development pegs a negative development gamma at .65 gradient, or for every 1 unit of energy that falls on the film, .65 density will occur on the straight line portion of a plotted characteristic curve of densities (such as occur on a calibrated step wedge). A 1 stop push is .75 gamma and a 2 stop push is at .85 gamma. Conversely, a 1 stop pull is .45 gamma.
Since film development and printing, or film scanning and manipulation,is designed to bring the image back to represent the initial scene values, one would think that we would attempt to print a .65 gamma negative with a paper/developer combo that would bring it back to the original 1.0, but it was found that 1.0 was far too low in contrast for pleasing visual contrast. Through experimentation and testing, it was determined that
end result gammas that were most pleasing to people were roughly in the 1.4 to 1.8 gamma range.
You can arrive at
end result gamma by multiplying your gamma chain of reproduction:
.65 gamma original x 2.20 gamma paper/developer combo = 1.43 gamma end result.
.65 gamma original x 2.40 gamma = 1.56 and so on..
Strangely enough, when CRT tubes were being developed for television, they found that the typical gamma response of the camera target tubes was very close to film gamma and that if they biased the tube to a gamma of about 2.20, pleasing images resulted.
Long story short, when computer monitors were CRT based, the 2.20 legacy (yes there were exceptions) was retained and by the time LDC and other displays came in, it was required to retain this gamma response characteristic to retain backward compatibility with existing electronic images.
OK, so what does that have to do with the 2.20 gamma figure in the scanner software? This is a Look Up Table (LUT) adjustment to bias the gamma response of the digital data as it is rendered into the file. In one way of thinking, it's the grade of the digital paper you are using; lower numbers are lower contrast and higher numbers are higher contrast.
However, you must remember that you are taking a digital image of a negative that is being inverted to a positive OR a positive image that is being translated into what the software developer has determined is a "pleasing" image contrast from a 1.0 gamma original; often a rendition of statistically normal pixel values within what is defined by the histogram.
So, you can basically vary the gamma control to whatever is pleasing to your taste and not worry about it if you get good results, but if you get weird results, it's because the LUT doesn't map your image data pleasingly.
The only way you can offset this is by manipulating the dmax, dmin and pixel value mapping PRIOR to the positive/negative LUT being imposed. The only way you can see this take effect is to change controls prior to the scan, make a scan and then evaluate. I tend to use the curves tool to elevate my dmax and lower my dmin values, as well as expand my midtones with a "balloon" type curve to create a lighter, low contrast image that can be corrected later (also with curves) in Photoshop. You can't recover graduations that are not clearly demarked by code values without heavily degrading the image, but you can make substantial corrections if there are code values there to manipulate.
I hope this makes sense.


 I;ve got enough troubles with scanning without introducing more unknowns.
  . Your could use following formula as example,
