OP
OP
Andreas Thaler
Subscriber
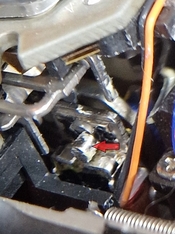
Now I was able to verify that contamination is the cause of the problem with the mirror magnet.
Larry Lyells, himself:


This means that the common fix with the magnetized screwdriver is no longer necessary, as this does not solve the problem or does not solve it permanently.
The sustainable solution is to remove the magnet and clean its three contact surfaces.
With this I close the topic.
+++
All information provided without guarantee and use at your own risk.
Larry Lyells, himself:
This means that the common fix with the magnetized screwdriver is no longer necessary, as this does not solve the problem or does not solve it permanently.
The sustainable solution is to remove the magnet and clean its three contact surfaces.
With this I close the topic.
+++
All information provided without guarantee and use at your own risk.
Last edited: