Building a Darkroom in a 2.5ft by 6ft Room

Simpler Time

A
Simpler Time

  • 0
  • 0
  • 26
Rural Ohio

Rural Ohio

  • 3
  • 0
  • 31

Recent Classifieds

Forum statistics

Threads
201,055
Messages
2,818,322
Members
100,496
Latest member
Incredulousk
Recent bookmarks
0

AndyH

Member
Allowing Ads
Joined
Aug 16, 2004
Messages
451
Location
New England
Format
Medium Format
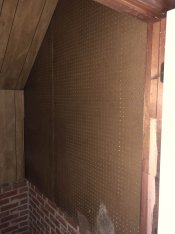
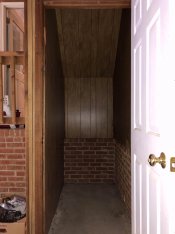
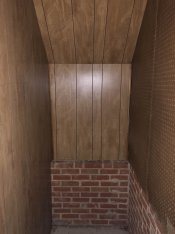
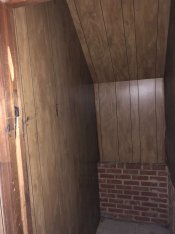
Thanks a lot for all the tips everyone, never ceases to amaze me how willing this community is to help a stranger think through something like this. In one of my darkroom books, I found this image that's pretty close to the layout of my closet. You'll see that I've highlighted in red where the door actually is at our house, so it's slightly different. I like the idea of putting shelves next to the angled wall under the stairs.

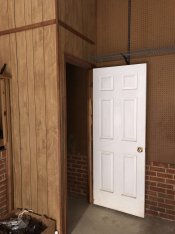
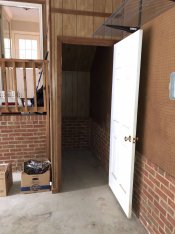
That is, by far, the better layout. It should be relatively easy to move the door if the wall is non bearing. Even if it is a bearing wall, cutting an opening and installing the door on the side is just a matter of installing an appropriately sized header over the new door opening, and doubling up the studs supporting either end. If you can do it yourself, it would be very cheap, but even if you have to hire a home improvement contractor, it's a pretty cheap job if you reuse the original door and frame.

Andy
 

ParkerSmithPhoto

Member
Allowing Ads
Joined
Jan 16, 2010
Messages
1,685
Location
Atlanta, GA
Format
Medium Format
@MattKing thanks for the response. I don't know much about processing with tubes but would love to stick to using the trays I've already purchased. Yep, there is a utility sink in the laundry room that is right inside the house from the garage.
I like Matt's idea of using a drum. You could set up the enlarger inside the closet so that the back of the enlarger faces the stairs. That would give you enough room to close the door behind you and not feel like you were just jammed in there.

After you expose the paper, you load it into a Beseler or Unicolor drum, step out into the light where you have a table with a Beseler or Unicolor motor base. Pour in the developer, set it on the base and off you go. These are pretty inexpensive items and will make your life a million times easier. You could even setup a small sink to hold everything and put a bucket underneath to catch the liquids. My darkroom sink drained into buckets for years before I got a drain installed.
 

Luckless

Member
Joined
Feb 9, 2016
Messages
1,367
Location
Canada
Format
Multi Format
A rather slick setup I've seen someone do with a similar space was to rebuild parts of the room as large 'drawers' that could be easily pulled in our out as needed but did not require the room to be permanently enlarged.

Think of the "Pop out room" seen in some of the fancier motor homes. When you aren't using the space it compacts neatly into the closet, but when you want to use it you extend it out and free up space inside the room for you to stand. [Care with design needs to be taken to ensure a light seal, and that it can't be easily bumped open of course.]

But whichever style you ultimately go with, I strongly suggest padding the corners of the bottoms of the stairs. It is the sort of thing you'll swear to yourself that you'll never bang your head into, but it is easy enough to slip up sooner or later while reaching for something.

On a semi-related note, it may also be worth walling off the lower portion under the stairs and putting small closet doors opening out into the other space. I find that is far easier to actually make use of rather than trying to stuff everything in from the large size of the large wedged shaped space. [A single door at the end of the 'stair wedge' means that much of the storage space at the small end ends up either being unused, or just a dumping ground that stuff goes to die in till you move, or till you want to pick a fight with the SO over cleaning the closet out...]
 
OP
OP
noahsmith

noahsmith

Member
Allowing Ads
Joined
Apr 30, 2017
Messages
85
Location
United States
Format
Medium Format
Sorry for the delay in response everyone, been busy finally closing on the house! I really appreciate you all taking the time to give me solid suggestions - means a lot! I’ve attached some photos of the closet itself. Hopefully this makes it easier to understand the space. I think it will be doable just a bit small. Hopefully I can make the room a bit longer one day.
 

Attachments

  • 0BD0543B-7BFC-413E-B1CB-955990F33EBE.jpeg
    0BD0543B-7BFC-413E-B1CB-955990F33EBE.jpeg
    557.2 KB · Views: 120
  • 8B003288-0307-47A7-86F6-800FAD8AA810.jpeg
    8B003288-0307-47A7-86F6-800FAD8AA810.jpeg
    557.9 KB · Views: 124
  • D7E8E05C-B5AE-4955-89F4-369BC2DDF2E2.jpeg
    D7E8E05C-B5AE-4955-89F4-369BC2DDF2E2.jpeg
    538.3 KB · Views: 119
  • F1D5D859-34AE-46BF-9F20-13319C046BC5.jpeg
    F1D5D859-34AE-46BF-9F20-13319C046BC5.jpeg
    519.9 KB · Views: 119
  • D56C3EF4-7DF0-49FF-A171-CA6322A8B2B8.jpeg
    D56C3EF4-7DF0-49FF-A171-CA6322A8B2B8.jpeg
    641.1 KB · Views: 116
  • 15EAB0E4-B97E-4FE2-97A1-4EF4110EF8DA.jpeg
    15EAB0E4-B97E-4FE2-97A1-4EF4110EF8DA.jpeg
    686.9 KB · Views: 125

logan2z

Subscriber
Allowing Ads
Joined
Jan 11, 2019
Messages
3,933
Location
SF Bay Area, USA
Format
Multi Format
Sorry for the delay in response everyone, been busy finally closing on the house! I really appreciate you all taking the time to give me solid suggestions - means a lot! I’ve attached some photos of the closet itself. Hopefully this makes it easier to understand the space. I think it will be doable just a bit small. Hopefully I can make the room a bit longer one day.
That looks cozy, but where there's a will there's a way. I'm sure you can make it work.
 

mshchem

Subscriber
Allowing Ads
Joined
Nov 26, 2007
Messages
15,615
Location
Iowa City, Iowa USA
Format
Medium Format
Black out the garage and just store stuff in the closet. My solution has been to build a cabinet for the enlarger and another for developing film. (The cabinets keep the dust off things.) When I print, I pull out a large folding table and the print washer lives in the attached laundry room.
That's neat!
 

kingbuzzie

Subscriber
Allowing Ads
Joined
Jan 18, 2015
Messages
441
Location
Athens, GA
Format
Medium Format
Lay everything out on the floor and use chalk on the floor for the table sizes. I highly encourage at least a light tight vent through the door if nothing else.
 

mshchem

Subscriber
Allowing Ads
Joined
Nov 26, 2007
Messages
15,615
Location
Iowa City, Iowa USA
Format
Medium Format
One suggestion is use a single tray. Get 3 small plastic containers or qt. Kodak plastic graduates. Pour the solution in and out of the tray. Kinda like a tube, only save the chemistry. Rocking print trays come up on Ebay but any tray will do.
Consider printing at night, years ago when I lived out in the country, our development had sodium vapor streetlights. Didn't bother printing. Don't try it with LED streetlights.
I set up a similar setup like yours for loading reels and developing 4x5 sheet film in little Kodak hard rubber tanks.

Think 3D, as if you were on the space station, you will figure it out.
 

Paul Howell

Subscriber
Allowing Ads
Joined
Dec 23, 2004
Messages
10,007
Location
Scottsdale Az
Format
Multi Format
If you use a motor base and paper drum you can use the closest for the enlarger, once the paper is in daylight drum you can process by the sink in the garage. You need a work bench long enough for the motor base and longest drum you intend to use. Given the size of your closet not sure you can print larger than 11X14. You can find a motor base on Ebay along with paper drums, but drums have go up in price as no one is making new drums.
 

Nokton48

Member
Allowing Ads
Joined
Oct 8, 2006
Messages
3,080
Format
Multi Format
^^ +1 Using large print drums can save a lot of space. Simply the best way to do it if cramped up.
 

Kino

Subscriber
Allowing Ads
Joined
Jan 20, 2006
Messages
7,899
Location
Orange, Virginia
Format
Multi Format
A Nova Slot processor is great for conserving space if you can find one cheap enough!
 

Renato Tonelli

Subscriber
Allowing Ads
Joined
Jan 26, 2007
Messages
1,482
Location
New York,NY & Pontremoli
Format
Multi Format
with a bit of creativity and ingenuity, quite doable.
Absolutely; you could for example mount the enlarger on the wall without the baseboard and instal a drop-down table underneath that locks into place when you need it (I’ve seen this setup). A tray ladder for the trays if you can’t afford a Nova slot processor (or don’t want one), etc. Give yourself time to think through possible solutions.
 

Bill Burk

Subscriber
Allowing Ads
Joined
Feb 9, 2010
Messages
9,455
Format
4x5 Format
I would think you need more space than that closet per se.
What if you hang curtains outside the closet and take an additional six feet of running space outside the door.
Printing, and developing prints, doesn't have to be as dark as film changing.
You could use the closet for the film changing (and maybe the enlarger itself) but then have a sink outside that door where you develop prints (and film that's already in tanks).
 

John Koehrer

Member
Allowing Ads
Joined
Apr 3, 2004
Messages
8,277
Location
Aurora, Il
Format
Multi Format
If the angled wall is under a staircase, you can gain a bit more room by cutting a section out to move the enlarger a bit further into the room.
It's not going to be much but every little bit helps.
 

ParkerSmithPhoto

Member
Allowing Ads
Joined
Jan 16, 2010
Messages
1,685
Location
Atlanta, GA
Format
Medium Format
Sorry for the delay in response everyone, been busy finally closing on the house! I really appreciate you all taking the time to give me solid suggestions - means a lot! I’ve attached some photos of the closet itself. Hopefully this makes it easier to understand the space. I think it will be doable just a bit small. Hopefully I can make the room a bit longer one day.
Trying to have a wet space in there will be a nightmare. The only (and I mean ONLY) way to do this is to have the enlarger table backed up against the stairs so that you walk straight in, close the door behind you, expose the paper, put it in a print drum, then walk out and process the print in the adjacent room. This could actually work quite nicely, as you already have pegboard for easy storage of neg carriers, dodging tools, etc., and the room itself would easily hold a Beseler 23C or something similar where you could print medium format and expose up to 16x20.

Add some weatherstripping and a floor sweeper and that door should be pretty well light tight; look for any light leaks under the stairs, fill them with caulk or expanding spray foam and you'll be ready to make prints and load film. I would also suggest painting the entire inside white. Then you can use a very small safelight and get plenty of bounce. You will probably need to have some electrical run into that space. If you have an overhead light on a pull chain, just tap into that wire and run it down the wall in a conduit.

Good luck!
 
Last edited:

ParkerSmithPhoto

Member
Allowing Ads
Joined
Jan 16, 2010
Messages
1,685
Location
Atlanta, GA
Format
Medium Format
One other idea: screw 2x4 strips into the studs on the side walls, about 4' each extending all the way back to the stairs, then add a few cross braces using Simpson Strong Tie connectors from Home Depot. Lay a thick piece of plywood or MDF on top of this to make your enlarger table. This should be rock solid, giving you storage behind the enlarger and also underneath. Extending it all the way back will keep you from dropping your tools off the back of the table. Painting everything white will give you good safelight bounce and make it feel much less cramped and oppressive.
 

John Koehrer

Member
Allowing Ads
Joined
Apr 3, 2004
Messages
8,277
Location
Aurora, Il
Format
Multi Format
Trying to have a wet space in there will be a nightmare. The only (and I mean ONLY) way to do this is to have the enlarger table backed up against the stairs so that you walk straight in, close the door behind you, expose the paper, put it in a print drum, then walk out and process the print in the adjacent room. This could actually work quite nicely, as you already have pegboard for easy storage of neg carriers, dodging tools, etc., and the room itself would easily hold a Beseler 23C or something similar where you could print medium format and expose up to 16x20.
Good luck!

That's what Alfred Steiglitz did although he was using large format film. Worked for him.
 

logan2z

Subscriber
Allowing Ads
Joined
Jan 11, 2019
Messages
3,933
Location
SF Bay Area, USA
Format
Multi Format
That's what Alfred Steiglitz did although he was using large format film. Worked for him.
That's essentially what I did to separate my wet and dry spaces. I expose the paper in my dry space (a spare bedroom), put the exposed paper in a paper safe and walk to the wet space to process the print. It works out nicely and keeps my exposure to chemical fumes at a minimum (although I'm using a vertical slot processor so fumes are pretty minimal).
 
OP
OP
noahsmith

noahsmith

Member
Allowing Ads
Joined
Apr 30, 2017
Messages
85
Location
United States
Format
Medium Format
Thanks so much for all of these suggestions everyone. You all are amazing! We’re at the beginning of week 2 of being in the new house and haven’t had time yet to work on the darkroom but I’ll be sure to keep everyone posted on the progress of it. I super appreciate everyone taking the time to give some really excellent advice and ideas. Thanks again!
 
OP
OP
noahsmith

noahsmith

Member
Allowing Ads
Joined
Apr 30, 2017
Messages
85
Location
United States
Format
Medium Format
401A7969-062C-4A0C-9FB6-839414F3ECC2.jpeg
Here’s an update on how the darkroom is looking so far. I decided to use a kobalt shelf unit for the base of my enlarger. I’ll be storing chemicals and paper in the shelves inside it. As for my trays, I’m going to have them set up on the shelves, just need to be careful to not accidentally hit one and knock it off/tip over.

the next thing I need to figure out is ventilation. I’m planning on putting a light tight louver above the door on the outside. I’ll put a fan on the inside near that vent to push air out. For the intake vent, is it okay to put it above/below the other vent? Or should it be somewhere totally different?
 
Last edited:

MattKing

Moderator
Moderator
Allowing Ads
Joined
Apr 24, 2005
Messages
54,604
Location
Delta, BC Canada
Format
Medium Format
Looks good!
I'd consider extending the shelves and adding a lip.
It would definitely be better to have the intake vent separated from the outlet - ideally low and at the opposite end of the room.
If you can have the outlet venting from above the trays - maybe by using a bit of dryer venting tube - that would be best.
 

John51

Member
Allowing Ads
Joined
May 18, 2014
Messages
797
Format
35mm
I'll second the idea of wider shelves with a lip.

I use a 4th tray for transporting the print to the wash area. When I take the 2nd print to be washed, I put the now washed 1st print in the drying rack. Then back to do the 3rd print.

Because I leave the darkroom after every print, I'm not that fussed about ventilation. The darkroom door is open as often as it is closed and I'm only close to the chems for a few minutes at a time.
 

logan2z

Subscriber
Allowing Ads
Joined
Jan 11, 2019
Messages
3,933
Location
SF Bay Area, USA
Format
Multi Format
Good progress!

Another vote for wider shelves. I wouldn't be in there five minutes without knocking a tray to the floor :smile:
 
Photrio.com contains affiliate links to products. We may receive a commission for purchases made through these links.
To read our full affiliate disclosure statement please click Here.

PHOTRIO PARTNERS EQUALLY FUNDING OUR COMMUNITY:


Ilford ADOX Freestyle Photographic Stearman Press Weldon Color Lab Blue Moon Camera & Machine
Top Bottom