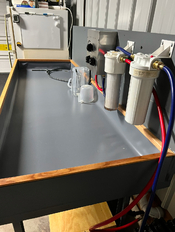
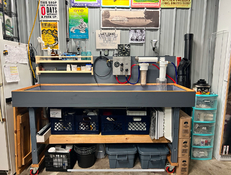
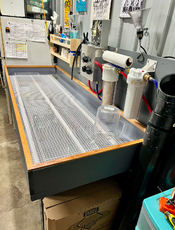
Here’s another inexpensive approach. For my darkgarage sink, I converted a homemade 7-foot workbench by adding sidewalls from leftover 1x6 lumber, drilling an hole for a drain, and lining it with PVC shower pan liner. The exposed wood was painted with some leftover porch paint. The oak corner trim covers where the PVC liner is stapled along the upper edge and was finished with some leftover spar urethane from another project. My thinking is that if the liner needs to be replaced, I can remove the corner trim, pull the staples and drain, and replace the PVC liner. My cost for the liner, trim, and drain was just under $100. I later added a couple of shelves on the left side of the backsplash and picked up some plastic grid and PVC lattice strips to make a sort of inexpensive duckboard along the bottom.