


Mustafa Umut Sarac
Member
I received below mail from Luisa Casella from Metropolitan Museum of Art.
I sent a mail her couple of hours ago about the preperation of starch grains , tinting them and finding from the market.
Luisa Casella
Sherman Fairchild Center for Works on Paper and Photograph Conservation
The Metropolitan Museum of Art
1000 Fifth Avenue
New York, NY 10028-0198
T. +1 212 396 5524
F. +1 212 650 3811
E. luisa.casella xxxxxxxx metmuseum.org
APPENDIX I: PREPARATION OF THE LAYERS1
Selecting the starch grains
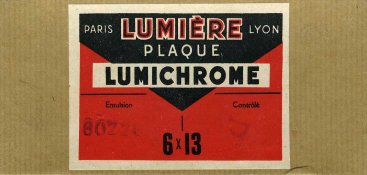
Autochrome starch grains were in the range of 10 to 20 microns in diameter. Resolution of the image is not critical for the present experiment. A separation by flotation will be done to avoid larger grains2.
Fill a large container with 2 liters of distilled water and 75 grams of potato starch.
Stir vigorously. Allow it to set for 15 minutes. The majority of grains are deposited in the bottom, while the smaller particles remain in suspension. Using a plastic tube, siphon the intermediate layer as best as possible (avoiding being to close to the top or the bottom).
Filter this solution using a Büchner funnel covered with filter paper, recovering a few grams of starch grains. Rinse these in ethanol and air dry.
After dry, gently pestle the grains in a mortar to separate lumps.
Tinting of starch grains:
Dilution of the dyes in distilled water will be done according to original dilutions in autochrome plates:
Orange-red grains:
Distilled water 100 ml
Erythrosine 14,5 g
Rose Bengal 2,6 g
Tartrazine 19,7 g
Green grains:
Distilled water - 100 ml
Ammonia - 9 g
Tartrazine - 21 g
Patent Blue - 10 g
Sodium Sulfate - 21 g
Violet-blue grains:
Distilled water - 100 ml
Crystal Violet - 7 g
Malachite Green - 1 g
Tartrazine was used in different concentrations both in the orange-red (19,7g) and in the green grains (21g); the concentration for this experiment will therefore be the approximate average - 20g.
In the case of the dyes present in the green dye (tartrazine and the patent blue) ammonia and sodium sulfate are added so the ionic environment provided by the starch would adsorb the colors.
Tinting:
The selected starch grains are mixed to its mass equivalent in dye-saturated solution.
The solutions so far are:
1.
100 ml water
Erythrosine 14,5 g
2.
100 ml water
Rose Bengal 2,6 g
3.
100 ml water
Tartrazine - 20 g
Ammonia - 9 g
Sodium Sulfate - 21 g
4.
100 ml water
Patent Blue - 10 mg
Ammonia - 9 g
Sodium Sulfate - 21 g
5.
100 ml water
Crystal Violet - 7 g
6.
100 ml water
Malachite Green - 1 g
The ratio in the original recipe was of starch to dye is:
- 2,3g dye to 3g starch for the orange (Erythrosine, Rose Bengal, Tartrazine)
- 2,24g to 3g starch for the green (Patent Blue, Tartrazine)
- 2,25g dye to 3 g starch for the blue-violet (Crystal Violet, Malachite Green)
In the present experiment the dyes are individually added to the starch. The ratio will be maintained as above, except for Tartrazine of which an average value will be used (2,27g).
Stir the mix for 30 minutes to one hour until there are no white starch grains. This is done at room temperature, except for Crystal Violet and Malachite Green which need to be at 30°C using a double-boiler. Strain the solution through Whatman filter paper and air dry.
Preparation of Varnish Layers
First varnish:
Toluene - 100 g (87 ml)
Natural rubber - 1,5 g
Dissolve the rubber in toluene for 24 hours.
Add:
5,6 ml of the 10% solution of dammar residue in toluene (see second varnish) - this solution is obtained from the mixture described in the second varnish (ethyl acetate and dammar) after rinsing with 60ml of ether and let dry. Make a 10% solution in toluene3.
Second varnish: 4
In a container, add:
Ethyl acetate 300 ml
Dammar gum 28,8 g
Let dissolve for 24 hours, stirring occasionally. An insoluble residue is left in the bottom. Recover this residue using filter paper. Use the residue for first varnish.
Add to the filtered solution:
7,2g nitrocellulose
Stir until complete dissolution (few days) and add:
Castor oil 4,536 g
Strain using filter paper.
APPENDIX II: INFORMATION ON DYES USED FOR THE EXPERIMENT
1.
CI #: 19140
Name: Tartrazine
Family: Azo
Other Names: Acid Yellow 23
CAS#: 1934-21-0
Supplier: Fluka/ Sigma-Aldrich
Name given by supplier: Tartrazine
Solubility: 0.5gr/ 10ml*
2.
CI #: 42025
Name: Malachite Green Ortho-chlorinated
Family: Triarylmethane
Other Names: Setoglaucin, Basic Blue 1
CAS#: None
Supplier: Salor/ Sigma-Aldrich
Name given by supplier: Rhoduline Blue 6G
Solubility: No known value*
3.
CI #: 42051
Name: Patent Blue
Family: Triarylmethane
Other Names: Acid Blue 3
CAS#: 3536-49-0
Supplier: Fluka/ Sigma-Aldrich
Name given by supplier: Patent Blue V calcium salt
Solubility: Water soluble*
4.
CI #: 42555
Name: Crystal Violet
Family: Triarylmethane
Other Names: Basic Violet 3
CAS#: 548-62-9
Supplier: SIAL/ Sigma-Aldrich
Name given by supplier: Crystal Violet
Solubility: 0.01-0.1gram/ 100 ml at 15.5°C*
5.
CI #: 45430
Name: Erythrosine
Family: Xanthene
Other Names: Acid Red 51
CAS#: 568-63-8
Supplier: National Aniline & Chemical Co.
Name given by supplier: Erythrosin, Bluish (Iodin Eosin)
6.
CI #: 45440
Name: Rose Bengal
Family: Xanthene
Other Names: Acid Red 94
CAS#: 632-69-9
Supplier: Aldrich/ Sigma-Aldrich
Name given by supplier: Rose Bengal
Solubility: 100mg/ ml*
*Data provided by Sigma-Aldrich technical services based on their experiments.
Filter
Dye
C.I. Number
Other Names
Appearance
Orange-red
Erythrosine B
45430
Acid Red 51
Yellow
Rose Bengal
45440
Acid Red 94
Magenta
Tartrazine*
19140
Acid Yellow 23
Red
Green
Patent Blue
42051
Acid Blue 3
Blue
Tartrazine*
19140
Acid Yellow 23
Red
Violet-blue
Crystal Violet
42555
Basic Violet 3
Purple
Setoglaucine or Malachite Green Orthochlorinated
42025
Basic Blue 1
Blue
* Tartrazine was used both in the red-orange and the green grains
Best ,
Mustafa Umut Sarac
Istanbul
I sent a mail her couple of hours ago about the preperation of starch grains , tinting them and finding from the market.
Luisa Casella
Sherman Fairchild Center for Works on Paper and Photograph Conservation
The Metropolitan Museum of Art
1000 Fifth Avenue
New York, NY 10028-0198
T. +1 212 396 5524
F. +1 212 650 3811
E. luisa.casella xxxxxxxx metmuseum.org
APPENDIX I: PREPARATION OF THE LAYERS1
Selecting the starch grains
Autochrome starch grains were in the range of 10 to 20 microns in diameter. Resolution of the image is not critical for the present experiment. A separation by flotation will be done to avoid larger grains2.
Fill a large container with 2 liters of distilled water and 75 grams of potato starch.
Stir vigorously. Allow it to set for 15 minutes. The majority of grains are deposited in the bottom, while the smaller particles remain in suspension. Using a plastic tube, siphon the intermediate layer as best as possible (avoiding being to close to the top or the bottom).
Filter this solution using a Büchner funnel covered with filter paper, recovering a few grams of starch grains. Rinse these in ethanol and air dry.
After dry, gently pestle the grains in a mortar to separate lumps.
Tinting of starch grains:
Dilution of the dyes in distilled water will be done according to original dilutions in autochrome plates:
Orange-red grains:
Distilled water 100 ml
Erythrosine 14,5 g
Rose Bengal 2,6 g
Tartrazine 19,7 g
Green grains:
Distilled water - 100 ml
Ammonia - 9 g
Tartrazine - 21 g
Patent Blue - 10 g
Sodium Sulfate - 21 g
Violet-blue grains:
Distilled water - 100 ml
Crystal Violet - 7 g
Malachite Green - 1 g
Tartrazine was used in different concentrations both in the orange-red (19,7g) and in the green grains (21g); the concentration for this experiment will therefore be the approximate average - 20g.
In the case of the dyes present in the green dye (tartrazine and the patent blue) ammonia and sodium sulfate are added so the ionic environment provided by the starch would adsorb the colors.
Tinting:
The selected starch grains are mixed to its mass equivalent in dye-saturated solution.
The solutions so far are:
1.
100 ml water
Erythrosine 14,5 g
2.
100 ml water
Rose Bengal 2,6 g
3.
100 ml water
Tartrazine - 20 g
Ammonia - 9 g
Sodium Sulfate - 21 g
4.
100 ml water
Patent Blue - 10 mg
Ammonia - 9 g
Sodium Sulfate - 21 g
5.
100 ml water
Crystal Violet - 7 g
6.
100 ml water
Malachite Green - 1 g
The ratio in the original recipe was of starch to dye is:
- 2,3g dye to 3g starch for the orange (Erythrosine, Rose Bengal, Tartrazine)
- 2,24g to 3g starch for the green (Patent Blue, Tartrazine)
- 2,25g dye to 3 g starch for the blue-violet (Crystal Violet, Malachite Green)
In the present experiment the dyes are individually added to the starch. The ratio will be maintained as above, except for Tartrazine of which an average value will be used (2,27g).
Stir the mix for 30 minutes to one hour until there are no white starch grains. This is done at room temperature, except for Crystal Violet and Malachite Green which need to be at 30°C using a double-boiler. Strain the solution through Whatman filter paper and air dry.
Preparation of Varnish Layers
First varnish:
Toluene - 100 g (87 ml)
Natural rubber - 1,5 g
Dissolve the rubber in toluene for 24 hours.
Add:
5,6 ml of the 10% solution of dammar residue in toluene (see second varnish) - this solution is obtained from the mixture described in the second varnish (ethyl acetate and dammar) after rinsing with 60ml of ether and let dry. Make a 10% solution in toluene3.
Second varnish: 4
In a container, add:
Ethyl acetate 300 ml
Dammar gum 28,8 g
Let dissolve for 24 hours, stirring occasionally. An insoluble residue is left in the bottom. Recover this residue using filter paper. Use the residue for first varnish.
Add to the filtered solution:
7,2g nitrocellulose
Stir until complete dissolution (few days) and add:
Castor oil 4,536 g
Strain using filter paper.
APPENDIX II: INFORMATION ON DYES USED FOR THE EXPERIMENT
1.
CI #: 19140
Name: Tartrazine
Family: Azo
Other Names: Acid Yellow 23
CAS#: 1934-21-0
Supplier: Fluka/ Sigma-Aldrich
Name given by supplier: Tartrazine
Solubility: 0.5gr/ 10ml*
2.
CI #: 42025
Name: Malachite Green Ortho-chlorinated
Family: Triarylmethane
Other Names: Setoglaucin, Basic Blue 1
CAS#: None
Supplier: Salor/ Sigma-Aldrich
Name given by supplier: Rhoduline Blue 6G
Solubility: No known value*
3.
CI #: 42051
Name: Patent Blue
Family: Triarylmethane
Other Names: Acid Blue 3
CAS#: 3536-49-0
Supplier: Fluka/ Sigma-Aldrich
Name given by supplier: Patent Blue V calcium salt
Solubility: Water soluble*
4.
CI #: 42555
Name: Crystal Violet
Family: Triarylmethane
Other Names: Basic Violet 3
CAS#: 548-62-9
Supplier: SIAL/ Sigma-Aldrich
Name given by supplier: Crystal Violet
Solubility: 0.01-0.1gram/ 100 ml at 15.5°C*
5.
CI #: 45430
Name: Erythrosine
Family: Xanthene
Other Names: Acid Red 51
CAS#: 568-63-8
Supplier: National Aniline & Chemical Co.
Name given by supplier: Erythrosin, Bluish (Iodin Eosin)
6.
CI #: 45440
Name: Rose Bengal
Family: Xanthene
Other Names: Acid Red 94
CAS#: 632-69-9
Supplier: Aldrich/ Sigma-Aldrich
Name given by supplier: Rose Bengal
Solubility: 100mg/ ml*
*Data provided by Sigma-Aldrich technical services based on their experiments.
Filter
Dye
C.I. Number
Other Names
Appearance
Orange-red
Erythrosine B
45430
Acid Red 51
Yellow
Rose Bengal
45440
Acid Red 94
Magenta
Tartrazine*
19140
Acid Yellow 23
Red
Green
Patent Blue
42051
Acid Blue 3
Blue
Tartrazine*
19140
Acid Yellow 23
Red
Violet-blue
Crystal Violet
42555
Basic Violet 3
Purple
Setoglaucine or Malachite Green Orthochlorinated
42025
Basic Blue 1
Blue
* Tartrazine was used both in the red-orange and the green grains
Best ,
Mustafa Umut Sarac
Istanbul

 but their heyday was the 1930's and 40's with the growth of colour litho printing.