At Last! Building Out My Darkroom!

Ode to Cor

H
Ode to Cor

  • 2
  • 0
  • 56
Moon in Myrtle

D
Moon in Myrtle

  • 5
  • 0
  • 56
Wooden Stone

H
Wooden Stone

  • 2
  • 2
  • 87
Sonatas XII-34 (Homes)

A
Sonatas XII-34 (Homes)

  • 1
  • 1
  • 73

Recent Classifieds

Forum statistics

Threads
199,451
Messages
2,791,776
Members
99,912
Latest member
ArcherKeating
Recent bookmarks
0
OP
OP
aoresteen

aoresteen

Member
Joined
Jun 8, 2004
Messages
629
Location
Newnan, GA,
Format
Multi Format
Rough drain complete

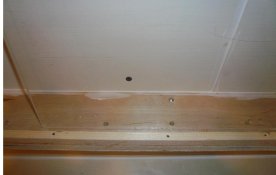
I finished up the last bits to get the rough drain line in. Glued in a 9 foot section of 1.5" PVC pipe. It runs to the right side of the rear wall as that's where the two sinks will intersect with a single common drain. Note the open floor at the far right side. This is to make sure if there are any drain leaks the water goes right down to the vinyl floor. You do not want a storage shelf under your drain!
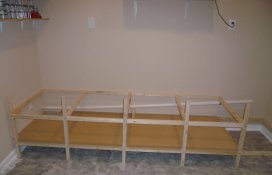
drain 4.jpg

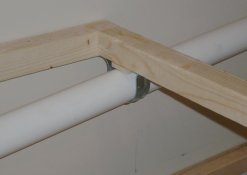
I used a hanging strap at the right end to raise up the drain. Plenty of flexibility in the PVC pipe to do this. I glued a scrap of 2x2 wood to snug up the strap fit:
drain 5.jpg

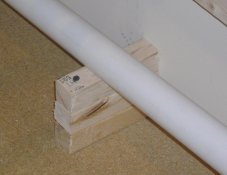
Three pieces of scrap 2x2 cobbled together for a center support.
drain 6.jpg

Now to install the 2nd shelf and the rest of the sink support frame.
 
Last edited by a moderator:
OP
OP
aoresteen

aoresteen

Member
Joined
Jun 8, 2004
Messages
629
Location
Newnan, GA,
Format
Multi Format
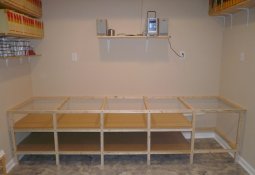
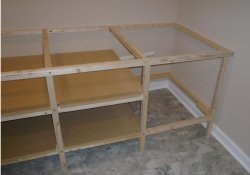
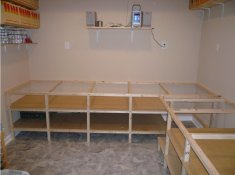
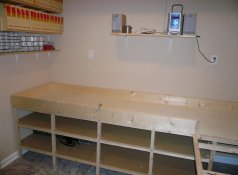
I finished the film side sink support framing & shelves. The shelves were made from a 4x8 sheet of 1/2" particle board. It is important to screw the shelf to the frame. I used 1.5" #6 screws; pilot holes were drilled with a 3/32" drill bit. The shelf ties the entire 2x2 frame together and makes the support frame very strong. The sink support frame is 30" tall.

sink frame film side 1.jpg

Note the outlets that are high up on the wall. When I had the basement finished off I had these outlets put up high for timers, safe lights, and processors. I even had an outlet put in the ceiling.

The open end at the right side is for the drain:

sink frame film side 2.jpg

The next step is to do the same thing along the right wall for the print sink. Construction will be exactly the same, so no updates until I finish it. This sink will be a bit longer that the one just built. It's starting to look like a darkroom!
 
OP
OP
aoresteen

aoresteen

Member
Joined
Jun 8, 2004
Messages
629
Location
Newnan, GA,
Format
Multi Format
Sink support frames complete!

I finished building the sink support frames today! No issues, just a lot of other things I had to do that kept me away from the darkroom.

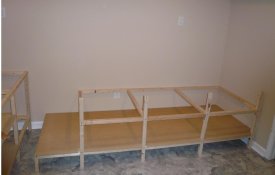
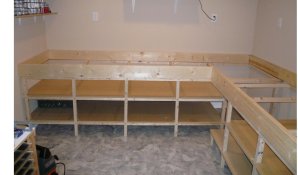
Here's the right side first shelf in:

Sink frame right 1st shelf.jpg

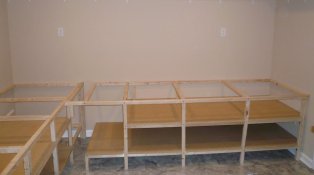
Here it is all done:

sink frame right finished.jpg

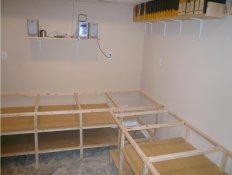
Note the open space at the left end of the frame where it joins the rear wall farming. I realized that if I made the second shelf the same length as the 1st shelf I would have no access to the drain area and would not be able to hook up the drain after the sinks are installed! So I cut the 2nd shelf back from 96" to 80". I can crawl in under the drain area and work on the drain as needed.

From the doorway looking in:

sink frame right finished 2.jpg

And where the two sinks will join:

sink frame right finished 3.jpg

Next up: Building the sinks and the back splashes. Once they are in I will start painting it.
 

Joel_L

Subscriber
Joined
Mar 12, 2011
Messages
580
Location
Colorado
Format
Multi Format
I like your setup. before I moved 8 years ago, I had a darkroom that also had a wet side dry side. I had two enlargers, one for 35mm and one for 6x7. Where I am now, I'm on a septic system and never rebuilt the darkroom. Now all I do is film in my Jobo and scan to print. Looking at your work is making me miss my darkroom. maybe some day again. Enjoy yours!

Joel
 
OP
OP
aoresteen

aoresteen

Member
Joined
Jun 8, 2004
Messages
629
Location
Newnan, GA,
Format
Multi Format
My Florida darkroom was on a septic tank (see my 1st post) Never an issue with B&W chemistry.
 
OP
OP
aoresteen

aoresteen

Member
Joined
Jun 8, 2004
Messages
629
Location
Newnan, GA,
Format
Multi Format
Where will you be putting you Jobo processor? :wink:

I'm not quite sure where I will put it this time. In the past it was next to the 20x24 Cascade print washer so that would be on the right side sink. We'll see.
 

Joel_L

Subscriber
Joined
Mar 12, 2011
Messages
580
Location
Colorado
Format
Multi Format
My Florida darkroom was on a septic tank (see my 1st post) Never an issue with B&W chemistry.

I do about 60% E6, 30% B&W, and 10% C41. With the small quantities I do, none of it is probably an issue. For now I'm OK with just doing the film and scanning. But I do get the itch once and a while, especially when I look at the two enlargets just sitting in the basement. Now if Ilfochrome or R3000 were still practical, I'd be more tempted.

Joel
 
OP
OP
aoresteen

aoresteen

Member
Joined
Jun 8, 2004
Messages
629
Location
Newnan, GA,
Format
Multi Format
Lots of progress! Sinks Complete!

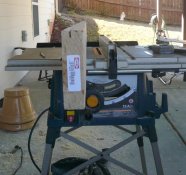
I made a lot of progress in the last few days. The sinks are done. The sinks were made out of 2x6 for the sides and 1/2" nice plywood for the bottoms. First the 2x6 needed to have a notch cut into them to hold the plywood. Using a table saw I cut a 1/2" deep notch 3/4" wide.

sink sides 1st cut 2.jpg

Then the board is flipped for the second cut. I used a 10" (borrowed from a friend as my 8.5" saw will not miter a 2x6) miter saw to cut the ends at a 45 degree angle. I test fitted the 2x6s to make sure all was well:

test fit sink sides 1.jpg


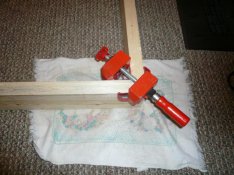
I used a corner clamp to hold the 2x6s in place so I could drill and screw the corners. I also used a bit of TightBond II glue as well.

Sink frame corner clamp.jpg

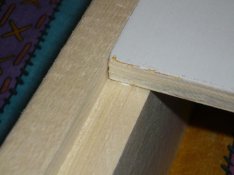
Here's a peek at the bottom of the sink showing the notch for the 1/2" plywood.

sink bottom lap.jpg

Since the sink is longer than 8' I had to add an extra piece of plywood to complete the bottom. The inside diameter of the sink is 32" for 20x24 trays. With 3/4 overlap on each side means that the bottom sheet of plywood was cut 33.5" wide from a 48x96 inch sheet.

film sink installed.jpg

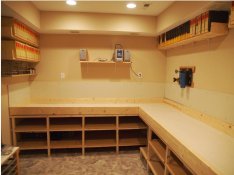
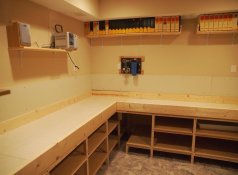
The 2nd sink was built the same. I installed them and the back splashes. I used 14.5" high back splashes. Why? Because when you cut a 4x8 sheet of plywood 33.5" wide you get a 14.5" x 96 piece left over :smile: ! I mounted the water temp/filter unit on 3/4" x 4" x 20" boards to make sure it will line up with the water pipes in the wall behind the unit.
Sinks done 1.jpg

Sinks done 2.jpg

sinks done 3.jpg

Next up: Cut hole for drain, Caulking and painting. Now it's really starting to look like a darkroom!
 
OP
OP
aoresteen

aoresteen

Member
Joined
Jun 8, 2004
Messages
629
Location
Newnan, GA,
Format
Multi Format
Print wash area Complete

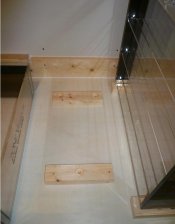
I decide to finish the print wash area before painting. I enlarged the back splashes, made a print squeegee area, and installed raising blocks for the two Cascade print washers. Rasing up the print washers 1.5" makes draining easier and gives better access to the area underneath the washers. In my old darkroom I just used a couple of blocks of 2x4 wood. I decided to make them a bit more custom this time.

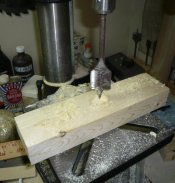
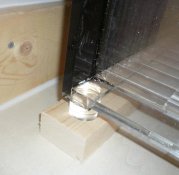
I cut some scrap 2x6 wood to 11' x 2.5" x 1.5". The 20x24 washer has feet that a just under 1.5" in diameter so I use a 1.5" spade drill bit and bored a 1/4" deep hole for the foot rest. It is important to use a drill press as the depth of the bore has to be the same. I set the stop for about 3/8" and did all three holes at the same time.

washer block 1.jpg

One side has two feet the other side has one. Once located where I wanted them I used wood glue to hold them in place.

washer block 2.jpg

washer block 3.jpg

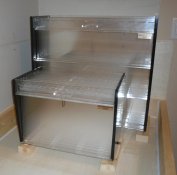
Both washers on blocks:

washer block 4.jpg

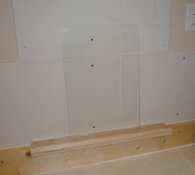
I squeegee my washed prints on a plexiglass sheet then dry them on screens. I built a shelf to hold the plexiglass sheet. Since I'm setting up to be able to do 20x24 prints the shelf is 24" wide. I drilled a number of 1/4" holes so that water will drain down to the sink. It sits behind the holding rinse tank.

print squeege 1.jpg

print squeege 2.jpg


I added 3 back splash panels in the print wash area. Here it is:

wash area 1.jpg

wash area 2.jpg

All the seams have been caulked. Next up is painting!
 
OP
OP
aoresteen

aoresteen

Member
Joined
Jun 8, 2004
Messages
629
Location
Newnan, GA,
Format
Multi Format
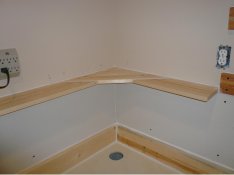
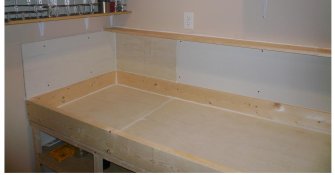
Progress is good. I added a rear wall shelf made fron 1x6 lumber (3/4" x 5.5"), cut the drain hole, and put on the first coat of primer:

Shelf:

corner shelf.jpg

back splash shelf.jpg

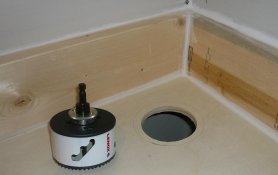
Drain hole was cut with a 3.5" hole saw:

drain hole.jpg


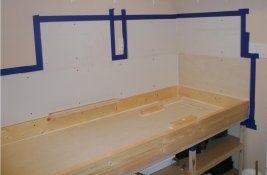
After sealing the shelf with caulk, I masked the sink off with blue painter's tape and put on the first coat of primer:

Mask paint area.jpg

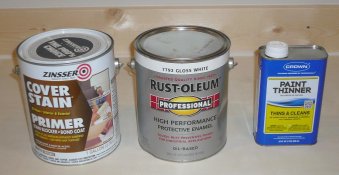
Paint products I bought at Lowe's:

paint products.jpg


1st coat of primer:

1st primer coat.jpg

Today the 2nd coat of primer goes on and by Friday the top coats should be done.
 

ToddB

Member
Joined
Jul 10, 2012
Messages
1,134
Format
Medium Format
Impressive!! Your carpentry work is fantastic too.

ToddB
 
OP
OP
aoresteen

aoresteen

Member
Joined
Jun 8, 2004
Messages
629
Location
Newnan, GA,
Format
Multi Format
Impressive!! Your carpentry work is fantastic too.

ToddB

Thanks but it's B level. No macro shots :smile: I'm also in the dog house as I put on the second coat of primer and forgot to close the basement stairs. The Commander in Chief is upset as the house now smells like oil paint. My bad!!!!
 
OP
OP
aoresteen

aoresteen

Member
Joined
Jun 8, 2004
Messages
629
Location
Newnan, GA,
Format
Multi Format
Done!!! At last!

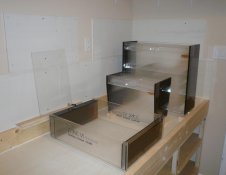
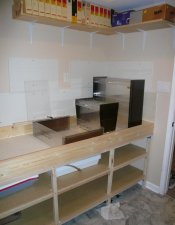
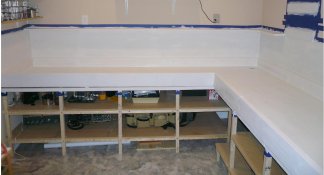
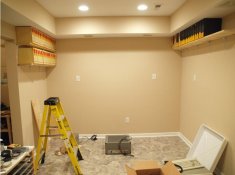
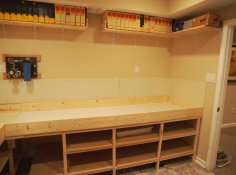
Well, I've finished the major construction of the dark room. I finished the painting (two coats primer plus three topcoats. The plumbing is in. Of course you are never done with a darkroom but I can now start processing film. Here's what the room looked like when I started way back in November:

slide tray shelves insatlled.jpg

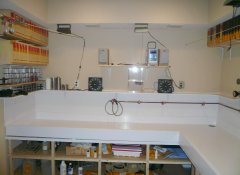
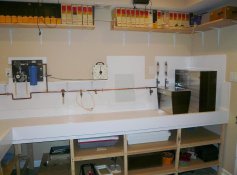
Here's what it looks like now:

main sink plumbing.jpg

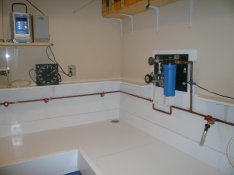
The corner drain area:

corner plumbing.jpg

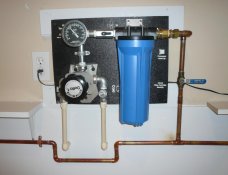
The water control unit plumbing:

water control unit plumbing.jpg

The print washing area.

print wask side plumbing.jpg

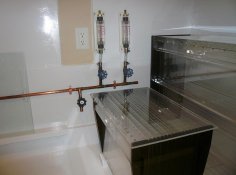
The print washers. Note the flow meters for the archival washers:

Print washers plumbing.jpg

I still have to hook up the print washers but that will not take too long. I did all the copper plumbing myself. I'm actually pretty good sweating copper joints. No leaks! I need to seal the door and finish putting in the safelights but the major stuff is DONE! Ye HAW!
 

pkaren62

Subscriber
Joined
Jan 21, 2014
Messages
1
Location
Luton, Engla
Format
4x5 Format
I'm glad you're finally going to get a darkroom you'll be able to enjoy for years to come. I wish you happy developing and printing!

My husband (bless him) built my darkroom in a shed in our garden. The wet side is on one of the two longer walls, the dry side on the other. The enlarger is in between on the far (shorter) wall - the trough is a couple of feet away from the enlarger.

He used Ikea kitchen cabinet frames under the countertops (cheap, cheerful, last a lifetime). Two of the cabinets have doors. In one, under the dry side, I keep my developed negatives and prints, stored in Really Useful Boxes (that's the brand name) for added protection. They are designed to live in basements so offer reasonable protection from the elements.

In the other, under the enlarger, I keep the paper. I keep my 4x5 negatives in an old ammo box, which is designed to keep the weather out.

I also have a small camping heater (the kind that cuts out if it falls over) to heat the shed in winter and reduce the humidity a little (it rains A LOT in England). I run the heater on low for an hour a day, plus it's on when I'm working in the darkroom. Since it's a little heater, it uses hardly any electricity.

So far I've had no problems with damp. The paper is fine, the negatives are fine.

Bruce Barnbaum, one of my favourite B&W photographer/printers, has kept his negatives and papers in his darkroom for years and they're fine.
 

Bateleur

Member
Joined
Jun 18, 2009
Messages
155
Location
Netherlands
Format
Multi Format
Well done, and enjoy the moment when the first print comes out of the wash!
 
OP
OP
aoresteen

aoresteen

Member
Joined
Jun 8, 2004
Messages
629
Location
Newnan, GA,
Format
Multi Format
Well, things took a bit longer than I expected. I had leaks at the transition from the cold/hot water PVC to copper and after repairing it twice I had to call a plumber. $300 later - no leaks. Then I was sick again and ended up in the hospital with a bleeding ulcer ect. Family obligations and what not. Not to mention two vacations (Ireland/Scotland 2014 & Germany 2015) where I increased my backlog of undeveloped film. Finally, I spent the last week or so getting ready to process my backlog of over 100 rolls of B&W film.

(big drum roll!) Today I processed 4 rolls of Arista 400 135-36 (Tri-X) in HC-110B. Of course things took a lot longer than expected. I could not find my beer can opener to pop open the 35mm film cassettes. A quick trip to Walt-Mart fixed that. Then I discovered my process thermometer was missing. I have no idea where I put it but I'm sure it's in a safe place :smile: . My other thermometers were all within a degree so I drove on. But things worked out - four rolls of 35mm film are now drying in the darkroom.

I closed down my last darkroom around March 2007. That makes it about 8 years 9 months I've been without a darkroom. Way, way too long. I will be busy for the next 3 months developing and proofing a lot of film. Once that is all done I have about 3 years worth of printing to do. Life is good :smile: !!
 

bence8810

Member
Joined
Oct 18, 2015
Messages
377
Location
Tokyo
Format
Multi Format
Welcome back and thanks for sharing. I just saw this thread today and read through the whole thing. Real impressive progress, glad you can finally start making use of it all!

Ben
 

pbromaghin

Subscriber
Joined
Sep 30, 2010
Messages
3,824
Location
Castle Rock, CO
Format
Multi Format
Wonderful ending. Now I just have to read the book.
 

Sirius Glass

Subscriber
Joined
Jan 18, 2007
Messages
50,442
Location
Southern California
Format
Multi Format
Welcome to the darkroom side.
 
Photrio.com contains affiliate links to products. We may receive a commission for purchases made through these links.
To read our full affiliate disclosure statement please click Here.

PHOTRIO PARTNERS EQUALLY FUNDING OUR COMMUNITY:


Ilford ADOX Freestyle Photographic Stearman Press Weldon Color Lab Blue Moon Camera & Machine
Top Bottom