ANNUAL PINHOLE DAY 2015 (April 26th): please join - WPPD

Where Bach played

D
Where Bach played

  • 0
  • 0
  • 26
Love Shack

Love Shack

  • 1
  • 1
  • 480
Matthew

A
Matthew

  • 4
  • 3
  • 1K
Sonatas XII-54 (Life)

A
Sonatas XII-54 (Life)

  • 3
  • 3
  • 1K
Zakynthos Town

H
Zakynthos Town

  • 1
  • 1
  • 2K

Forum statistics

Threads
199,798
Messages
2,796,786
Members
100,038
Latest member
SE1-andi
Recent bookmarks
0

bergytone

Member
Joined
Sep 8, 2014
Messages
168
Location
Grand Haven,
Format
Multi Format
@ DrCroubie, I haven't been using filters for the most part. On my last attempt I tried a yellow filter behind the pinhole, and I did a test exposure with and without the filter. I did the test using the darkslide to make a test strip. The unfiltered exposure with my F275 camera and pre-flashed Arista grade 2 was good at about 30 seconds on a sunlit scene. That's where the shadow detail started showing up. I tried doubling the time for the filtered test, and even the longest time of 1:15 didn't match the exposure without the filter at 15 seconds. From what I'm seeing, it looks like I'm about four stops slower with my yellow filter. My filter is a piece of Ilford multigrade 00 filter material. But there's a flaw with my test. Since I used grade 2 paper, filtering probably doesn't have the contrast effect it would on MGiV paper other than to just slow it down.

I learned mostly from Joe VanCleave that Arista EDU grade 2 is a great way to get your arms around the contrast, but the best thing to do is to avoid contrasty shots, work on subjects out of the direct sunlight. But I'm no expert.... still learning.
 
OP
OP
TheToadMen

TheToadMen

Subscriber
Joined
Sep 18, 2012
Messages
3,570
Location
Netherlands, EU
Format
Pinhole
On my last attempt I tried a yellow filter behind the pinhole, and I did a test exposure with and without the filter.

Isn't there a difference in the effects of filters on different multigrade and single grade papers?
And isn't the effect of filters different on photo paper than on regular film?

I found this:
"Differently sensitised materials require different safelights. In traditional black-and-white photographic printing, photographic papers normally are handled under an amber or red safelight, as such papers typically are sensitive only to blue and green light. Orthochromatic papers and films are also sensitive to yellow light and must be used only with a deep red safelight, not with an amber one. Panchromatic films and papers, nominally sensitive to the entire spectrum, sometimes have a region of minimum in their range of sensitivity that allows the careful use of safelight confined to that part of the spectrum, e.g. KodakPanalure panchromatic paper, tolerant of limited exposure to light filtered through a Kodak 13 Safelight Filter. Other panchromatic materials must be handled only in total darkness."
 

Dr Croubie

Member
Joined
Mar 21, 2013
Messages
1,986
Location
rAdelaide
Format
Multi Format
Isn't there a difference in the effects of filters on different multigrade and single grade papers?

Pretty much, yes.
Graded paper is blue-sensitive, multigrade is both blue and green sensitive.
In theory, if you put a yellow filter in front of graded, blue-sensitive-only paper, then you'll block out everything and get nothing. Of course, in practise, you do get something, because neither the filters nor the spectral response of the paper are perfect, so you'll still just get a grade-2, much slower paper. But still it's blue-sensitive so skies white, reds black, if you're lucky maybe some foliage will be light (ie distant mountains that look blue)

Put a blue-blocking green-passing (yellow, green, yellow-green) filter in front of multigrade paper, and you'll get a) something closer to 00 grade paper, and b) sensitive to green light instead of blue. So skies lightish (lighter than film with an orange or red filter) but not pure white, foliage light, reds still black. Maybe some yellowish looking colours will come out a bit lighter.

In short, that's why I shoot MGiv with a YG filter (I didn't have a pure-green filter to play with, and I've got my speeds down with this combo so not changing it now).
 

Dr Croubie

Member
Joined
Mar 21, 2013
Messages
1,986
Location
rAdelaide
Format
Multi Format
Wooden-framed foamcore box-camera is coming into shape!
That's the front (although I might make it the back) and the top/bottom getting glued on, the side on the floor is next.
Image size is 500x770mm, that's just over 19x30" (500x770mm is the size the foamcore sheets came in, I wish it had come in slightly larger sizes, then I could have fit 20x24" paper in it).
Depth of this bit is just under 500mm, it'll be the 'outer' shell.
The other piece will be possibly 250mm deep (ie, cut a sheet in half), slide in and hopefully be snug enough to not leak too much light (if not, I've got a huge darkcloth I can wrap it in).

Then I can 'focus' from about 250mm to 500mm, even out to 700mm if I'm careful not to take it apart and bleed light into it.
Or, because it's such a big area 250mm FL doesn't make much sense, so I might make the inner bit from whole sheets, and 'focus' from 500-1000mm, haven't decided yet.

attachment.php
 

Attachments

  • image.jpg
    image.jpg
    172.8 KB · Views: 208
Last edited by a moderator:

daleeman

Member
Joined
Jul 17, 2008
Messages
1,150
Location
Homosassa, Florida
Format
Multi Format
Breaking out the Zero Image multi format this time. Trying to plan where to go and what to see. That is what is racking my little mind, looking for something different in the area I lived in for years.
 

EdColorado

Member
Joined
Feb 7, 2009
Messages
506
Location
Loveland, Co
Format
Multi Format
I'll be using my Reality So Subtle 6x17 which I recently received (and have yet to use). I also spent this afternoon converting an old broken down Mamiya 180mm TLR lens into a pinhole "lens". This one didn't have a shooting lens or shutter, just the viewing lens. I removed most of the viewing lens to get it out of the way and mounted a homemade pinhole over the shooting lens mount. A quick measure of the film plane to lens mount distance gave me 91mm, which according to the pinhole calculator at mrpinhole.com calls for a .402mm hole. I used a pin and on my first try got a mostly (sort of) round hole that measures out at... .400mm! Damn, must be karma. :smile: 
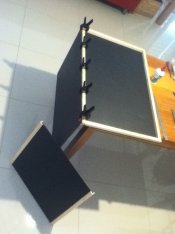
The tolerances on this project were to say the least a bit on the loose side so I'm sure it will work just fine. The lens will be mounted on an old broken down C220 I've also never tried to use. It seems to wind ok, what else do I need? Oh yeah, the light seals are trash so I'll probably just tape the door closed with electrical tape. If the thing actually takes interesting pictures then I'll consider new light seals.

So I'll have one cool well made camera and one quick and dirty camera, neither of which I'll have used before, all coupled with the fact that I haven't shot a pinhole photograph since jr. high school back in '71. Should be a great day! :smile:
 

f/16

Member
Joined
Sep 2, 2011
Messages
375
Location
Houston, TX
Format
Multi Format
If you have a camera and home made pinhole body cap does that count or do you need a dedicated pinhole camera?
 

Dr Croubie

Member
Joined
Mar 21, 2013
Messages
1,986
Location
rAdelaide
Format
Multi Format
If you have a camera and home made pinhole body cap does that count or do you need a dedicated pinhole camera?

I'm pretty sure that as long as f>100 you'll be fine...
 
OP
OP
TheToadMen

TheToadMen

Subscriber
Joined
Sep 18, 2012
Messages
3,570
Location
Netherlands, EU
Format
Pinhole
(email reminder from pinholeday.org)

Pinhole Day is this Sunday (April 26th, 2015)! Are you ready?


Time to gear up for this year's Pinhole Day...
Join the thousands of like-minded people around the world who are looking forward to participating in this year's special day. You're the ones who makes it all happen!


Using a handmade, decorated or otherwise special camera?
Don't forget to take a photo of your camera and add it to the gallery along with your pinhole photo.


http://pinholeday.org


https://www.facebook.com/PinholeDay


https://twitter.com/PinholeDay
 

NedL

Subscriber
Joined
Aug 23, 2012
Messages
3,398
Location
Sonoma County, California
Format
Multi Format
Pinhole Family Portrait

From WPPD last year, the lineup is the same this year. If I get ambitious tomorrow I might make an 11x14 box camera.


pinhole family portrait par Ned, on ipernity

Clockwise from left:
  • Oatmeal tin anamorphic with triangular pinhole made from 3 razor blades. 5x7 paper.
  • Big Hello Kitty popcorn tin uses 11x14 paper
  • In the mirror is an instant film camera with a weird looking dude aiming it. I don't know that guy.
  • Black matboard box camera uses 8x10 paper.
  • 1st ground level coffee can is for macro with a 0.15mm pinhole uses 5x7 paper
  • upper coffee can has selectable rise or fall, 5x7 paper
  • last coffee can was my first and probably still my favorite, also 5x7 paper.
As you can see, I like super-simple pinhole cameras, nothing fancy, none of them took more than half an hour to make.

All the cans are spray-painted flat black inside, and waiting for that to dry was the longest part of making them.

The cans have a 1/4" hole drilled, and then a piece of aluminum soda can with a pinhole is taped on the inside with black tape.

De-burring the drilled hole is optional, and the burrs can cause interesting effects.

I darken the area around the pinhole with a black sharpie pen on the inside.

I like to make the pinholes and then just check that they are "in the ballpark"... they are easy to swap out and I swap in new ones until I'm happy. In my favorite one, on the far right, I'm sure the pinhole is not "optimum" but I like the pictures it makes the best.

The exception is the matboard camera, where I carefully measured the pinhole with my enlarger and it is perfectly round and very thin. I made a bunch of pinholes and picked the one closest to optimum for a paper negative. That camera makes the most "sharp" images, and I like it, but it is also the least "pinholey" and more like a lensed camera photograph.

Most use tape as the shutter...with a a bit of non-sticky side folded over where it covers the pinhole.

The instant film camera has a sliding shutter made from black matboard material.

The Hello Kitty tin has a piece of refrigerator magnet for a shutter.

The coffee cans are pretty much light tight: there is a circle of black paper under the lids, but I usually put that foil on top as a failsafe.

Looking forward to Sunday. Might have a challenge because it is supposed to be windy here... so I will go with the flow and think about wind as a friend.
 
Last edited by a moderator:

Dr Croubie

Member
Joined
Mar 21, 2013
Messages
1,986
Location
rAdelaide
Format
Multi Format
I've just realised how huge this thing really is...

attachment.php


(for scale, 135-36 RVP, 4x5" Ektar, 8x10" FP4+)
 

Attachments

  • image.jpg
    image.jpg
    81.9 KB · Views: 216

NedL

Subscriber
Joined
Aug 23, 2012
Messages
3,398
Location
Sonoma County, California
Format
Multi Format
Fabulous Fifties

My wife was at a white elephant gift exchange and got this lunch box for me to make a camera out of:
attachment.php

Today I poked a pinhole in the bottom, and sanded the metal until it was thin.
Photo paper will go in the lid. Then the inside was lined with 120 backing paper:
attachment.php

It uses a piece of tape for a shutter:
attachment.php
 

Attachments

  • ff01.jpg
    ff01.jpg
    133.3 KB · Views: 184
  • ff02.jpg
    ff02.jpg
    130 KB · Views: 203
  • ff03.jpg
    ff03.jpg
    150.1 KB · Views: 238

pdeeh

Member
Joined
Jun 8, 2012
Messages
4,770
Location
UK
Format
Multi Format
I didn't prepare at all, and spent a frustrating/annoying hour or so this morning making a hash of making a plateholder for my 76-year-old 6x6 plates. Gave up in the end. Loaded a 6x9 back with 70+ year old nitrate film and scrunchied it onto my Zero45, then walked 4 miles up to the woods with a tripod and shot the roll in flat overcast light. All exposures were about 20 seconds using the f/45 zoneplate.
I've unrolled the roll and rolled it back up on itself. It'll have to stay like that for a few days to get some of the curl out so that I can actually get it onto a reel to develop. It's like spring steel :smile:
Of course if I'd thought about it in advance I'd have loaded some holders with RC paper and by now they'd be dry enough to scan or make contacts ...

"he who fails to prepare must prepare to fail" hehehe
 
OP
OP
TheToadMen

TheToadMen

Subscriber
Joined
Sep 18, 2012
Messages
3,570
Location
Netherlands, EU
Format
Pinhole
I shot 2 rolls of expired Konica Professional 400 (120 format) in my Noon Pinhole camera:

attachment.php

(6x12 format, exposure time 15-20 sec.)

and one sheet of Ilford photo paper (30x40 cm) in my homebuild LF wooden pinhole camera:

attachment.php

(rated @ ISO 3, exposure time 30 minutes)

I didn't have the time because I have to fill in my tax forms for 2014. But didn't want to pass this WPPD so I loaded the cameras and gave myself 1 hour into the fields (and into the water).

I set up the LF pinhole camera for an exposure of 30 minutes and then went into the field and the stream to shoot the Noon camera.

I hope some good was registered ...
 

Attachments

  • IMG_7416.jpg
    IMG_7416.jpg
    82.4 KB · Views: 227
  • IMG_7420.jpg
    IMG_7420.jpg
    71.4 KB · Views: 228

Gadfly_71

Member
Joined
May 5, 2006
Messages
224
Location
Phoenix, AZ
Format
Multi Format
For WWPPD 2016 my camera is a converted cigar box 4x5. Focal length is approximately 120mm and the laser drilled pinhole is .5mm (f/240)
2015-04-11 12.36.50.jpg
 

Nige

Member
Joined
Sep 8, 2002
Messages
2,321
Format
Multi Format
I used my 7.9x10 (failed to allow for the thickness of the matt board when constructing) and 5x7 box cameras with RC paper.

I had spied an old truck parked in a street recently and decided that would be my subject. We'd been to my sons footy match earlier where it had rained on and off all morning, so after lunch with a break in the weather I loaded up the car with cameras (the 2 pinholes loaded with one sheet of paper each) and threw in my 4x5 to take a 'real' shot as well. Grabbed the tripod I use with the 5x7 but even though thinking about it, left without grabbing the necessary QR plate to suit.

Got to the location and set up the 5x7 where I discovered I'd forgotten the QR plate. Set up my 4x5 tripod instead only to find that uses a larger screw... pack that away but then had a faint recollection that the head came with both, so examined the head and yeah! found the smaller screw in it's storage hole. Luckily car has a screwdriver in toolkit so could remove base plate off 4x5 and screw onto 5x7 pinhole. Next I realised I didn't wear my watch so scrolled through my phones apps looking for a timer. Didn't see one (or fathom that the clock app did have a timer... discovered that later) so I recorded a video for the 3min exposure I needed. With about 30sec to go it started raining so upon completion of the exposure I threw everything in the car and waited the rain out. Not complete waste of time as I worked out how to bring up a stopwatch in the clock app! With the rain stopped, I set up the 7.9x10. This doesn't have a tripod mount (need to fix that oversight) so I balanced it on top of the 5x7 still on the tripod. As it was windy, I sat my other tripod on top to 'steady the ship'. Started the stopwatch and went to setup the 4x5 while the 4min exposure took place. Wandered back and observed the whole box and tripod weight rocking in the wind so thought that exposure was going to be toast. Waited for the remaining seconds to tick off before covering the pinhole, then packing it away. Took a couple of shots on 4x5 then departed as it started raining again.

Got home and processed the 'negs'. The 5x7 is usually 'bullet proof' but I seem to have used dead RC paper and it turned out rather terrible! The 7.9x10 however looked promising considering the wind and wobble I'd observed. Scanned them and inverted (lazy mans pinhole photography!) with the 7.9x10 easily the better exposure. Resized down to WPD gallery requirements and uploaded... here it is http://pinholeday.org/gallery/2015/index.php?id=50
 

DWThomas

Subscriber
Joined
Jun 13, 2006
Messages
4,611
Location
SE Pennsylvania
Format
Multi Format
Hmm - the stories so far make me feel a little better! Maybe it's because this is my 11th year for WPPD, I've had a large assortment of unrelated stuff clamoring for my attention the last few weeks and really did not do much planning and organizing. In some past years I've headed northwestward in the state armed with roll film pinhole cameras, and done a major tour, several hundred miles, wandering all day. This year, again shooting my 8x10, it seemed silly to go that far with only ten shots capacity. Yeah, I could take more than one pinhole camera, I'm not that limited, but such things require planning and organization! :blink: So I "documented" another old railroad bridge down the way. I didn't even get serious about picking a destination until yesterday.

Like Nige, I didn't wear a watch -- ooops! We are not quite at the 1st anniversary of my finally succumbing to acquiring a phone smarter than I am. So I said "oh, I'll use the timer on the phone" then I discovered it counts minutes. Hmm -- OK -- 'Stopwatch' -- yeah, that looks good. Scared the begeebers out of me when I tapped 'Start' and the bottom pair of digits started flying around like crazy -- it pretends to count hundredths of seconds?! Talk about overkill!

I used my Digisix in incident mode and a table generated from Pinhole Designer for exposure. I tried Pocket Light Meter on the phone and it seemed to want more exposure. But of course that was reflected readings for who knows what acceptance angle. Someday I have nothing to do (in the next ten years) I should get out a gray card and do some playing to check that out. It seemed OK for more normal f stops when I first got the app and tried it.

I used 8x10 Fuji HR-T X-Ray film, which I'm aware can be very soft, so I spread out my processing and wash only two at a time in a kluged together "cascade washer." I'm now backed up waiting for the washing after developing three and they look pretty OK, so at least I know I've got something. At one time leading up to today I had another idea to try with paper negatives, but by the time yesterday was pretty much over, a straight, simple approach seemed very attractive.

At some point in the next day or three, I will hopefully have some images online.
 

EdColorado

Member
Joined
Feb 7, 2009
Messages
506
Location
Loveland, Co
Format
Multi Format
I almost didn't go out. It was raining and in the mountains where I'd planned on going it was supposed to be snowing. In the end I decided what the heck, if nothing else it would be a nice drive so I headed on up to Rocky Mtn. Nat. Park, about 40 minutes from my house. Once there it really wasn't too bad. A bit of rain and snow here and there, kind of cold, but nothing that was going to kill the day.

I had two pinhole cameras with me (plus a couple of old rangefinders). A Mamiya C220 with a coke can pinhole taped on the front and a Reality So Subtle 6x17. I shot a few frames with the Mamiya but haven't finished the roll yet so no pictures to show. The 6x17 was my real reason for going out though. I'd received it a couple weeks earlier and was waiting for Sunday to try it out. Its a joy to use and early results are quite promising! I shot one roll, 4 shots on 120 film in this format, with the submitted one being the last.

Here it is: http://pinholeday.org/gallery/2015/?id=758
 
OP
OP
TheToadMen

TheToadMen

Subscriber
Joined
Sep 18, 2012
Messages
3,570
Location
Netherlands, EU
Format
Pinhole
The 6x17 was my real reason for going out though. I'd received it a couple weeks earlier and was waiting for Sunday to try it out. Its a joy to use and early results are quite promising! I shot one roll, 4 shots on 120 film in this format, with the submitted one being the last.

Here it is: http://pinholeday.org/gallery/2015/?id=758

You did well!! Glad you wen't, aren't you?
BTW: try also colour film with this pinhole camera like Superia X-TRA 400. you'll be surprised.
 
Photrio.com contains affiliate links to products. We may receive a commission for purchases made through these links.
To read our full affiliate disclosure statement please click Here.

PHOTRIO PARTNERS EQUALLY FUNDING OUR COMMUNITY:


Ilford ADOX Freestyle Photographic Stearman Press Weldon Color Lab Blue Moon Camera & Machine
Top Bottom