Helinophoto
Member
This is how I adjusted the focus on my Rolleiflex Automat 3.5 MX-EVS.
Disclaimer:
- This worked for my particular model of this camera.
- I bought the camera for $25, so basically I had nothing to loose, as a CLA would cost way more then the camera was worth.
- My fungus-infected, ugly and pretty rotten Rolleiflex was way off concerning focus, making the camera effectively a dud.
- I wouldn't attempt doing this with an expensive Rolleiflex which is worth more, I advice you to send such a camera off to CLA at a reputable service man.
Prerequisites.
- You need to be able to loosen the leather and remove the front cover, so that you are able to loosen the lock-nut on the viewing lens and screw this lens in and out.
- Masking tape, the thinner, the better.
- A white wall.
- A studry non-slip base to put your camera on.
- A flashlight, the stronger the better.
The Rolleiflex Automat MX-EVS doesn't have any adjustments for the taking lens, it sits static on the lens board, which moves as you focus.
The viewing lens can be adjusted by loosening the lock nut and screw the viewing lens in and out and then locking the lock-nut again.
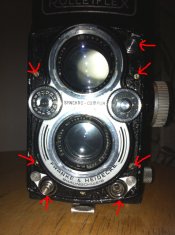
- Remove the leather and front-cover (4 screws) + removing the knobs for self-timer, shutter and m/x sync levers. (make sure you put the small parts in a cup or similar or they will get lost)
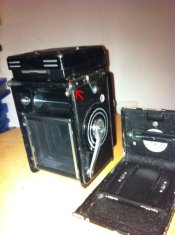
- Remove the lid that you normally open to insert film into the camera, completely.
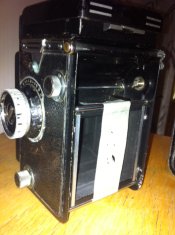
- Place a piece of masking-tape over and past the rollers that the film rolls over (you'll need 4-5 inches), so that the tape lies flat on the film-plane, where the film normally lies.
- Now, poke a few holes and irregular tears in that tape with a sharp object.
- Do the same with a new strip of tape, fold the tape back on itself about 0.5 inch on each end, poke some holes in it.
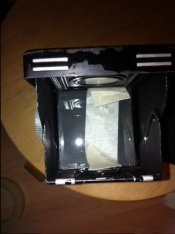
- Now, place that piece of tape on your viewing ground-glass (smack on the middle). (The folds you just made, makes it easier to remove it later).
- Use a strong flash-light, place the camera on a stable base, direct the camera towards a white wall.
- Turn off the lights.
- Set camera to bulb, use a remote trigger which is able to hold the shutter open by itself.
- Trip the shutter, make sure the shutter stays open.
- Shine your flash-light into the camera from behind, adjust focus on the taking-lens via the focus-knob, so that you can see your tape, with the holes and small details clearly on the wall.
- Now shine your flashlight from above and down at your ground glass. You should see a new image on the wall. (albeit dimmer, as the focus-screen and mirror steal some light, hence you need a strong light for this)
- Loosen the lock nut and screw on the viewing lens until you get a nice, clear view of the tape on the wall, with all the holes and small details as sharp as you can get them.
- Screw the lock-nut in place, make sure you don't turn on your viewing lens when you do it.
You are done, what is sharp in the ground glass, should now also be sharp on the film-plane.
I tried adjusting the focus using a focusing screen from my Hasselblad on the film-plane, however, the Hasselblad focusing screen has some thickness, which caused my Rolleiflex to front-focus about 3-4 inches.
With the tape-trick and shining the light trough from behind the camera, you should be able to get the focus exactly right - on the film plane and on the ground-glass -
Sometimes it can help to be two people doing this procedure, because you may need to scrutinize the focus up-close. The Rolleiflex close-focusing distance isn't close enough, for you to be able to view the details on the wall, if you sit behind the camera while you do this.
My Rolleiflex Automat is spot on after this procedure. I've not found any tips like this on the net.
(I'll attach some photos later)
Now, all I need is to order some new leatherette (my old automat-dog need a whole new set anyway, it's ugly as sin, but the taking-lens is clear and sharp as a razor )
)
Disclaimer:
- This worked for my particular model of this camera.
- I bought the camera for $25, so basically I had nothing to loose, as a CLA would cost way more then the camera was worth.
- My fungus-infected, ugly and pretty rotten Rolleiflex was way off concerning focus, making the camera effectively a dud.
- I wouldn't attempt doing this with an expensive Rolleiflex which is worth more, I advice you to send such a camera off to CLA at a reputable service man.
Prerequisites.
- You need to be able to loosen the leather and remove the front cover, so that you are able to loosen the lock-nut on the viewing lens and screw this lens in and out.
- Masking tape, the thinner, the better.
- A white wall.
- A studry non-slip base to put your camera on.
- A flashlight, the stronger the better.
The Rolleiflex Automat MX-EVS doesn't have any adjustments for the taking lens, it sits static on the lens board, which moves as you focus.
The viewing lens can be adjusted by loosening the lock nut and screw the viewing lens in and out and then locking the lock-nut again.
- Remove the leather and front-cover (4 screws) + removing the knobs for self-timer, shutter and m/x sync levers. (make sure you put the small parts in a cup or similar or they will get lost)
- Remove the lid that you normally open to insert film into the camera, completely.
- Place a piece of masking-tape over and past the rollers that the film rolls over (you'll need 4-5 inches), so that the tape lies flat on the film-plane, where the film normally lies.
- Now, poke a few holes and irregular tears in that tape with a sharp object.
- Do the same with a new strip of tape, fold the tape back on itself about 0.5 inch on each end, poke some holes in it.
- Now, place that piece of tape on your viewing ground-glass (smack on the middle). (The folds you just made, makes it easier to remove it later).
- Use a strong flash-light, place the camera on a stable base, direct the camera towards a white wall.
- Turn off the lights.
- Set camera to bulb, use a remote trigger which is able to hold the shutter open by itself.
- Trip the shutter, make sure the shutter stays open.
- Shine your flash-light into the camera from behind, adjust focus on the taking-lens via the focus-knob, so that you can see your tape, with the holes and small details clearly on the wall.
- Now shine your flashlight from above and down at your ground glass. You should see a new image on the wall. (albeit dimmer, as the focus-screen and mirror steal some light, hence you need a strong light for this)
- Loosen the lock nut and screw on the viewing lens until you get a nice, clear view of the tape on the wall, with all the holes and small details as sharp as you can get them.
- Screw the lock-nut in place, make sure you don't turn on your viewing lens when you do it.
You are done, what is sharp in the ground glass, should now also be sharp on the film-plane.
I tried adjusting the focus using a focusing screen from my Hasselblad on the film-plane, however, the Hasselblad focusing screen has some thickness, which caused my Rolleiflex to front-focus about 3-4 inches.
With the tape-trick and shining the light trough from behind the camera, you should be able to get the focus exactly right - on the film plane and on the ground-glass -
Sometimes it can help to be two people doing this procedure, because you may need to scrutinize the focus up-close. The Rolleiflex close-focusing distance isn't close enough, for you to be able to view the details on the wall, if you sit behind the camera while you do this.
My Rolleiflex Automat is spot on after this procedure. I've not found any tips like this on the net.
(I'll attach some photos later)
Now, all I need is to order some new leatherette (my old automat-dog need a whole new set anyway, it's ugly as sin, but the taking-lens is clear and sharp as a razor
 )
)
Last edited by a moderator:


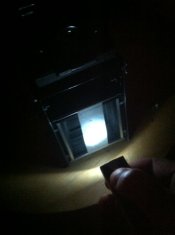
 I've re-set the parallelism successfully, but it's fiddly, and time consuming, without custom tools to speed things up...