About photopolymer intaglio and getting a press

Roses

A
Roses

  • 2
  • 0
  • 61
Rebel

A
Rebel

  • 4
  • 2
  • 77
Watch That First Step

A
Watch That First Step

  • 1
  • 0
  • 61
Barn Curves

A
Barn Curves

  • 2
  • 1
  • 53
Columbus Architectural Detail

A
Columbus Architectural Detail

  • 4
  • 2
  • 55

Forum statistics

Threads
197,488
Messages
2,759,836
Members
99,515
Latest member
falc
Recent bookmarks
9

MurrayMinchin

Membership Council
Subscriber
Joined
Jan 9, 2005
Messages
5,449
Location
North Coast BC Canada
Format
Hybrid
Not entirely sure what you mean; you mean you leave a laminated edge around the print, but allow the polymer to extend all the way to the edges of the final plate (after optional trimming)? Give it a try, but in my workflow, it was neigh impossible to get clean edges all around.

Here's an example:
ME161_IP_MG_0143.jpg

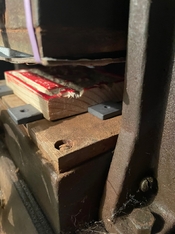
Note how there's a narrow blank edge along the top and bottom of the plate. Especially the bottom edge was rather dirty due to crumbling photopolymer. Note also the black stain about one quarter from the bottom left corner, which is basically a rather large ink reservoir held by this crumbling edge.

I managed to clean the top edge a little better, but it's still slightly dirty.

It's all nowhere near as clean as the results I saw from actual copper plates without lamination (i.e. 'proper'/old-fashioned gravure).


I suppose you could mask the edges of the plate, so that the photopolymer won't extend all the way to the edge of the plate. But then you'd still have a ridge where the polymer film ends and the plate continues. This will pick up ink and show up in the print as a hairline border, and there will be a slight difference in the depth of the intaglio depression on the paper. It'll likely be cleaner than the crumbly edge, though.
Ahhh, I see what you mean now.

Hopefully I'll figure it out during the climb up the learning curve.

Nice image, by the way...especially like the positive/negative space happening along the dark roofline and white building in the background on the right hand side.
 

Dan McGuire

Member
Joined
Aug 15, 2019
Messages
60
Location
Beautiful BC
Format
Large Format
Thanks.

When I said "enroute" I didn't specify just how long that road would be, did I?

I've cobbled most of the gear needed by wandering down the enlarged digital negative salt print and kallitype roads. The last major item needed is the etching press, and maybe a point source UV light instead of the DIY UV LED strip light source made for contact printing hand coated papers.

Second hand etching presses are rare and expensive as you noted. A new one of this breed is totally out of the question.

To bring down the cost, I could make, or have someone (college or high school project?) make one: https://www.buildapress.com/ or, could order a small one from Quebec, but his only go to 15" wide rolls and are direct drive: http://www.micheldupont.com/etching-press.html

Using steel backed plates is also too expensive, so I'm looking into David Kachel's use of rolls of dry polymer sheets for direct to plate polymer photogravures: http://davidkachel.com/wpNewDK/?page_id=593

Still searching Alberta & BC for a second hand press, of the right size, chain or gear driven, at an affordable price, just in case...

So, the ultimate goal is printmaking ink on old world papers of character, but I'm a ways off yet!

Hello Murry

I ran across this thread last night and then this link this morning
This is for a press maker in BC

I do have a question I would like to ask, how would you be making the negatives used to create the plates for printing
I have read that the negative (for want of a better word) is actually supposed to be a positive
So would you develop your film to create a positive, or would you enlarge the image onto a sheet of lith film

Dan
 

MurrayMinchin

Membership Council
Subscriber
Joined
Jan 9, 2005
Messages
5,449
Location
North Coast BC Canada
Format
Hybrid
Hello Murry

I ran across this thread last night and then this link this morning
This is for a press maker in BC

I do have a question I would like to ask, how would you be making the negatives used to create the plates for printing
I have read that the negative (for want of a better word) is actually supposed to be a positive
So would you develop your film to create a positive, or would you enlarge the image onto a sheet of lith film

Dan
Hi Dan,

Thanks for the tip but I contacted Thomas Presses, told him the amount of pressure photogravures need, and he felt it was too much pressure to ask of his press.

I'll be using recent digital images converted to B&W and scanned 4x5 B&W negatives, route them through the computer to digitally enlarge them, then use an Epson printer to make the plates using the direct to plate (DTP) method.

The positive image gets printed on the plates surface...no need for digitally enlarged positives on OHP film, stochastic/aquatint screens, or a vacuum press. The ink simply washes off after exposure to UV light.

So the theory goes...
 
Last edited:

MurrayMinchin

Membership Council
Subscriber
Joined
Jan 9, 2005
Messages
5,449
Location
North Coast BC Canada
Format
Hybrid
Hello Murray

"So the theory goes…" kinda sums up photography as a whole

Dan
Yup, someone here years ago said, "Try making some Ansco 120 and you'll never use Selector Soft again" and they were right.

Sometimes theories turn out to be true or provide springboards to unforeseen discoveries, but other times...
 

MurrayMinchin

Membership Council
Subscriber
Joined
Jan 9, 2005
Messages
5,449
Location
North Coast BC Canada
Format
Hybrid
Still ferreting away at the dry photopolymer film, crumbly edge, and ink blotchy plate mark thing.

...I suppose you could mask the edges of the plate, so that the photopolymer won't extend all the way to the edge of the plate. But then you'd still have a ridge where the polymer film ends and the plate continues...
Have gotten a bit further along into Kachel's ebook, and he describes using a mask during exposure, but has it slightly raised so the photopolymer extending out from the image area to the plates edge is subject to a 'penumbra shadow' resulting in there being no hard edge to chip.

Haven't wrapped my head around it yet, but appears to offer hope.
 

koraks

Moderator
Moderator
Joined
Nov 29, 2018
Messages
20,678
Location
Europe
Format
Multi Format
Have gotten a bit further along into Kachel's ebook, and he describes using a mask during exposure, but has it slightly raised so the photopolymer extending out from the image area to the plates edge is subject to a 'penumbra shadow' resulting in there being no hard edge to chip.

Smart! I never thought of that.

I'd not worry too much and just dive into it. Solve any problems as they arise. It's nice to know about options, but in the end, the only thing that matters is what works in your particular workflow.
 

MurrayMinchin

Membership Council
Subscriber
Joined
Jan 9, 2005
Messages
5,449
Location
North Coast BC Canada
Format
Hybrid
Smart! I never thought of that.

I'd not worry too much and just dive into it. Solve any problems as they arise. It's nice to know about options, but in the end, the only thing that matters is what works in your particular workflow.
Luckily for me, we had to spend a bit more money this summer than expected (they were trips, so all good) which has put a pause on equipment/materials acquisition and is allowing me to do more reading before committing.

Yesterday I read that using a brayer isn’t recommended for dry film because the “lifting force” of the tacky ink coming off the back edge of a brayer can peel off small bits of photopolymer from the plates edge when using dry films. I planned on getting some brayers, so look to have dodged one path to frustration there!

I charitably call my photography journey, episodic, so am used to mulling things over for variable lengths of time before diving in.
 

Bill Burk

Subscriber
Joined
Feb 9, 2010
Messages
9,156
Format
4x5 Format
Have been mulling this over.

Couldn't one include a pure white border or frame around an image in the image file before printing direct to plate?

The intention is to have a plate mark in the paper around my images...therefore...theory being...if you made a border of hardened photopolymer around the image, it would provide support for fine details along the edges of the image.

When the plate is trimmed to final size, just include the border as the plate mark area.

Make sense?

Yup. They’re called “bearer bars” standard practice in flexography
 

MurrayMinchin

Membership Council
Subscriber
Joined
Jan 9, 2005
Messages
5,449
Location
North Coast BC Canada
Format
Hybrid
Then again, I plan to use Kozo papers and keep plate sizes about 13"x17" or smaller, so maybe a modern take on a hand baren will do the trick: https://www.slamapress.com/en
 
Last edited:

MurrayMinchin

Membership Council
Subscriber
Joined
Jan 9, 2005
Messages
5,449
Location
North Coast BC Canada
Format
Hybrid
Then again, again...maybe this cheaper alternative: https://www.yoseido.com/product-page/yuki-baren-w-ball-bearing-baren affixed to the bottom of one of the antique granite curling stones (weighs about 40 pounds) I inherited from my grandparents.

Would save tens of thousands of dollars compared to buying an etching press, but would have to spend more time & effort ensuring consistent plate to paper pressings.

Source for PETG substrate...yup.

Source for 100% Kozo...yup.

Source for dry resist photopolymer...still searching...grrrrr...
 

Dan McGuire

Member
Joined
Aug 15, 2019
Messages
60
Location
Beautiful BC
Format
Large Format

MurrayMinchin

Membership Council
Subscriber
Joined
Jan 9, 2005
Messages
5,449
Location
North Coast BC Canada
Format
Hybrid
Murray

I found this

Thanks. It would have to travel from the Czech Republic. Probably okay in fall/winter due to cooler temperatures, but lots of opportunity for higher than recommended temperature exposure.

Also, pretty expensive...almost the same price as ImagOn which is supposed to be re-branded Riston MM500 series and much more expensive.
 
Last edited:

Dan McGuire

Member
Joined
Aug 15, 2019
Messages
60
Location
Beautiful BC
Format
Large Format
Murray

I have reached out to a US supplier of the DuPont resist and am trying to determine what I will need
When I get the information I will forward it on to you
Being right near the US border, shipping charges may not be as bad as getting it shipped to Canada

Dan
 

MurrayMinchin

Membership Council
Subscriber
Joined
Jan 9, 2005
Messages
5,449
Location
North Coast BC Canada
Format
Hybrid
Murray

I have reached out to a US supplier of the DuPont resist and am trying to determine what I will need
When I get the information I will forward it on to you
Being right near the US border, shipping charges may not be as bad as getting it shipped to Canada

Dan
Sounds good. I've contacted a few as well (for Riston MM550 and Eternal E9220) so maybe between the two of us...
 

mark

Member
Joined
Nov 13, 2003
Messages
5,699
Just jumping in to say beware of buildapress.com. I purchased the Orangeman plans a couple years ago and got nothing. I also got zero response to any of my contacts to find out why.
 

MurrayMinchin

Membership Council
Subscriber
Joined
Jan 9, 2005
Messages
5,449
Location
North Coast BC Canada
Format
Hybrid
Just jumping in to say beware of buildapress.com. I purchased the Orangeman plans a couple years ago and got nothing. I also got zero response to any of my contacts to find out why.
Weird...I ordered the Orangeman plans a couple years ago as well and received them, no problem. Had an issue where my Mac jumbled up the plans, I emailed him, and got a response right away on how to fix it.
 
Last edited:

MurrayMinchin

Membership Council
Subscriber
Joined
Jan 9, 2005
Messages
5,449
Location
North Coast BC Canada
Format
Hybrid
An update about acquiring photopolymer film:

I found that IEC sells in 250 foot lengths, which is waaaay more convenient than the 1000 foot minimum roll length (which means organizing a group order) that some places insist on.

I got 13.5" by 250' of Eternal E9220 priced at 28 cents per square foot for $78.76 US.


Bill Burk

Subscriber
Joined
Feb 9, 2010
Messages
9,156
Format
4x5 Format
I ended up using my “vulcanizer” as a wood block press. For short runs it’s not a bad hack.
 

Attachments

  • IMG_9121.jpeg
    IMG_9121.jpeg
    393.5 KB · Views: 40

koraks

Moderator
Moderator
Joined
Nov 29, 2018
Messages
20,678
Location
Europe
Format
Multi Format
I ended up using my “vulcanizer” as a wood block press. For short runs it’s not a bad hack.

Cool. Did you do a lot of wood block printing? I briefly dabbled in lino printing. Although an etching press isn't ideal for lino or woodblock, it does work with some care and creativity. The other way around...not a chance.
 

Bill Burk

Subscriber
Joined
Feb 9, 2010
Messages
9,156
Format
4x5 Format
Just the batch of Christmas cards. I grew up with a few art teachers and I studied printing, so the different skills required just came naturally. Except I forgot to mirror image the carving and had to use wood putty to patch the words and re-carve them.
 

mark

Member
Joined
Nov 13, 2003
Messages
5,699
Weird...I ordered the Orangeman plans a couple years ago as well and received them, no problem. Had an issue where my Mac jumbled up the plans, I emailed him, and got a response right away on how to fix it.

Hmmm…..I’m glad you got them.
 

eli griggs

Member
Joined
Nov 15, 2005
Messages
3,799
Location
NC
Format
Multi Format
The Conrad 12, 15, 18 inch presses are beautifully tools and have planetary drive gearing, etc.
 

richyd

Member
Joined
Jul 24, 2012
Messages
191
Location
London UK
Format
Medium Format
Just learnt about COB light sources from posts above. Would this unit be suitable and what sort of power connections would be required? They have complete lamp units at another £100 more and at other wavelengths. This is a 365 nm unit and going from the discussion above would it also work with other alt process, platinum, VDB, etc?


I currently have an old face lamp that I have used for VDB, works well for that and made a calibration plate for photopolymer but then had a hiatus and didn't have time to follow through but have a project now to work on.

Thanks.
 

koraks

Moderator
Moderator
Joined
Nov 29, 2018
Messages
20,678
Location
Europe
Format
Multi Format
Would this unit be suitable and what sort of power connections would be required?

Yes, it should work.

You need:
* A suitable LED driver. A COB unit like this probably runs at 1500mA (max) and 30-35V forward voltage. Do NOT use a power supply with a fixed output voltage. You need a constant current power supply for this.
* A suitable heatsink and optional fan. There are convenient COB LED heatsink assemblies for sale that have the holes pre-drilled to match these COB LEDs. Use a suitable thermal paste between the LED and the heatsink.
Optionally you may also want to fit a suitable lens over it if it turns out that the 120 degree beam angle isn't optimal for your purposes. However, increasing the distance to the light source in case of problems will also help, although this will evidently come at the cost of much longer exposure times.

The driver + heatsink may end up costing the same or even more as the COB LED. Your 100GBP complete unit may therefore be a good option. Generally, a ready-made unit offers good value and of course a lot less fuss than DIY-ing something. I've explored both routes (and continue to do so) and would recommend just purchasing a ready-to-go 365nm LED floodlight. Buyer beware, though: there are some caveats. Feel free to ask if you want to dig into this further.

Chinese sellers (AliExpress) sell the same stuff for a little less. This UK-based seller undoubtedly sources from China and sells on at a margin; decide for yourself if you prefer the convenience and speed of a domestic purchase at higher cost.

This is a 365 nm unit and going from the discussion above would it also work with other alt process, platinum, VDB, etc?

Yes. Although those processes generally work just as well with 395nm, which tends to give far more bang for your buck. Some photopolymers however really seem to require 365nm.
 
Photrio.com contains affiliate links to products. We may receive a commission for purchases made through these links.
To read our full affiliate disclosure statement please click Here.

PHOTRIO PARTNERS EQUALLY FUNDING OUR COMMUNITY:


Ilford ADOX Freestyle Photographic Stearman Press Weldon Color Lab Blue Moon Camera & Machine
Top Bottom