>15x enlargements from 135 negatives? [SOLVED]

The circus is in town.....

A
The circus is in town.....

  • 0
  • 0
  • 0
Kildare

A
Kildare

  • 3
  • 2
  • 21
Sonatas XII-25 (Homes)

A
Sonatas XII-25 (Homes)

  • 3
  • 3
  • 64
Susan At The Park

A
Susan At The Park

  • 4
  • 2
  • 170
Jade

H
Jade

  • 1
  • 0
  • 93

Recent Classifieds

Forum statistics

Threads
199,282
Messages
2,789,015
Members
99,855
Latest member
Tomas_M
Recent bookmarks
2

Svenedin

Member
Joined
Mar 19, 2016
Messages
1,191
Location
Surrey, United Kingdom
Format
Med. Format RF
john the problem with seesawing is that the paper i generally use for alt prints is a stiff 300gsm mixed-media paper so I'm not confident that even when wet it would be soft enough to do the trough thing. maybe if i went down to a lighter-weight fabriano or similar it could work though.

i think clive once suggested to someone they develop their films in their own pee in trays outside at night by the light of the moon, so maybe that's an option to give myself more space to work

Snorting with laughter. Surely only the full moon when there's an R in the month with 14 turns widdershins.
 
OP
OP
pdeeh

pdeeh

Member
Joined
Jun 8, 2012
Messages
4,765
Location
UK
Format
Multi Format
I've taken mine apart for cleaning before. Not difficult. The condensers are designed to be interchangeable so it's not much of a hassle to clean them. You may as well give it a good service and blow all the dust out as well.

I've had it a few years now and I have to do this regularly. I live in a house that seems to create dust in absurd volumes. The thing that does annoy me the most about this enlarger is the tendency for the lamp head to fall off when you turn it sideways. It doesn;t seem to have any clips or screws to stop it happening. I ended up using cable ties.
 

Svenedin

Member
Joined
Mar 19, 2016
Messages
1,191
Location
Surrey, United Kingdom
Format
Med. Format RF
I've had it a few years now and I have to do this regularly. I live in a house that seems to create dust in absurd volumes. The thing that does annoy me the most about this enlarger is the tendency for the lamp head to fall off when you turn it sideways. It doesn;t seem to have any clips or screws to stop it happening. I ended up using cable ties.

I have an old house, dogs and open fires. Dust is everywhere, always. I haven't encountered the lamp head falling off when moving it sideways. The stud that engages with the column bracket has a reduced diameter section where the adjusting screw engages. Providing your do not undo the head angle adjusting knob too much the head is held captive and cannot fall off. Just turn the angle adjusting knob until the head can just be rotated and not further. If you undo the knob too far the screw/bolt will be out of the reduced diameter section of the stud and the head can fall off. Even so, it won't fall off mine easily. Is your baseboard level? There are spirit levels in the head and the baseboard column bracket.
 

Attachments

  • IMG_1190.JPG
    IMG_1190.JPG
    712.2 KB · Views: 97
Last edited:
OP
OP
pdeeh

pdeeh

Member
Joined
Jun 8, 2012
Messages
4,765
Location
UK
Format
Multi Format
No, you've misunderstood. Do please remember that I have owned this equipment for some years and understand how it is constructed and how to use it (despite my recent lapse that is).

The negative carrier stage which also contains the condenser lenses is held very securely of course, but the lamp housing-cum-mixing box sits in the carrier stage by an interference fit. You lift it off to gain access to the condenser assembly. It is not held in by any screws or fittings.
 

Svenedin

Member
Joined
Mar 19, 2016
Messages
1,191
Location
Surrey, United Kingdom
Format
Med. Format RF
Obviously I do misunderstand. The lamp housing/mixing box is held on very securely with a screw on either side on my enlarger. Maybe our enlargers are significantly different.
 

Attachments

  • IMG_1191.jpg
    IMG_1191.jpg
    136.5 KB · Views: 104
Last edited:

removed account4

Subscriber
Joined
Jun 21, 2003
Messages
29,832
Format
Hybrid
i think clive once suggested to someone they develop their films in their own pee in trays outside at night by the light of the moon, so maybe that's an option to give myself more space to work
john the problem with seesawing is that the paper i generally use for alt prints is a stiff 300gsm mixed-media paper so I'm not confident that even when wet it would be soft enough to do the trough thing. maybe if i went down to a lighter-weight fabriano or similar it could work though.

i think clive once suggested to someone they develop their films in their own pee in trays outside at night by the light of the moon, so maybe that's an option to give myself more space to work

ahh
i get it. i forgot alt process paepr was so think sometimes yeah it might be too stiff to make bend like that.
i processed film by the moonlight in my father in laws laundry room years ago. it wasn't in pee, but caffenol.
the film came out fantastically. others would say baa humbug!
so, outside might be good :smile:
 
OP
OP
pdeeh

pdeeh

Member
Joined
Jun 8, 2012
Messages
4,765
Location
UK
Format
Multi Format
. Maybe our enlargers are significantly different.
by the looks of things yours is a much newer model. presumably user feedback about the top of the head falling off led them to a redesign ...
 

Svenedin

Member
Joined
Mar 19, 2016
Messages
1,191
Location
Surrey, United Kingdom
Format
Med. Format RF
by the looks of things yours is a much newer model. presumably user feedback about the top of the head falling off led them to a redesign ...

Yes. I wonder whether you could drill a couple of holes and put some small screws in. Might solve the issue.
 
OP
OP
pdeeh

pdeeh

Member
Joined
Jun 8, 2012
Messages
4,765
Location
UK
Format
Multi Format
I don't own any tools except screwdrivers and a couple of scalpels. I'm happy with my cable-tie solution
 

MartinP

Member
Joined
Jun 23, 2007
Messages
1,569
Location
Netherlands
Format
Medium Format
The cheapest way to find a large (huge) tray is to get one of the leak-trays that are made to go underneath washing-machines. They are not very rigid (as that is not required for their designed function) but placing them on a piece of chipboard gives something which is adequately manoeuvrable without a tsunami-effect.
 
OP
OP
pdeeh

pdeeh

Member
Joined
Jun 8, 2012
Messages
4,765
Location
UK
Format
Multi Format
I think that in a world where i had a permanent darkroom with a counter big enough three or four of this size of tray, the drip/leak trays would be a very good option indeed.
But what puts me off trying them is that I think they are generally made of polystyrene and are relatively brittle. I'm not sure that one would stand the constant tipping/pouring/lifting that's going to be needed for a one-tray setup in my little space without cracking quite quickly. By contrast, Paterson trays are rigid polyethylene or polypropylene and will take lots of abuse without flinching.

That's not to say I don't appreciate all the suggestions, even though I have thought this all through quite thoroughly!
 

ac12

Member
Joined
Apr 27, 2010
Messages
720
Location
SF Bay Area (SFO), USA
Format
Multi Format
Two ideas for processing in small space. I use both of these, but for smaller size prints than what you are after.
#1 - A large processing drum. You might be able to find a 16x20 or 20x24 drum.
#2 - Make a version of the old Honeywell rocking print tray. The rocking tray allows me to process in a single tray, and is easier for me to manage than a flat tray, and uses less chemicals. The largest rocking print tray that I know of is 11x14, I don't know if they made a larger size.
 
OP
OP
pdeeh

pdeeh

Member
Joined
Jun 8, 2012
Messages
4,765
Location
UK
Format
Multi Format
thanks.
remember that in this case, the paper is very stiff and heavy and a drum, however large, probably isn't going to work (for similar reasons to the "see-saw" using a trough, discussed with jnanian above).
as for the rocking print tray - I've never seen it branded Honeywell, but do you mean the stainless doofer sometimes branded "Color Canoe" ? They are such beautiful things I'd want to own one just for the sake of owning one; But they are rare even on eBay, and then only appear in the US. The cost of buying and shipping a giant version to the UK boggles the mind :sad:
 

cliveh

Subscriber
Joined
Oct 9, 2010
Messages
7,560
Format
35mm RF
If you used a cardboard box with bin liner inserts, you could make them as deep slots and process with the prints dipped in a vertical plane and agitate by holding the print by one edge and moving the print up and down in the slot. Some print washers incorporate this design.
 
OP
OP
pdeeh

pdeeh

Member
Joined
Jun 8, 2012
Messages
4,765
Location
UK
Format
Multi Format
hmm now that is an interesting bit of lateral thought.
The thing that has led me down this route was acquiring a few boxes of large (40x50cm) lith film.
the boxes in which they were delivered are tall and thin, unsurprisingly.

[/strokes chin thoughtfully]
 
Last edited:
OP
OP
pdeeh

pdeeh

Member
Joined
Jun 8, 2012
Messages
4,765
Location
UK
Format
Multi Format
Care to share how you do this? I've dabbled in this a little bit with Arista Lith 2.0 film but haven't really sunk my teeth into it yet.

I'm not sure quite how much help I can be. It's not that complicated if you already know how to make a print in the darkroom!

The reason for going this route is to make negatives for alt-process printing - in my case, cyanotypes and Namias' sepiaprints (there's (there was a url link here which no longer exists) started by NedL on the latter). The nice thing about it is that it offers me the opportunity to make contact prints of any size without having to have a camera of the appropriate format. It also means I can make large alt prints from any of the hundreds of rolls of 135 and 120 I've shot over the past few years since coming back to film.

I'd considered using reversal processing for all my rolls, but that means if I do want to make a conventional darkroom print, I have to faff about making a contact negative. This way is more flexible.

In the past I have tried making enlarged interpositives on paper then contacting those to make paper negatives. I got some decent results but there were some buts.

Then I read a thread at LFPF in which Bob Carnie talked about making interpos contacts from negatives and enlarging those - see this thread . He suggested that there was an advantage to doing it this way in terms of preserving sharpness (if that's important to you).

Bob's approach seems to be to make a flat (low contrast) but very fully exposed interpos - lots of detail in the shadows - and control contrast in the enlargement and development stage. I'm not sure that this works for me, but then I'm at a fantastically lower skill- and experience level than Bob! I also think he is using continuous-tone ortho film (e.g. Ilford Ortho) rather than lith film.

FWIW, this is how I proceed ...

I picked up quite a large supply of old Agfa lith film by lucky chance on eBay recently - 40x50cm in boxes of 150 sheets :smile:

I'd experimented in the past shooting Arista lith film in LF cameras, and found my way to "tame" it was to grossly overexpose it and then grossly underdevelop it. SO I reckoned that a similar approach should work for this process.

So ... I start with pretty much any old negative, whether 135 or 120, within reason. By which I mean, I've picked reasonably "good" negatives that print easily - Goldilocks negatives, if you like. Not too thin, not too thick, not too contrasty.

I contact them to lith film under the enlarger.

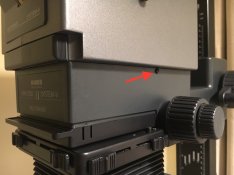
On the baseboard of my enlarger I have a sheet of thick glass hinged by duct tape to a sheet of fibreboard. So, under the glass goes the lith and the negative I want to contact, emulsion to emulsion of course.

I keep the same head height on the enlarger for all my contact work, and defocus it.
Then I make a series of separate exposures of the frame I want on a strip of lith film - I usually start at f/8, and make 4, 8, 12 and 16 second exposures. Yes, I know the f/stop brigade will be hopping from foot to foot in frustration at my method, but they'll just have to suck it up :D

(Digression.
It's worth considering how you do the latter bit. It isn't quite the same as making test strips - you're exposing afresh each time, so I've ended up making a long thin mask out of black card to allow me to keep the lith strip static and move the negative along for each exposure; I didn't even bother trying to make contacts on fiddly little scraps the same size as the negative - doing it the way I have means I can cut it to a strip that fits my normal negative carriers for the final stage, so I can easily try differently exposed interpozzes to make the enlarged negatives.)

For my light source and head height, 10-15secs is usually in the ballpark at f/8.

Then I prewash the exposed film, for about 90 secs. I do this partly from habit, partly because it seems to mitigate any uneven development, which I have seen before in this sort of scenario.

Then, obviously, into the developer. I have experimented a bit with devs, and haven't quite settled on my preferred solution (pun unintentional).

The two I've used most are:

1. Very dilute D23 - very dilute indeed, in fact, at 1:13 or 1:14.

2. Soemarko's LC1B low-contrast developer at 1:3 or 1:5. You can find the formula for this stuff by searching APUG. n.b. this really is a low-contrast developer - at the suggested 1:5 - 1:10 dilutions Soemarko suggests.

I develop for about 8 mins in trays. Because it's ortho film, of course, we can observe progress under safelight, but it does take a bit of practice to know when you've got the right degree of development, and it's very easy to pull it too soon.

(I find that a flat interpos doesn't work for me. Ones that look about the same contrast as the original negative seem to be best. But, to emphasise, I'm still a real novice at this. I do own a densitometer but I never make measurements. I do it all by eye.)

Next ... hang the little buggers up to dry after a proper fix and wash. Wash and tidy everything, put away, Make tea. Eat supper. watch tv. get annoyed at the state of the world. block deplorables on twitter.

Now, onto making the final negative. Nothing rocketsciency here either.

Put interpos into enlarger, adjust height to make desired size of negative, focus. Make test strips as you would with an ordinary enlargement.

I use the same developers, dilutions and times as noted above.

Stop, fix, wash, hang etc.

Developer capacity is surprisingly high even for the D23 at 1:14. I can get quite a few whole-plate size negs out of a litre. It does exhaust though, and you do have to be on the ball about extending development time. But again of course one can develop by inspection so you shouldn't end up too far awry.

I have tried Rodinal in the past, and I'll try again one day, probably when my LC1B runs out. 1:100 or 1:150 will probably work.

My lith film is 20 to 30 years old, and it has a bit of age-fog. I have to dump 5ml/litre of 0.1% Benzotriazole solution into my developers to get rid of that (despite my being told in another thread that I'm completely wrong about the dilution and amount I'm using. Odd, because I haven't seen my interlocuter from that thread in my house looking at my solution, but there we are). Fresh film of course won't need this treatment.

When developing in trays I pay no attention to temperature (there, that'll annoy some of the technical obsessives). So long as the darkroom is comfortable to work in wearing a T-shirt, I reckon the developer's about the right temperature for me

Dust and hair are utter demons in this process. The tiniest dustbunny on your interpos (which you can't inspect by loupe until it's dry of course) can render it utterly useless. UT.TER.LY.

Now, for any naysayers or critics who want to jump in and tell me "you're doing it wrong" or some bollocks about not respecting the integrity of the metol blah blah ... no, I'm not doing it wrong. I'm doing it the way I've worked out how to do it. It may not be optimal. There may be better ways, better developers, better whatevers. I'm not staking a claim for this as being the best or only way of doing it. I was asked to describe what I do, so I have.

I hope it's interesting and helpful to you adelorenzo anyway.
 

ac12

Member
Joined
Apr 27, 2010
Messages
720
Location
SF Bay Area (SFO), USA
Format
Multi Format
thanks.
remember that in this case, the paper is very stiff and heavy and a drum, however large, probably isn't going to work (for similar reasons to the "see-saw" using a trough, discussed with jnanian above).
as for the rocking print tray - I've never seen it branded Honeywell, but do you mean the stainless doofer sometimes branded "Color Canoe" ? They are such beautiful things I'd want to own one just for the sake of owning one; But they are rare even on eBay, and then only appear in the US. The cost of buying and shipping a giant version to the UK boggles the mind :sad:

Yes, the two that I know of are the Heath/Mitchell Color Canoe, and the Honeywell Rocking Print Tray.

The Honeywell Rocking Print Tray has larger curve radius IOW it is less curved than the Heath/Mitchell Color Canoe.
Because of that it seems to me that it would be easier to make your own version of it. And the less curved shape is easier, for me to use.
The one thing about both are that the ends curve in and over (see pix in link below). So when the chemicals hit the end of the tray, they splash back inwards, rather than UP, as it would be when hitting the vertical side of a tray. This curve may not be practical to build into a home made rocking tray. Maybe just a short horizontal top of a couple inches, just enough to block the splash.

I can picture in my mind how it could be made at home, but actually making it may be more difficult.
- jig saw to cut the sides to the proper shape.
- finding a stiff enough piece of wood sheet, metal or plastic to be the curved bottom.
- attach the bottom to the side pieces, then cut and attach the ends.
- calk the edges.
- then waterproof it with poly-urathane or epoxy paint or similar durable coating.

Here is a pix of the Mitchell Color Canoe
https://www.bing.com/images/search?...4b59486fb46d157df752464aa0b9c7c4o0&ajaxhist=0

Of course, now that I am looking for it, I could not find a pix of the Honeywell Rocking Print Tray.
I may have to dig mine out to shoot a pix.
 

ac12

Member
Joined
Apr 27, 2010
Messages
720
Location
SF Bay Area (SFO), USA
Format
Multi Format
If you used a cardboard box with bin liner inserts, you could make them as deep slots and process with the prints dipped in a vertical plane and agitate by holding the print by one edge and moving the print up and down in the slot. Some print washers incorporate this design.

I doubt that the cardboard box will hold up to the liquid inside without flexing outward and deforming.
The problem is that cardboard is just not STIFF enough.
Support the outside of the cardboard with a sheet of plywood, so it won't flex, and that might work.
 

cliveh

Subscriber
Joined
Oct 9, 2010
Messages
7,560
Format
35mm RF
I doubt that the cardboard box will hold up to the liquid inside without flexing outward and deforming.
The problem is that cardboard is just not STIFF enough.
Support the outside of the cardboard with a sheet of plywood, so it won't flex, and that might work.

That depends on the thickness of the cardboard and the width of the slot. The developer would expand the bin-bag to line the slot.
 

mshchem

Subscriber
Joined
Nov 26, 2007
Messages
14,805
Location
Iowa City, Iowa USA
Format
Medium Format
Shoot your film, develop it with B&W reversal chemistry. Back light the positive and shoot a negative with a 16 x 20 process camera. Just like the good old days. You will probably need arc lights and 15 feet of bellows. :laugh:
 

ic-racer

Member
Joined
Feb 25, 2007
Messages
16,575
Location
USA
Format
Multi Format
Back light the positive and shoot a negative with a 16 x 20 process camera
Backlighting turns it into an enlarger that accepts 16x20 paper or film. In fact if you had a 16x20 camera and were using it to magnify a 35mm negative you would want an enlarging lens. The major difference is an enlarger has the bellows between the subject and the lens, whereas a process camera has the bellows between the sensitive material and the lens.
I think enlargers can be more versatile than process cameras. Not only can they magnify translucent subject matter, some enlargers allow one to place film where the negative would be. In that case the enlarger functions exactly like a [process] camera to image opaque subject matter.
 

Attachments

  • camera enlarger.jpg
    camera enlarger.jpg
    132.2 KB · Views: 108
Last edited:
OP
OP
pdeeh

pdeeh

Member
Joined
Jun 8, 2012
Messages
4,765
Location
UK
Format
Multi Format
I can picture in my mind how it could be made at home, but actually making it may be more difficult.
It would definitely be in my case, as I don't possess a jig-saw, a workbench, a space in which to put the latter or any of the craft skills required :D :D :D
 
Photrio.com contains affiliate links to products. We may receive a commission for purchases made through these links.
To read our full affiliate disclosure statement please click Here.

PHOTRIO PARTNERS EQUALLY FUNDING OUR COMMUNITY:


Ilford ADOX Freestyle Photographic Stearman Press Weldon Color Lab Blue Moon Camera & Machine
Top Bottom