I'm currently doggy paddling deep in the depths of the zone system, figuring my photography and printing requires some discipline.
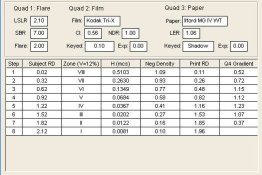
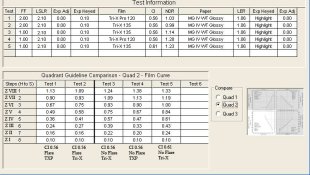
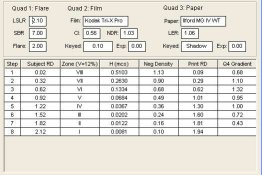
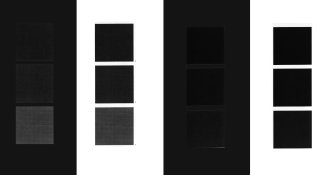
At the point of calibrating my equipment, I've made a greyscale with Delta 100 in order to assess a personal film speed. I'm a bit confused however about John Blakemore's suggestion, when finding a standard negative print time, to print test strips of negatives representing Zones II and III together in the negative carrier (medium format). This is in order to find the point where the the clear film stock seperating the two negatives will not render any blacker on the paper. In 'John Blakemore's Black and White Workshop' he says '...ZIII should be very dark but show full texture [uh huh] and Zone II should be only just visibly seperated from the full black but showing no texture.'
This begs the question; how will I know what Zone I looks like compared with absolute black when I'm visualizing the print and if the test is in search of dead black, surely making the test strips with negatives representing ZI and ZII would make more sense? Up until this point, I've been under the impression, during my intensive studying of the Zone System, that Zone I is the darkest usable black (tone but no texture). Why then has it been disregarded all of a sudden when it comes down to the reality of making the print?