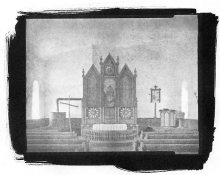
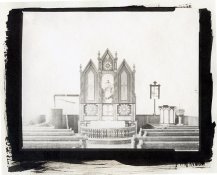
Tried to do some Ziatypes this weekend and kept running into the same problem. Either the print came out with only some detail, or it was 'muddy' for lack of a better term. Posted an example of each one, the one I suspect is because the exposure was not no enough (using the big UV source in the sky) and that could be due to the fact that the clouds only show up when you need a UV source, otherwise they are totally absent..one of those weekends. The other though could be over exposed, but it does not have the sharp detail that the other has. The chemicals are about a year old or so, could this be the problem. Process was step by step from B&S, paper is Cranes, Any thoughts (besides buy/build a UV light source)?
Thanks,
Thanks,