• Welcome to Photrio!
    Registration is fast and free. Join today to unlock search, see fewer ads, and access all forum features.
    Click here to sign up

Yellow stains on Adox MCP?

Chose vue

A
Chose vue

  • 0
  • 0
  • 26
Chose vue

A
Chose vue

  • 1
  • 0
  • 33

Recent Classifieds

Forum statistics

Threads
202,109
Messages
2,835,210
Members
101,120
Latest member
Arvin
Recent bookmarks
0

Puma

Member
Allowing Ads
Joined
Jan 26, 2011
Messages
117
Format
35mm RF
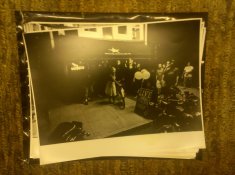
I've included some images but as they were taken with my camera phone, I don't own a digital camera, the yellow spots are hard to see. If you look carefully at the shot with the back of the girls head you can see the yellow in the blown out parts of her hair, top left. In the bicycle shot you can see it on the bottom right (Five o' clock)

The entire package of paper did this, every print. I fix for the recommended time, and wash extensively. After the first problem occurred I washed these prints for over an hour.

I showed the prints to a few people and they said there was water on them at some point of manufacture. I've had this problem with other batches of ADOX but never to this extent.

Can anyone tell me what this is? How to correct it?
 

Attachments

  • mail.jpg
    mail.jpg
    41.9 KB · Views: 156
  • IMG_20110912_220130.jpg
    IMG_20110912_220130.jpg
    1.2 MB · Views: 133
OP
OP

Puma

Member
Allowing Ads
Joined
Jan 26, 2011
Messages
117
Format
35mm RF
The pictures are harder to see than I thought. I can't control the white balance on the camera phone and that makes it even harder.
 

piu58

Member
Allowing Ads
Joined
May 29, 2006
Messages
1,545
Location
Leipzig, Germany
Format
Medium Format
I tried to balance the colors of one of the images out . I can see a yellow spot quite easily near the lower border:
yellow.jpg
 
OP
OP

Puma

Member
Allowing Ads
Joined
Jan 26, 2011
Messages
117
Format
35mm RF
That's it! Thanks for your help. Now what is it and what can I do to prevent it in the future?
 

ADOX Fotoimpex

Partner
Partner
Allowing Ads
Joined
Nov 20, 2005
Messages
890
Location
Berlin
Format
35mm RF
From what I can see these look like fixer stains but ofcourse this is hard to tell with these images.

Did you process every sheet individually in the trays or can it be that you have kept several sheets in the fixer/water at once?

During manufacturing there will get no water on the prints after drydown else they would glue together either on the roll or as a sheet.
But even if water got onto the sheets there should be no yellow stains arising from this. All emulsion is aquaous when coating and then dries. Rewetting it and drying it can lead to physical border effects around the wet spot but not to a colour change (at least as far as I know).
In this case you could see the wrinkles when you pull a sheet from the black bag.

If they don´t show on the paper prior to processing they originate most likely in the process.

Which "other problems" did you encounter with our papers?

I am a bit wondering about people posting threads like this in public forums rather than contacting the manufacturer.
Next to helping you as a customer we also need feedback. For the very unlikely event that in fact there is a manufacturing problem we need to be able to isolate batches and check on things.

Kind regards,

Mirko
 
Last edited by a moderator:

Marco B

Subscriber
Allowing Ads
Joined
Jan 13, 2005
Messages
2,736
Location
The Netherla
Format
Multi Format
From what I can see these look like fixer stains but ofcourse this is hard to tell with these images.

Did you process every sheet individually in the trays or can it be that you have kept several sheets in the fixer/water at once?

This was my thought also, the papers may simply not be properly fixed or washed. If not properly fixed due to papers touching each other or otherwise, the yellow stain may be a small amount of colloidal silver (very small silver particles, much smaller than developed silver) that printed out from unfixed silverhalide. That could show up as a yellow stain. Or the fixer isn't washed out properly, possibly also leading to some colloidal silver deposits.
 
OP
OP

Puma

Member
Allowing Ads
Joined
Jan 26, 2011
Messages
117
Format
35mm RF
Hi,

From what I can see these look like fixer stains but ofcourse this is hard to tell with these images.

Did you process every sheet individually in the trays or can it be that you have kept several sheets in the fixer/water at once?

During manufacturing there will get no water on the prints after drydown else they would glue together either on the roll or as a sheet.
But even if water got onto the sheets there should be no yellow stains arising from this. All emulsion is aquaous when coating and then dries. Rewetting it and drying it can lead to physical border effects around the wet spot but not to a colour change (at least as far as I know).
In this case you could see the wrinkles when you pull a sheet from the black bag.

If they don´t show on the paper prior to processing they originate most likely in the process.

Which "other problems" did you encounter with our papers?

I am a bit wondering about people posting threads like this in public forums rather than contacting the manufacturer.
Next to helping you as a customer we also need feedback. For the very unlikely event that in fact there is a manufacturing problem we need to be able to isolate batches and check on things.

Kind regards,

Mirko

I would like to point out that I in no way placed blame, but merely asked a question about the possible origin of these issues. I distinctly asked "what is this and how can I correct it?" which implies no blame, so please don't infer something that isn't there. The suggestion that it was water on the paper came from a friend who is knowledgable about photography but it doesn't mean they're right, it was just speculation on their part and I recognized it as such which is why I came to this forum to see if anyone had any insight. Why bother the company if I'm making some error? I also know I don't know everything so I come to my peers for help.

Other than this particular problem I haven't had any issues with the paper but I've had it a few times. I also assumed that the prints weren't washed enough so I washed them excessively (one hour) but the problem continued. I might be making another error somewhere else. I process one print at a time with a timer in my left hand for active awareness. For these prints I used Dektol 1:2 for 60 seconds, kodak regular stop bath 48 ml in 1000 ml of water for 30 seconds and (kodak rapid fixer without hardener) single bath fixing (these are RC) for 60 seconds. I then take the tray out of the darkroom and put under running water in a kitchen sink to wash it. I normally wash for about ten minutes, just to be sure, with wet hands I carefully massage the print as I was told by a old friend who's been printing for 40 years that this would speed the removal of the fixer. I then place the prints face down on screens to dry. One of the things my friend who said it water noticed was that it seemed to occur in the same areas of each print if there was a distinct highlight in the same spot/area of the paper.

Out of the box the paper looks perfect, no defects that I can see, no waves, no spots, literally nothing that's apparent under safelight conditions.

I actually hope that it's something that I'm doing and can correct, I love this paper. I've got 48 images to print by October 6th for a show and I shot and will print all of this on the knowledge that I have with this paper. Moving to something else would be like reinventing the wheel. Could it be the massaging? I keep my hands clean but you never know?

-Puma
 

MattKing

Moderator
Moderator
Joined
Apr 24, 2005
Messages
55,377
Location
Delta, BC Canada
Format
Medium Format
Each of the times you refer to (time in developer, time in stop bath and time in fixer) seem to me to be bare minimums - I would definitely try lengthening them by at least 30 seconds each.

I would also avoid the massaging - seems likely to increase the likelihood of physical damage to an RC print. It might make more sense with a fibre based print.

One final suggestion - check your screens! Contamination can definitely hide there.
 

ozphoto

Subscriber
Joined
Apr 2, 2006
Messages
1,922
Location
Adelaide, SA, Australia
Format
Multi Format
I seem to remember having a similar problem with my paper of choice, a very long time ago. Sometimes I'd have great prints, then some would start to show this type of yellow staining.

I tried a few things also; first I thought perhaps I wasn't washing long enough too, but then I noticed that it seemed to happen when water pooled on the print as it dried. I decided to do 2 quick tests:

  • print as per my normal routine and use some fotoflow as a final bath after washing thoroughly - and hang to dry. The staining disappeared.
  • print as per my normal routine final wash as per normal and dry on blotting paper wiping off excess water with a *very* soft sponge. Once again, the staining disappeared.

The excess water obviously was retaining some chemical (most probably fixer) and by pooling on the prints, due to my error, ended up staining the finished print.

Since changing my wash and dry methods, this has become an error of my past - and a good learning experience too! :blink:
 

piu58

Member
Allowing Ads
Joined
May 29, 2006
Messages
1,545
Location
Leipzig, Germany
Format
Medium Format
I got other, but similar staining by developing papers too long. Some papers don't hamonize with some developers in that way. Try to devlop not longer that 5 times of the time when the first parts of the image occur. Or make a test with an other paper developer.
 

Oren Grad

Member
Joined
Feb 17, 2005
Messages
1,620
Format
Large Format
(kodak rapid fixer without hardener) single bath fixing (these are RC) for 60 seconds.

At what dilution do you use the Kodak Rapid Fixer? How much solution do you use in the tray, and how many prints do you fix in it before you discard the fixer and replace it with a fresh batch?

I then take the tray out of the darkroom and put under running water in a kitchen sink to wash it. I normally wash for about ten minutes

For RC paper, that should be ample - if anything, it's too long. Does the water circulate evenly across the entire print?

with wet hands I carefully massage the print[/quote as I was told by a old friend who's been printing for 40 years that this would speed the removal of the fixer.

I have never heard of such a thing. What is the evidence for it? Try washing without the "massage".

I then place the prints face down on screens to dry.

Try hanging the prints instead, by a clothespin or other clip on one corner. Perhaps there's some sort of contamination on the screens.

Good luck...
 

Roger Cole

Member
Allowing Ads
Joined
Jan 20, 2011
Messages
6,069
Location
Atlanta GA
Format
Multi Format
Each of the times you refer to (time in developer, time in stop bath and time in fixer) seem to me to be bare minimums - I would definitely try lengthening them by at least 30 seconds each.

I would also avoid the massaging - seems likely to increase the likelihood of physical damage to an RC print. It might make more sense with a fibre based print.

One final suggestion - check your screens! Contamination can definitely hide there.

Assuming the Rapid Fixer is mixed to film strength the times are fine for RC paper. In fact the stop and fix should be fine for FB provided the fixer is fresh.

The development time should be enough for RC though shorter than I personally prefer, but that shouldn't cause the staining.
 

2F/2F

Member
Allowing Ads
Joined
Apr 29, 2008
Messages
8,031
Location
Los Angeles,
Format
Multi Format
I am thinking that it could be old fixer stains, insufficient fixing, and/or marks from the screens. I've never heard of drying RC on screens, especially not face down; only fiber. I squeegee my RC prints and then set them face up on a towel on top of the washing machine and dryer. Or if it is just a few, I tack the corner into the drywall above the bathroom door and let them hang. (Fiber always goes on the towels.)
 

hpulley

Member
Allowing Ads
Joined
Oct 6, 2010
Messages
2,207
Location
Guelph, Onta
Format
Multi Format
No massage, no squeegee needed for RC! Rapid fixer is 30s fix for RC. Put them in a simple RC print drying rack which holds the prints upright and the water just falls off, dries in no time. No need for screens. Simple running water wash for at least 2 minutes, most RC papers shouldn't be wet for more than 15 minutes total so if they spend around 5 minutes in developer, stop and fixer then washing for 10 minutes is pushing it and you may get edge/corner problems.
 

MattKing

Moderator
Moderator
Joined
Apr 24, 2005
Messages
55,377
Location
Delta, BC Canada
Format
Medium Format
Assuming the Rapid Fixer is mixed to film strength the times are fine for RC paper. In fact the stop and fix should be fine for FB provided the fixer is fresh.

The development time should be enough for RC though shorter than I personally prefer, but that shouldn't cause the staining.

Kodak recommendations for Kodak chemistry and RC papers are as follows:

1) Developer (Dektol or Polymax): 45 seconds to 3 minutes
2) Stop Bath: 10 seconds
3) Rapid Fixer (mixed to paper strength): 2 minutes
 

Roger Cole

Member
Allowing Ads
Joined
Jan 20, 2011
Messages
6,069
Location
Atlanta GA
Format
Multi Format
Most people I know have used rapid fix mixed to film strength since Ilford published their shortened process using such. We don't have enough info. The Ilford sequence was originally 30 seconds in such fix but that's so short it's hard to control. I use one minute for RC and one minute each in two such fixing baths for FB. Kodak also recommended hardener which I don't use for prints nor do others I know.
 

pentaxuser

Member
Joined
May 9, 2005
Messages
20,385
Location
Daventry, No
Format
35mm
I have no idea how many APUGers use Adox MCP but if there was an inherent problem with Adox MCP I'd have expected a lot more threads on yellow stains.

Unless the respondent from Adox is concealing information on customer complaints it appears that the OP's problem is limited to him with maybe or maybe not, similar or not, problems from one other user.


One problem seems to be that he has received some very strange advice from a "guru" he trusts and the other is that short of watching his exact process, it is difficult to be sure of exactly what is happening.

If it were Ilford paper instead of Adox that had produced this problem then I am sure that Simon Galley would be posting immediately, asking that the OP send his paper batch back to Ilford for testing

Just a suggestion but maybe Adox might consider suggesting that the OP correspond with Adox and if necessary send the batch back for testing.

The alternative is that we continue discussing it on APUG and until and unless we find a cause of the problem Adox continues to suffer potential but possibly unwarranted damage to its reputation.

A good many months ago we had a thread on a problem with Ffordes which as I recall was largely a one customer problem and yet each time anyone replied, the tread title was repeated to the unfair detriment of Ffordes.

Forums have the abillty to damage reputations without having deliberate intention of "malice aforethought" unfortunately.

pentaxuser
 

2F/2F

Member
Allowing Ads
Joined
Apr 29, 2008
Messages
8,031
Location
Los Angeles,
Format
Multi Format
I use Adox MCP as my main RC paper now. Never a problem with it.

If it were Ilford paper instead of Adox that had produced this problem then I am sure that Simon Galley would be posting immediately, asking that the OP send his paper batch back to Ilford for testing.

Hasn't Mirko already responded in this thread?
 
Photrio.com contains affiliate links to products. We may receive a commission for purchases made through these links.
To read our full affiliate disclosure statement please click Here.

PHOTRIO PARTNERS EQUALLY FUNDING OUR COMMUNITY:


Ilford ADOX Freestyle Photographic Stearman Press Weldon Color Lab Blue Moon Camera & Machine
Top Bottom