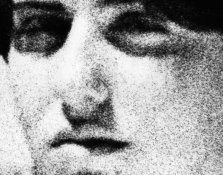
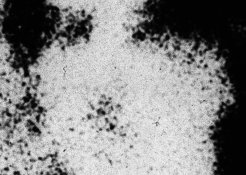
The grain still looks pretty sharp. The second one, a few enlargement steps further, clearly shows the grain of the internegative.
If I could get rid of this effects with the chemicals that 2F/2F suggested, I would rather go for it than breaking my back trying to get a perfect alignment or focusing!
Grain is grain, it is supposed to be there... it is what forms your image in the first place. Take away the grain, and you won't have an image. I doubt if using specific chemicals will solve it all.
I think the main problem is not the chemicals, but the enlargement steps for the internegatives. Unless you manage so many interneg steps and usage of such low ISO film, so as to be able to print your extreme enlargement at an enlargement value that grain is virtually invisible, you won't get rid of the internegatives grain.
The suggested 4-7x times steps of 2F/2F and IC-racer might just make it for 100 ISO film, but maybe the steps are still to big for 400 ISO film, especially a 7x step. I think that will start to show grain very clearly.
Maybe something in the 4x times range would yield your desired result without the pepper grain of the internegative being visible. But this would require a 50x75 cm final negative to print a 2 x 3 meter mural...

No enlarger for that...
I hate to say it, but I think you need to go "Hybrid" to really get rid of that internegative grain. Make a high quality drum or Imacon scan of your negative, and than have it:
- Either printed digitally as a direct positive conversion
- Or have some shop print it is as a huge, e.g. 1 x 1.5 meter transparent digital negative on something like
Mitsubishi's Pictorico OHP and make a contact print on your fibre paper of that... Pictorico seems to be available in rolls of up to 59 inch wide...
Essentially, this last thing is what most alternative photographers on HybridPhoto seem to do to make their contact negatives for for example Pt/Pd prints. Going the contact print route, will also solve your alignment and focus issues, no need for that in contact printing... Nor need for an enlarger.
Marco


 )
)