• Welcome to Photrio!
    Registration is fast and free. Join today to unlock search, see fewer ads, and access all forum features.
    Click here to sign up

When your Darkroom has a window...

Recent Classifieds

Forum statistics

Threads
203,106
Messages
2,849,898
Members
101,670
Latest member
JeremiahPeterson
Recent bookmarks
0

ula_mv

Member
Allowing Ads
Joined
Feb 20, 2014
Messages
7
Location
Los Angeles
Format
35mm
The dilemma:

All areas in the apartment larger than a closet have windows
Bathroom has one large window
My way of blocking light from this window must be easily removed and reattached
I would like it if it didn't leave behind ugly things to look at when the bathroom is busy being used by everyone else in the apartment.
Setting it up cannot take a significant amount of time. I will be assembling and disassembling my entire darkroom every time I print.

Has anyone created something that solves the problem of external light on a temporary, repeatable basis?

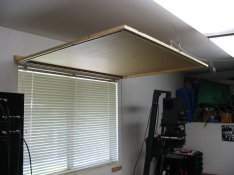
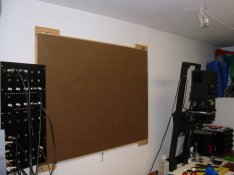
Most of my thoughts right now are revolving around a board/blackout curtains cut to size and taped down each time with duct tape, but that strikes me as exceptionally error prone.

Thanks all!
 
My darkroom has 2 windows, because I don't always want it to be dark. However, I have darkroom blinds that run in channels in both widows, but in the summer some light creeps round the edge. To remedy this I cut 2 sheets of MDF slightly bigger than the windows and these are fixed in place with a couple of wooden pegs fixed to the wall. The thing to remember is that light can't go round corners (only by reflection). In such a way you can have total darkness.
 
For close to forty years i have successfully blocked light leaks from the door to my darkroom with a block-out cloth. I stapled it both top and bottom to dowel sticks. The cloth is of course larger than the door in every direction. Above the door I screwed in an "L" hook on each side so the dowel rests on them. To use I just place the dowel across the hooks and unroll. The bottom dowel weights down the cloth and maintains the shape. to remove just roll it up and lift off the hooks. If you have to repair the holes they are small and wood filler or plaster should do it. Other than getting the materials it should take a couple of minutes to assemble and seconds to install and remove.

http://www.jeffreyglasser.com/
 
i posted my thoughts in the wrong section lol
 
Gator board with weather stripping on the edges. Friction fit. Put a knob in it to make it easy to remove. Nothing like a nice tight fit with nothing to get ahold of when you want to get it out.
Black Gator board is opaque. If the window faces South you may want to paint the outer surface a light color.

Reinforce the area where the knob goes on both sides unless you like trying to patch things up.
 
My dry darkroom has a large window and I have a flattened corrugated box which is gaffer taped flat that I place between the blinds and the window and then cover with blackout cloth that attaches to the wall with velcro. That blocks out the light in that room.

The bathroom which serves as my wet darkroom has a window with a semicircular top. I cut a piece of plywood to shape attached darkroom cloth to one side had put two handles on it to make it easier to put in and take out. After the board in inserted I use gaffers tape to spread out and hold the blackout cloth to the wall.
 
Get the thick black plastic drop cloth (sold at Home Depot) and a bit of wide masking tape. For bright daylight, you may need to use a couple of layers.

I use this in my basement, cut to size and then taped along the edges. Easy to pop up and remove, roll it up and use it again later. The blackout curtains also work quite well with some push pins. Maybe cut a piece of black foam core to a snug fit to handle 95% of the work, then drape the cloth over a rod to do the rest.
 
When I was in college I had a "darkroom" (I use the word loosely) in my apartment. My enlarger went in the hall closet (extension cords are wonderful), and the trays went in the bathroom, which was next to the closet and had a window. What I did when I needed to print was, I hung a very thick dark blanket, folded over itself once, at the end of the hall, and I shoved a measured-and-cut-to-fit piece of thick cardboard into the window frame. Worked perfectly. Made some nice prints there.
 
"When your Darkroom has a window... " you call it a Studio.
(I just could not refrain..)


Another way of temporarily and nicely covering a window would be a board from either plywood or foamboard. Arrested behind two fillets or levers.
When usingfoamboard, either use black one or a colour of your choice that you cover with aluminiun foil or varnish at the outer side.
 
Oh my word, so many thoughts!

You all have been incredibly helpful. I will be running the options by my roommates and figuring out what they're prefer as far as general obtrusiveness etc. goes. I have chalkboard paint on hand to prevent reflections. Everything that's been said is helpful in covering all the details. I hadn't even thought of light leaks around the door, just at the bottom, for instance. Perils of a first darkroom, I suppose.

Thanks so much everyone!
 
If your roommates like red, you could use rubylith on the window.
 
I too haven't considered light leaks at a door other than at the bottom.

Haven't all doors got flanges, and wouldn't these be sufficient?
 
No, they aren't always sufficient - my bathroom-darkroom door leaks light all the way round, flanges (sometimes called returns) notwithstanding.

After messing about unsuccessfully trying to use foamstrip and so on, I ended up using a solution almost identical to jeffreyg
 
My darkroom had been a bathroom. I used plywood to cover the window, and weather stripping on the door with a add-on door sweep on the bottom. The door is now 100% light-tight, and except for requiring a bit of a push to latch, the mods aren't particularly noticeable.
 
My darkroom window has a double sliding horizontal window. I remove the sliding storm glass from one half and replace it with a piece of plywood the same dimensions as the storm window. Two muffin fans are mounted in the plywood, with a light tight baffle on the outside. I cover the other pane of the window with black visqueen. The plywood goes in and out in seconds.
 
That sounds like what I did once - put in self-assembly secondary glazing, and use plywood panels in place of the glass. That gave 50% of the window space for light when needed, and the window could be opened for ventilation. In the summer the join needed some tape.

The other temporary case used a panel that was cut to fit the window frame with some black foam around the edges. That worked well. Both of these solutions were in the UK where a window sill would be over 6" deep. In California the walls are barely 6" thick and there is no sill to speak of.

My current darkroom has two windows. I have them permanently blacked out by backing the glass withhardboard panels and sealed at the edge with black silicone. I can still open the window if I need to for any reason.
 
There's a material at Home Depot, it's essentially plastic cardboard. It's white on one side and black on the other, light weight and rigid. Cuts with a utility knife. Opaque. Indispensable for blocking light, whether it's windows or doors.
 
When I lived in an apartment I used a changing bag and 'daylight' tank for film processing. I printed only at night. In fact for the first 12 years of using my current darkroom I only printed at night due to this glass door that I only recently covered with a light-tight shade.
file-26.jpg
 
I have just made a new blackout for our darkroom window.

I wanted something removable so as to leave daylight in when needed. I made a frame with a border of about 3.5 inches which mounts to the window frame. Also used some rubber draught excluder in there to be sure of no light leaks. This frame then has a another frame of timber half way in, I used 2 x 1 trimmed down to about 3/8" in thickness. Then there is a 3/8" piece of medite ( mdf ) cut to fit this opening ( again sealed with draught excluder) which lifts in and out easily and is secured with some simple hardwood twist locks.

I used medite as I tried ply before and hot weather warped it real bad. I also put some foam backed reflective foil on the back of the medite sheet to help reflect some of the heat away.

The 3.5" frame can be painted to match the original window if necessary so doesn't look to ugly although in this case it doesn't matter as it's a permanent darkroom. I will take some pictures and put them up here asap.
 
Oh my word, so many thoughts!

You all have been incredibly helpful. I will be running the options by my roommates and figuring out what they're prefer as far as general obtrusiveness etc. goes. I have chalkboard paint on hand to prevent reflections. Everything that's been said is helpful in covering all the details. I hadn't even thought of light leaks around the door, just at the bottom, for instance. Perils of a first darkroom, I suppose.

Thanks so much everyone!

Here is how I do it. I like to be able to go from normal room to dark room in a few seconds. I think it looks okay too. Enjoy.

Chris
 

Attachments

  • 00WhS7-252925584.jpg
    00WhS7-252925584.jpg
    181.4 KB · Views: 1,645
  • 00WhSC-252925684.jpg
    00WhSC-252925684.jpg
    157.4 KB · Views: 549
I guess you got the one and only darkroom equipped with high-frequency PL-connectors.

Maybe they come handy at high-speed processes...
 
Here is how I do it. I like to be able to go from normal room to dark room in a few seconds. I think it looks okay too. Enjoy.

Chris

My method is not quite as fast, but it is still fast.
 
Photrio.com contains affiliate links to products. We may receive a commission for purchases made through these links.
To read our full affiliate disclosure statement please click Here.

PHOTRIO PARTNERS EQUALLY FUNDING OUR COMMUNITY:


Ilford ADOX Freestyle Photographic Stearman Press Weldon Color Lab Blue Moon Camera & Machine
Top Bottom