Weird Smudge like stains and lines on emulsion side of negative

Kildare

A
Kildare

  • 1
  • 0
  • 36
Sonatas XII-26 (Homes)

A
Sonatas XII-26 (Homes)

  • 1
  • 1
  • 55
Johnny Mills Shoal

H
Johnny Mills Shoal

  • 1
  • 0
  • 45
The Two Wisemen.jpg

H
The Two Wisemen.jpg

  • 0
  • 0
  • 55
tricky bit

D
tricky bit

  • 0
  • 0
  • 50

Recent Classifieds

Forum statistics

Threads
199,291
Messages
2,789,222
Members
99,861
Latest member
Thomas1971
Recent bookmarks
0

noahswan

Member
Joined
Jun 14, 2023
Messages
25
Location
Berlin
Format
Medium Format
Hello!

Hope everyone reading this is well.
I have an isse concerning development.
The massive blotches/lines have been appearing on these negatives from a studio shoot I did yesterday. The first three rolls I developed did not have these and then the last 4 did.

It’s worth mentioning that 1. It runs across the whole negative, not just in the frame, and seems to be on the emulsion side.
2. It only happens during/after drying.


Also I would loke to know your tips for getting rid of it?
If possible.

I’ll post a scan underneath (cant send photo of negative i dont have them kn me

Thank you!
 
OP
OP
noahswan

noahswan

Member
Joined
Jun 14, 2023
Messages
25
Location
Berlin
Format
Medium Format
IMG_3173.jpeg
 
OP
OP
noahswan

noahswan

Member
Joined
Jun 14, 2023
Messages
25
Location
Berlin
Format
Medium Format
this is an example of these blotches
See how it goes past the frame lines into the next frame? I was trying weird multi-exposures with this photo.
 
OP
OP
noahswan

noahswan

Member
Joined
Jun 14, 2023
Messages
25
Location
Berlin
Format
Medium Format
This is an example of it not being there. Same camera same dev method same session same everything.

I dry them in a heated drying cabinet with laundry clips to attached at the bottom for weight
 

koraks

Moderator
Moderator
Joined
Nov 29, 2018
Messages
23,585
Location
Europe
Format
Multi Format
Hmm, interesting. Could you post a photograph of the emulsion-side of the first example? Please hold the film at an oblique angle so that the anomaly is as clearly visible on the film surface as possible, please.

Also, could you give additional information on the film you used, your chemistry and your development process? Please be as detailed as possible.

PS: instead of posting numerous replies, please try to combine as much as possible into a single post if you're going to post it all at the same time anyway. Thanks.
 
OP
OP
noahswan

noahswan

Member
Joined
Jun 14, 2023
Messages
25
Location
Berlin
Format
Medium Format
Sorry I’m doing this on a phone and this website isn’t really optimized/practical for posting photos and text at the same time on my shitty old iPhone.

Film was Kentmere 100 120mm format

I developer it in rodinal. 15 minutes 1+50 at 20°.
Agitation every minute for about 10 seconds with 4 revolutions per agitation.

Stop bath with acidic solution diluted in water (few drops in 700mL)

Fixed with Adox fixer at 1:4 for 5 minutes.

Rinsed and soaked in water and hung to dry with the heater on (ventilation+heating turned on).

I used my studio’s tap water for every step of the process as this has worked for me for about a year as it isn’t “hard” water. Maybe that has changed now?
 

Attachments

  • IMG_3182.jpeg
    IMG_3182.jpeg
    45.3 KB · Views: 82
  • IMG_3181.jpeg
    IMG_3181.jpeg
    27.7 KB · Views: 96

koraks

Moderator
Moderator
Joined
Nov 29, 2018
Messages
23,585
Location
Europe
Format
Multi Format
Sorry I’m doing this on a phone and this website isn’t really optimized/practical for posting photos and text at the same time on my shitty old iPhone.

I see; it's not a big issue anyway. Don't worry about it!

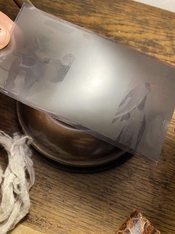
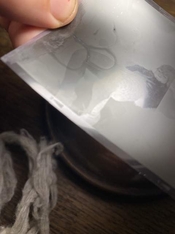
Thanks for posting the additional photos. I think your problem is that the film dries rapidly with too much water still clinging onto the emulsion. This creates the type of drying marks you're seeing. Here's some things you could try:
* Use distilled water for the last wash step. Simply soak the film in distilled water (instead of water from the tap) for a minute or so before hanging it up to dry.
* Shake the film dry while it's still on the development reel so that there's as little water as possible clinging to the film surface.
* Do not use heat when drying the film. A fan is OK (although watch out for dust). The more rapidly you try to dry the film, the higher the risk of the kind of defects you've observed. If you're using one of those Jobo film drying funnels, try turning on the fan, but not the heat. Alternatively, just hang your film to dry from a clothes line in e.g. a bathroom and give it a few hours.

To fix this affected film, you might try the following:
* Mix a bath of around 0.5% acetic acid. Wash the film in this bath (use e.g. trays to process cut strips of film).
* Now thoroughly wash the film to remove any acid, and give it the final bath in distilled water and the drying treatment as outlined above.
The acid will help dissolve the calcium deposits left on the emulsion side.

There's no guarantee of entirely removing these marks. Part of the marks is due to calcium deposits, but part is also a different surface finish of the gelatin layer that resulted from water droplets clinging to the film becoming very hot. This physically alters the gelatin itself, and I'm not entirely sure if this is reversible. If it is, the wash process outlined above should help.

Good luck. I dry lots of gelatin (usually in far thicker layers than on regular film) and there's just no way to really rush it. Except for forcing dry air across the surface with a fan, there's not much you can do. Note also that in film and silver gelatin paper manufacturing, no heat is actually used to dry the emulsion. It's all cool or even cold air, but the air is very dry and forced at high speed across the emulsion. You can mimic this a bit in a home setting by taking e.g. a space dehumidifier unit and placing it near the film (turned on evidently) or even running the in-house airconditioning if you have it. This will dry the air, and in turn this will help immensely to speed up drying the gelatin emulsion while not overheating it.

PS: do you know that old story (whose truth is still debated) about Robert Capa's photographs of the landings on D-Day being destroyed by overheating them in a drying cabinet? Your post made me think of that one!
 
OP
OP
noahswan

noahswan

Member
Joined
Jun 14, 2023
Messages
25
Location
Berlin
Format
Medium Format
Thanks for the super quick reply.

I’ll try out that method today and report back later on how much it helped. Crossing my fingers
 
Photrio.com contains affiliate links to products. We may receive a commission for purchases made through these links.
To read our full affiliate disclosure statement please click Here.

PHOTRIO PARTNERS EQUALLY FUNDING OUR COMMUNITY:


Ilford ADOX Freestyle Photographic Stearman Press Weldon Color Lab Blue Moon Camera & Machine
Top Bottom