What do you mean by " a faster exposure gives you more shadows"? Do you mean that the shadows will be less detailed and there will be more of them as in blacker shadows with less detail. If you do then a faster exposure will do this.
It has never been clear to me what you regard as a flat print. Do you regard the jens portraits as flat?
Show us some flat negatives and what prints from those negatives look like at grades 2,3, 4 and 5 look like
We will be in a better position to advise you what to do once we see a range of examples
pentaxuser
A faster exposure = darker shadows, since (see below) I mostly get fine exposed negs, but a lack of shadows. I like very strong tonal contrast... Check my website for my black and white work (jessestr.be) and you'll see what I like, mostly strong contrast and a lot of tonal contrast.
What I mean with a flat print is that I have a lot of grey tones, not really a bright white, and also not really a deep black. When a print just looks lifeless... Due to the flat light in real life too...
I consider the portrait of Jens as good, a little too bright on the highlights.
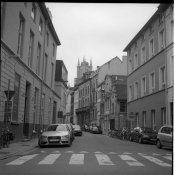
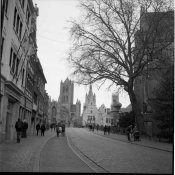
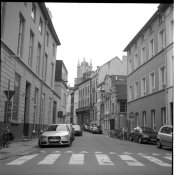
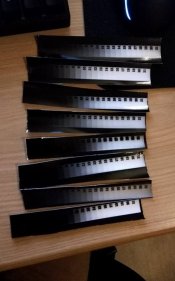
See attachments for examples. These are SCANS (uneditted) but look exactly like the testprints I made of them. This was a roll to test my exposure/development. It was a dull day, but as you can see, much midtones and greyish... but no real highlights/shadows. Due to my exposure or just the light? That's the question.
Keep in mind that this is the most extreme case I've ever had. Most negatives have more tonal range/contrast
They are taken on a 1956 Rolleiflex, with clean optics. (tessar lens.. so not the most contrasty lens)
Before you go any further, I think you need to think about what you consider to be "contrast".
Thanks for the explanation. See above what I mean about contrast.
You didn't answer the most important part of Rob's question.
For example, in your portraits which are side-lit with window lighting, which meter, in which mode, with which accessories, held in which position and directed which way?
For spotmeter, I measure on the skin that I want to be in zone 6 (for caucausian skin) and then put that in zone 6, mostly works great. But very difficult in some tricky lightning situations.
For incident, I place the meter just below the chin and point the white dome to the lens of the camera.
Had you read anything on that site you would of had an gathered an understanding similar to Rob's post.
A densitometer, RH Analyzer, spot meter and little understanding. Looks like someone went on a little spending spree.
I've been printing 1.5 years just with teststrips and on looks. Since I had the chance to get the Analyzer cheaply, I took it

The densitometer is included in the analyzer and I've been using the spotmeter for over a year now too... But I shouldn't justify myself for this...
I don't see anything wrong with the example of the portrait in post #24 other than it could be tad bright for the facial tone. I've used the Pentax spot meter before and with Caucasian skin, as he has in the example, I'd take the reading, open one stop and that's going to be about as good as it gets...IF the meter is calibrated correctly.
...
Generally speaking, if I shoot Tri-X at box speed I do so on a "cloudy, bright no shadows" condition or a heavy overcast day. I'll give that roll, if shot entirely under those circumstances, about 1 1/2 minute to2 minutes more developing time than if I shot that roll at ASA 200-250. Then, I develop with less time. On the other side of the coin, I've had good luck with either Tri-X or HP-5 at ASA250 and just using HC-110 with Dilution H for around 10 minutes and most all frames look good with adequate shadow detail and no blown highlights.
Experience is the best teacher in all things photographic and there has been some very good advice given here by those that have been down this road before.
Thanks for the insights. I'll keep the extra development time in mind for dull days. The portrait is the only one that's fine on the roll, except as you say, the skin is a bit too bright. But as you can see in the attachments, the rest is just lifeless.
for studio portraits I would suggest an incident meter. Subjects move and so the reflection values move before you have time to put down your meter and trip the shutter whereas the light stays the same if its flash.
Outdoors for any protraits I would use incident. Again subjects move. However, if you meter their forehead on the light side and not so light side and average the two readings then you'll be pretty close and it won't matter unless they turn their head away from the light source used for the readings.
....
Personally I would bin the analyser and learn to do it intuitively. You'll actually learn how paper responds to your inputs instead of being dependant on machine calibration and automation.
Thanks again... Maybe I should go back to the teststrip method and see what it gives me. The analyzer has worked for me... and has also opened my eyes on some negatives. I get very much different (and better results) since the analyzer also calculates the exposure difference when changing grades etc. The values/grades I get are much different then the ones I come up with on test printing, and often they are much better... They look extremely weird when they come up on the screen, but when the print is developed... it looks great. But yes, maybe I should just ditch it.
I have 30 fiber prints to make for an exposition starting June 3th... I was hoping the analyzer would speed the process but I guess it's just holding me back.
I justfound out that, it's partly because of the analyzer that I was thinking that my negs looked flat, since I wasn't using it right and it wasn't calibrated very well for the gradation part. The grades look much better now for what I want to achieve...
I'll re-read all the post written here and source more information about printing. Everything made more sense when I just used test strips.. now it seems that everything is going wrong from the development of the film... but it's probably just the analyzer that is fooling me.
Nobody said it was going to be easy when I switched to film.. but I love learning the tricks to get it right...