Thanks for your inputs indeed ^^
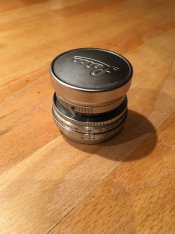
I packed away the lens, just to cool my head and let time pass while my brain was working the issue on the back-burner, sort off, and checking the Internet for hints. (very little to find out there, very little and very old information, so the people involved haven't been active online for years).
As for servicing.....well, where I live, I need to hand the lens over to a "pro photo service", and all they do, is tell everyone that the lens needs to be shipped to Germany, then charge a premium for the service.
There are very very few people who can service Leica here (privately) and shipping it off to anywhere, will cost a lot in shipping, time and battling the customs and tax-issues.
Yes, regular vodka should be ok, it's pretty clean and evaporates slow enough it seems. It's a question of having the blades in the spirit and mount them wet (not pour in vodka and use the lens as a shot-glass

), this amount should not be enough to soak much, other than the area where the aperture-seating holes are, it also evaporates fairly quickly, so it should be very little risk of it migrating into the lens.
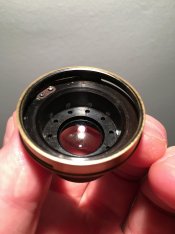
Also, when looking at the aperture-seating in the lens, it seems to be constructed so that the part with the holes, is actually resting on top of a solid shim. (you cannot see the lens trough the holes for the blades). This prevents light-leaks naturally, but it also protect the lens from any vodka I think.
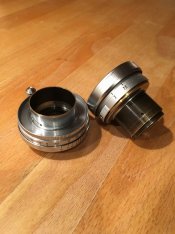
Shutterfinger, thanks but I really don't dare to try and remove the rear portion of the lens without reading up on how it it actually attached.....so far I've found diddly-squat on the collapsible Summicron and only a little information on the very similar Summitar.
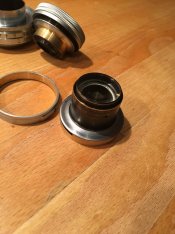
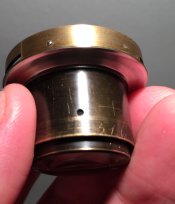
As far as I know, the elements themselves are inserted into the back-end and fixed by friction, I have no idea how the back-end tube is actually attached to the aperture-end. Messing too much with that, I am afraid is going to ruin the lens for real

(just too many things telling me "no" about this part of the lens, which is a shame, because it could have given access to the aperture from below).
However, I did see an interesting video on youtube about maintenance on various lenses, among them, cleaning rusty aperture blades. (here it is, from 16:00 minutes:
).
Now the aperture on that lens is quite different from mine, however, he uses a different technique; He gets the blades in there and then use the (what do you call it?) aperture control cup(?) to hold the blades, while gently pushing the lower blades into the holes.
I found that very interesting, as the biggest (by far) issue about rebuilding the aperture, is that the blades will come out of the holes if you just look at them hard enough.
Using the control-cup to keep the blades in check could really work well, as long as at least one blade is actually seated, , the starting point for the rest of the blades should be correct.
It is very easy to check if blades are seated correctly. By turning the control-cup very slightly (say to f3,5), blades attached properly, will start to move towards the middle, the places not moving, needs to be adjusted "about 5 notches in the counter-clockwise direction", since they are actually supposed to be seated into the hole there. That is also what the guy in this video does. he twists to check operation and adjust any misalignment by locating the notch further down, in the counter-clockwise direction.
I use a small piece of band-aide patch (the ones you stick onto a small wound) while I work. I cut out the sticky parts and have the (circular cut) felt resting on-top of the lens-element below the aperture. This is very light and it should protect against any falling blades or ill-formed movements with my wooden tooth-picks.
Looks like I need another tool though, in the video, he use a horizontal, very fine, pick of some kind, it needs to be very very fine (like a dental-tool), and should probably also be secured by a little tape on the bottom-end, to prevent any accidents, should it slip.
I am doing this in parts, trying various ways 2-3 times, to gauge how hard/easy the process was. Up until now, the closest and "easiest" (less of a hell) I have been to a full rebuild, was using tiny kitchen/hobby magnets, placed around the barrel (held together with tape). I actually only had one blade left to seat, but the last blade ruined the house of cards on that one.

I have found that stronger magnets tend to pull on the blades located on the other side of the lens. A few weak ones, seem to work better.
This isn't impossible, one just has to be careful and find the smartest way to work the problem.
Like I pondered in my original post, I doubt the factory-workers spent weeks assembling these things, so there simply must exist some other way of cracking this nut, other than fiddling with a house of cards.

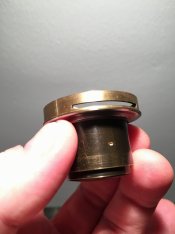
The biggest problem with the Summicron f2 collapsible, is depth and available space. The narrow passage down to the low-seated blades, makes it all but impossible to insert the last blades, without disturbing the others to a point where they start jumping out of their holes.
The technique in the video may just solve a lot of issues (while maybe creating others, like trying to locate the misaligned blade with the cup, obscuring the view).



 ), this amount should not be enough to soak much, other than the area where the aperture-seating holes are, it also evaporates fairly quickly, so it should be very little risk of it migrating into the lens.

