Sorry, I just snagged a D2VXL largely thanks to the excellent quality of information that I received in response to my previous questions here on APUG. They were fantastically helpful in making a well-informed purchase. Thanks to all but now I'm afraid that you have opened yourselves to more stupid Omega newbie questions.
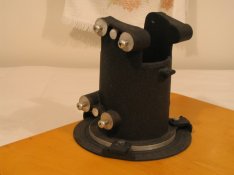
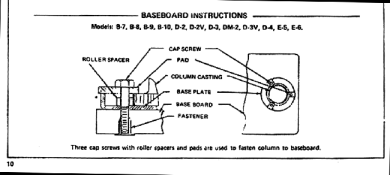
This enlarger came without a baseboard. The bottom of the column has a narrow flange. I am wondering what sort of hardware was originally used to fasten this to the baseboard. Is there some generic fastener that would be useful in this role?
This enlarger came without a baseboard. The bottom of the column has a narrow flange. I am wondering what sort of hardware was originally used to fasten this to the baseboard. Is there some generic fastener that would be useful in this role?
 ?
?