Stouffer Step Exposure

St. Clair Beach Solitude

D
St. Clair Beach Solitude

  • 7
  • 2
  • 90
Reach for the sky

H
Reach for the sky

  • 3
  • 4
  • 124
Agawa Canyon

A
Agawa Canyon

  • 3
  • 2
  • 162

Recent Classifieds

Forum statistics

Threads
198,873
Messages
2,782,338
Members
99,737
Latest member
JackZZ
Recent bookmarks
0

Shaggysk8

Member
Joined
Feb 14, 2009
Messages
465
Location
Northamptons
Format
4x5 Format
Ok I have looked and keep getting confused, I will be getting my first 4x5 soon and I have read you can use a Stouffer Step and take a picture then develop and work out density.

So my question is, I have a 21 Step can I use this and how do I take a picture of it, how do i expose on it. The may sound like a silly question but I have read so much I have just confused myself.

A nice step by step with bullet points would be handy :D

Paul
 

holmburgers

Member
Joined
Aug 13, 2009
Messages
4,439
Location
Vienna, Austria
Format
Multi Format
I'm not sure exactly what you need to know, as you haven't stated your intention. "Work out density", what specifically are you trying to find out?

You'll have to backlight it and then meter whatever step you want to be middle gray. This might be a chore with a small step wedge, and hopefully you have a spot meter. Surely someone with a better answer will chirp soon.
 
Joined
Jun 23, 2007
Messages
1,177
Location
Hamilton, Ca
Format
Multi Format
It's a printing aid. You set the step wedge beside your negative when making your contact print. You need a contact exposure long enough to render all the steps faithfully in the wedge. That gives you the best contact time. In that sense, the step wedge is an ideal negative.

If, when you arrive at a contact print that faithfully reproduces the steps but does not give you a nice looking contact print of your negative, then it indicates you are over or under exposed, or over or under developed.

By varying your contact time, you can work out how to modify your exposure and/or development.


There are other uses, like verifying the tonal range of an unmarked batch of paper, verifying your chemistry isn't exhausted, working out tonal transfer functions for alt process, but that is the nutshell.
 
Last edited by a moderator:

ic-racer

Member
Joined
Feb 25, 2007
Messages
16,546
Location
USA
Format
Multi Format
It might take months to wade through the varoius threads here on what do do (we need a film testing FAQ).

The two questions are:
1) How much exposure does the film need for excellent prints?
2) How long to develop the film to print on your favorite printing materials?


To answer #1 above, I like the simple zone I test where you just shoot a uniform target at zone I and check that the negative density is 0.1 (1/3 stop) above film base.

To determine how long the develop the film, you need to have already estabilshed that by printing and trial and error. Once you know your favorite gamma or contrst index, you can expose the wedge by taping it on unknown film and exposing it to get density data from which the H&D curve can be produced. Then by trial and error you can process the film to match the gamma or contrast index you previously found to be good with other films.

This is just one way to do it (the way I'd suggest in a FAQ), but there are many, many ways to answer the two questions above, perhaps some even better than what I have suggested. (Or buy Ralph's book, its all in there :wink: )
 
Last edited by a moderator:

RalphLambrecht

Subscriber
Joined
Sep 19, 2003
Messages
14,654
Location
K,Germany
Format
Medium Format
... A nice step by step with bullet points would be handy :D

Paul

Paul

Let's start with your list.

1. What is your goal? (film test, paper test, both)
2. Do you have a spotmeter?
3. Do you have a densitometer?
4. Why did you pick a 21-step for a 4x5 and not a 31-step?
5. Are you familiar with film, paper testing?
6. Do you understand log densities and how they relate to exposure?

Answering these questions will make it a lot easier to give you appropriate answers.
 

michaelbsc

Member
Joined
Dec 18, 2007
Messages
2,103
Location
South Caroli
Format
Multi Format
It might take months to wade through the varoius threads here on what do do (we need a film testing FAQ).....

I agree, but I would say FAQs plural.

Other wise it would become like the developer wars. (Huh?! NO! I did *NOT* say Rodinal.)
 
OP
OP
Shaggysk8

Shaggysk8

Member
Joined
Feb 14, 2009
Messages
465
Location
Northamptons
Format
4x5 Format
1. What is your goal? (film test, paper test, both)
To start with film test, I want to get the densitys correct

2. Do you have a spotmeter?
Yes I do, two in fact but I can only use one at a time

3. Do you have a densitometer?
In the post (melico photo log TD2)

4. Why did you pick a 21-step for a 4x5 and not a 31-step?
I use to make plates for a litho press after designing and I seemed to acquire it

5. Are you familiar with film, paper testing?
Yeah sort of, done a bit and have your amazing book (2nd) I think I am just a little confused

6. Do you understand log densities and how they relate to exposure?
Sort of but not really I get the whole thing but then I don't.

I really want to be able to predict what I am taking the best I can so I can control the whole process better.

I am a designer that designs for flexo presses (not the most accurate presses in the would) and I can predict the out come for that, and in many areas it is very much the same, but I just feel I need some do that do this advice and then I can go from there. So many people have there way of doing things and when you read it all you end up with a dense neg and black print...hahaha

All my roll film has come out ok, but this move into large format I want to create and paint an image rather than take one.

Paul
 

RalphLambrecht

Subscriber
Joined
Sep 19, 2003
Messages
14,654
Location
K,Germany
Format
Medium Format
Paul

This should work. To start with, set your spotmeter to the advertised film speed (ISO rating), tape your step wedge to a north-facing window, and measure step 11 (I assume you have a TP 4x5 step wedge). You can get as close as you like and your spotmeter allows you to. This will give you your exposure.

This and the rest is in the book, starting on page 217 with 'Elaborate and Precise' by the way. Step-by-step instructions are on page 221.

Once your ready and still have a question, let me know.
 

Martin Aislabie

Subscriber
Joined
Nov 17, 2007
Messages
1,413
Location
Stratford-up
Format
4x5 Format
Paul, if you want to do some film testing buy Ralphs excellent book - Way Beyond the Monochrome

Its now in its 2nd edition

It explains how to do your own film testing and provides the charts for you to plot out your results

Alternatively, if you want someone else to do all the hard work for you - buy the book Beyond the Zone System by Phil Davis and a film test from Fred Newman at the View Camera Store

Martin
 

Chuck_P

Subscriber
Joined
Feb 2, 2004
Messages
2,369
Location
Kentucky
Format
4x5 Format
Ok I have looked and keep getting confused, I will be getting my first 4x5 soon and I have read you can use a Stouffer Step and take a picture then develop and work out density.

So my question is, I have a 21 Step can I use this and how do I take a picture of it, how do i expose on it. The may sound like a silly question but I have read so much I have just confused myself.

A nice step by step with bullet points would be handy :D

Paul

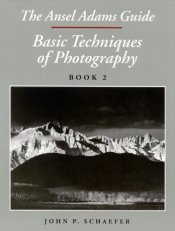
Just another source here for learning how to test film using a step tablet. The 4x5 step tablet is loaded in the film holder on top of the film and exposed.
 

Attachments

  • AA Guide 2.jpg
    AA Guide 2.jpg
    34.1 KB · Views: 291

RalphLambrecht

Subscriber
Joined
Sep 19, 2003
Messages
14,654
Location
K,Germany
Format
Medium Format
Just another source here for learning how to test film using a step tablet. The 4x5 step tablet is loaded in the film holder on top of the film and exposed.

Always good to compare methods, but there are reports about some film holders not able to take film and step tablet (too thick). Also, the OP has one of the following step wedges, and I don't know if they fit into the film holder.

http://www.stouffer.net/TransPage.htm

Anyway, I think it may be more realistic to actually photograph the tablet. This way you get the 'real' workflow with meter and camera flare and the difference between meter and the actual exposure, which is a mixture of image-forming and non-image-forming light.

A further method is to do it all in the darkroom, using the enlarger. After fitting a large-format lens to the enlarger, this works well, but it has the same advantage or disadvantage as placing the tablet into the film holder.
 

Lee L

Member
Joined
Nov 17, 2004
Messages
3,281
Format
Multi Format
I use a Stouffer 4x5 inch 31 step transmission wedge in the following way.

First, I place the wedge in a negative carrier and backlight it with evenly diffused light, with all stray light around it blocked off to prevent excessive flare. Then I photograph the step wedge with the film and camera I'm testing, using only the central portion of the negative, regardless of format. Since the Stouffer wedges are 10 stops, I meter the backlight without the wedge in place, and then set the exposure at 5 stops greater exposure than the backlight. This places the middle step(s) of the Stouffer wedge at medium gray, or what a Zone System user would call Zone V. It also gives a scale that reaches +/- 5 stops from middle gray, enough to cover 99% of shooting situations. I bracket if I feel I need more than the 10 stop range to test for unknown film speed or other factors.

I develop the film and then place it in the enlarger I use for printing. I project the negative of the step wedge onto the baseboard and focus, then read the steps with a Darkroom Automation Enlarging Meter. This gives me relative readings in stops (to 0.01 stop resolution) for each wedge, which is easily converted in a spreadsheet to optical density by multiplying by 0.30. The reason I use only the central 1/3 or so of the negative is to minimize light falloff in the enlarger. With the spreadsheet it's very easy to calculate fb+f and find where the Zone I density falls. The spreadsheet can draw a graph and calculate your choice of contrast indicators.

As Ralph indicates, this is a real end-to-end test of the process. It's also a very quick and easy way to add a one frame process control strip to any single sheet or single frame of roll film.

Lee
 

Chuck_P

Subscriber
Joined
Feb 2, 2004
Messages
2,369
Location
Kentucky
Format
4x5 Format
Always good to compare methods, but there are reports about some film holders not able to take film and step tablet (too thick). Also, the OP has one of the following step wedges, and I don't know if they fit into the film holder.

http://www.stouffer.net/TransPage.htm

Anyway, I think it may be more realistic to actually photograph the tablet. This way you get the 'real' workflow with meter and camera flare and the difference between meter and the actual exposure, which is a mixture of image-forming and non-image-forming light.

A further method is to do it all in the darkroom, using the enlarger. After fitting a large-format lens to the enlarger, this works well, but it has the same advantage or disadvantage as placing the tablet into the film holder.

I have a Stouffer 4x5 21 step tablet and the film and the tablet fits my Fidelity Deluxe holders just fine--those are the only holders I have so I can't speak for any other holders.

I understand fully there is a difference of opinion in how the wedge should be exposed. I can only say that I have enjoyed very fine negatives with this testing procedure and I can't honestly say the arguments I have seen (we have seen in other threads) are compelling enough to redo my tests. My negatives I'm producing just do not indicate a need for change.

Thanks for your input though, always appreciated.
 

goodimage

Member
Joined
Oct 18, 2019
Messages
18
Location
Wisconsin
Format
Medium Format
Paul

This should work. To start with, set your spotmeter to the advertised film speed (ISO rating), tape your step wedge to a north-facing window, and measure step 11 (I assume you have a TP 4x5 step wedge). You can get as close as you like and your spotmeter allows you to. This will give you your exposure.

This and the rest is in the book, starting on page 217 with 'Elaborate and Precise' by the way. Step-by-step instructions are on page 221.

Once your ready and still have a question, let me know.
Always good to compare methods, but there are reports about some film holders not able to take film and step tablet (too thick). Also, the OP has one of the following step wedges, and I don't know if they fit into the film holder.

http://www.stouffer.net/TransPage.htm

Anyway, I think it may be more realistic to actually photograph the tablet. This way you get the 'real' workflow with meter and camera flare and the difference between meter and the actual exposure, which is a mixture of image-forming and non-image-forming light.

A further method is to do it all in the darkroom, using the enlarger. After fitting a large-format lens to the enlarger, this works well, but it has the same advantage or disadvantage as placing the tablet into the film holder.
Good morning, Ralph. Happy to find this thread today. The photo that I sent you is how I photograph the step wedge.
 
Joined
Sep 10, 2002
Messages
3,590
Location
Eugene, Oregon
Format
4x5 Format
I'm going to suggest an alternative to using the step wedge. Simpler, faster, and gets you going quickly. You can do all the refining later.

1. Forget doing a film-speed test (you can tweak later). Rate your film at 2/3 stop slower than box speed (e.g., ISO 400 film you would expose at E.I. 250).
2. Make three negatives of the same scene (one with "average" lighting and contrast for what you plan to do).
3. Develop one at the recommended time, one 20% more and one 20% less (this is your development-time test).
4. Make "perfect proofs" of all three negatives. A perfect proof is one where the print exposure is the minimum to get the clear borders of the negative to print maximum black on the paper. This sounds tricky, but isn't really. Here's my method:
---- 4a. If enlarging, put the negative in the negative carrier so that an empty stripe for unhindered light from the enlarger is on one side. If contact printing, then just make sure you have space around the negative for light to hit the paper.
---- 4b. Make test-strip exposures on your favorite paper at a middle contrast setting (e.g., #2 or #2.5 filter or equivalent). I start by exposing the whole strip for 10 seconds and then cover stripes sequentially. Just like a test strip but you're exposing the negative, the clear rebate and an area that the film is not covering.
5. Develop at your standard print development time in your usual developer, stop, fix, wash and dry (drying completely is important).
6. Evaluate your negatives under "normal" viewing light. Too bright and you'll pick an exposure that's too long, too dim and you'll pick one that's too short, so really put some thought into what light you use to evaluate. I like to duplicate what I think is ideal display lighting.
7. Now. pick the first test-strip exposure stripe in which the clear rebate of the film is just as black as the black of the paper not covered by the film when you exposed. Careful here that you don't pick a too-dark stripe; when in doubt, pick the shorter exposure time.
8. Now make proofs of your three negatives at the exposure time(s) you've chosen. This is the minimum exposure to get maximum black. Use the same enlarger and lens settings, of course (height, aperture, etc.).
9. Process as before, wash and dry your prints and go back to your ideal lighting. Evaluate your prints. The one with the best contrast is your "normal" development time. If there isn't one that's ideal, choose an intermediate time (e.g., 10% more/less than recommended).

Now, you've got everything you need to start doing serious work. As you photograph and print, keep notes on subject contrast, exposure etc. Refine your film development time and personal E.I. as needed. If your negatives are consistently too contrasty (i.e., if you have to print with the #1 or #0 filters more than others), then reduce your negative development time, and vice-versa. If you don't get the shadow detail you need, then use a slower film speed. If your shadows are too detailed, then use a faster speed.

That's all. Once the majority of your negatives print well at a middle-contrast setting and you have the shadow detail you need, then that's close enough. There is enough leeway in the system to deal with extremes of contrast.

At this point, if you want to explore tailoring negative development time for scenes of different contrast (brightness range) then you can. Use the same procedure detailed above for N- and N+ development times.

Best,

Doremus
 

Andrew O'Neill

Moderator
Moderator
Joined
Jan 16, 2004
Messages
11,989
Location
Coquitlam,BC Canada
Format
Multi Format
I prefer to contact print the step wedge onto film in the darkroom via my enlarger. I use the Stouffer 31 step wedge and expose 5 sheets of film. For the 21 step wedge, I cut the sheet film in half, vertically. After I have my curves drawn up, EI, and development times are determined, I then go and make a test shot in the field.
 

Bill Burk

Subscriber
Joined
Feb 9, 2010
Messages
9,314
Format
4x5 Format
Paul,

You’re getting good advice so just pick your direction and go.

Fortunately you don’t need to know the circumference of the cylinder and thickness of the mounting tape and plate to calculate shrink. People just don’t talk about that stuff much. I used to run the photopolymer line at a print shop.

If you contact print through the Stouffer Scale onto film, the steps work just like they do for platemaking. If the steps don’t land like you want you change the exposure and try again. Suppose you want Step 20 to come out 0.10 density and it turns out all the steps are over 0.10 you gave it too long an exposure. If Step 18 comes out 0.10 … two steps is a stop. Give twice the exposure next time.
 

eggen

Subscriber
Joined
Nov 15, 2005
Messages
53
Location
Tampere City
Format
Multi Format
Paul

This should work. To start with, set your spotmeter to the advertised film speed (ISO rating), tape your step wedge to a north-facing window, and measure step 11 (I assume you have a TP 4x5 step wedge). You can get as close as you like and your spotmeter allows you to. This will give you your exposure.

This and the rest is in the book, starting on page 217 with 'Elaborate and Precise' by the way. Step-by-step instructions are on page 221.

Once your ready and still have a question, let me know.
Hello Ralph,
on page 218 you wrote: "Film has different sensitivity on different wavelengths of light. Therefore, select a light source with a color temperature representative of your typical subject matter and setup." And you wrote here in APUG "tape your step wedge to a north-facing window, and measure step 11 (I assume you have a TP 4x5 step wedge)." How important is really the right color temperature (5500 K)". How can I know when color temperature is right if I don´t have color temperature meter? When sun shine or there is raining or cloudy day, color temperature varies. Also exposure time should be between 1/500 and 1/2.
The other thing. You wrote on page 218 also: "It can be as simple as placing the step tablet onto a light table, and taking a close-up copy." I suppose the light of the light table should be about 5500 - 6000 K.

About the right exposure. "Assume the box speed to be correct and determine the right exposure with an average reading, or use a spotmeter for the medium grey bars. What this mean? Bar 11 or bars 10-12. Should I take reading with spotmeter for the light table directly (bar/step 11) or ground glass of the camera?

Thank you for an excellent book
Best regards
Esko Hietaranta
 

bernard_L

Member
Joined
Feb 17, 2008
Messages
2,035
Format
Multi Format
7. Now. pick the first test-strip exposure stripe in which the clear rebate of the film is just as black as the black of the paper not covered by the film when you exposed.
Doremus,
While it's nice in principle to have a method that does not require (expensive) equipment, I am not fully convinced. Assume your film has a long, progressive toe. The method that you propose will place the deep shadows (already suffering from being on the shoulder of the paper) in a region of poor separation. A more generous exposure than dictated by the method that you advocate would lead to better separation.
And something that I realized only recently. Even assuming that you don't care about separation between shadows (maybe because that was how your eyes, dazzled by sunlight, perceived the scene) you might care about the separation between the "blacks" and the significant mid-tones. Following the precept spelled out recently by Matt King (maybe by you also), assume your choice of paper grade and exposure are driven by the significant mid-tones: no more degrees of freedom. Then, where are the deep shadows? at paper Dmax, fine; at a muddy black, not so fine; Raise all exposures on the Loge-D curve, and the situation improves.
Curious to hear your comments.
Bernard
 

Bill Burk

Subscriber
Joined
Feb 9, 2010
Messages
9,314
Format
4x5 Format
The light you plan to shoot with is important to consider. A reasonable simulation of daylight easier to control can be electronic flash or tungsten filtered with 80B filter.

For exposure, just hit it with enough light. You are not trying to hit a perfect exposure. You are trying to get light on the film that will develop up to readable densities on most steps, maybe with a couple clear steps at the highest end.
 

M Carter

Member
Joined
Jan 23, 2013
Messages
2,147
Location
Dallas, TX
Format
Medium Format
I try to get a little "real world" with film testing, as I don't have a densitometer and I don't really see the need for one (I know, shoot me you graph-paper guys!)

For starters, some posts here saying "rate your film slower" - I know there's various beliefs about getting shadow up over various curves and so on, but if a film delivers the shadows I want at or near box speed, I'm good, and I'd rather test specifically for that. Rodinal 1+50 consistently requires at least an extra half stop for me, DD-X and box-speed is often fine.

I set up a still life and meter the whole thing, sometimes throw in my nice Mrs. to see skin tones, shoot at box speed and also third or half stop slower increments, take my best guess at processing. I choose the ISO that holds the shadows I want. I do my enlarger tests with unexposed/developed leader to set exposure (for 120 film) or using the edge of 4x5. Find where film base + fog just reaches black with a 2.5 filter. If I'm holding shadow texture 3 stops brighter than my base exposure, my development is good. If I'm showing texture in deep shadows (like dark knit fabrics or dark hair), my ISO is correct for me.

I'm doing a lot with liquid emulsions that are fixed grade, so that requires testing as well, having data to shoot negs specifically for grade 3.5 and so on.

In this test (desktop office scanner so not the best look at the test print), I've got texture even in her dark sweater and in the styrofoam block marked f22. Seems to be all I need. The half-stops in the test chart are handy to suss out if development is off and by how much; they're handy if I want to dial in specific push or pull times - how much development shift does it take to move the highs 1/2 or 1 stop is very clear with those squares.

I know that ain't the most high-tech way to do this, but dang, it works just fine for me! This is Acros, ISO 80, Rodinal 1+50, 8 minutes; it's a little flat as a test print, but everything I need is in the neg for me to choose whatever contrast I want in the final:

6HGPC7l.jpg
 

Sirius Glass

Subscriber
Joined
Jan 18, 2007
Messages
50,369
Location
Southern California
Format
Multi Format
The Mrs. does not appear to be a willing and happy model. May be you should use a timed delay shutter release and be the model to maintain peace and tranquility in the home.
 
Joined
Sep 10, 2002
Messages
3,590
Location
Eugene, Oregon
Format
4x5 Format
Doremus,
While it's nice in principle to have a method that does not require (expensive) equipment, I am not fully convinced. Assume your film has a long, progressive toe. The method that you propose will place the deep shadows (already suffering from being on the shoulder of the paper) in a region of poor separation. A more generous exposure than dictated by the method that you advocate would lead to better separation.
And something that I realized only recently. Even assuming that you don't care about separation between shadows (maybe because that was how your eyes, dazzled by sunlight, perceived the scene) you might care about the separation between the "blacks" and the significant mid-tones. Following the precept spelled out recently by Matt King (maybe by you also), assume your choice of paper grade and exposure are driven by the significant mid-tones: no more degrees of freedom. Then, where are the deep shadows? at paper Dmax, fine; at a muddy black, not so fine; Raise all exposures on the Loge-D curve, and the situation improves.
Curious to hear your comments.
Bernard
Bernard,

Getting separation in the shadow values from a film with a long toe (e.g., 320Tri-X) has nothing to do with how you expose the print. If you want more shadow separation from a long-toe film, you need to give the film more exposure, moving the shadow values up off of the toe and onto the straight-line portion of the film's response curve. Most modern films do fine with a stop or a bit more of overexposure. I overexpose intentionally fairly regularly with 4x5 320Tri-X just for that purpose.

If you give your paper less exposure in order to get more separation in the "shadow values," then you just end up with a print without any real blacks in it. Fine, if that's what you like, but I like a real, tangible, black in most of my prints. Even with short-toe films, if you really want a deep black in the final print, you'll need to expose the negative generously enough so that you can get the detail and tonality in the darkest areas that you want while still having a dark black for the areas of the negative that are close to fb+f density.

Now, when we let mid-tones be our guide to choosing a print contrast setting, that doesn't mean that shadows have to print darker than we'd like. We just need to dodge/burn accordingly to get the result we want. If the shadow separation is there on the film, then you can get it to print at any contrast setting. The trick is getting everything together in one print in the tonal relationships we want. Sometimes it's eminently doable, sometimes we have to make compromises and sacrifice a little mid-tone separation in order to get the shadows and high values where we want them.

Bottom line, you need to expose your shadows so that they print with the tonality and separation you desire while at the same time giving you the deep blacks you want for the darkest areas of the image. Just giving the paper less exposure to get detail in the shadows can result in less-than-black blacks.

Best,

Doremus
 

M Carter

Member
Joined
Jan 23, 2013
Messages
2,147
Location
Dallas, TX
Format
Medium Format
The Mrs. does not appear to be a willing and happy model. May be you should use a timed delay shutter release and be the model to maintain peace and tranquility in the home.
I should probably scan some of the goofy faces she makes when I test - this being 4x5 and 120, it's a little tough to shoot myself!

I'm truly a lucky bastard, she came upstairs when I started building this set, on my hands and knees covered with plaster, said "what the HELL?" and went back downstairs. She's a good one, my Mrs!

interim2-sm.jpg
 
Photrio.com contains affiliate links to products. We may receive a commission for purchases made through these links.
To read our full affiliate disclosure statement please click Here.

PHOTRIO PARTNERS EQUALLY FUNDING OUR COMMUNITY:


Ilford ADOX Freestyle Photographic Stearman Press Weldon Color Lab Blue Moon Camera & Machine
Top Bottom