• Welcome to Photrio!
    Registration is fast and free. Join today to unlock search, see fewer ads, and access all forum features.
    Click here to sign up

Square frame for a square picture?

Forum statistics

Threads
202,623
Messages
2,843,195
Members
101,413
Latest member
USMC46
Recent bookmarks
0

ymc226

Member
Allowing Ads
Joined
Oct 13, 2006
Messages
408
Location
Santa Monica
Format
Medium Format
I've always enlarged by MF negatives (6x6) cropping them to either 8x10 or 11x14 and bought frames accordingly.

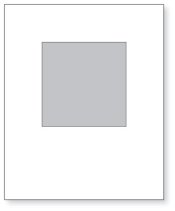
I was thinking of using the whole negative and enlarging to 11x11. Is it aesthetically displeasing to mount a 11x11 photo in a frame meant for 11x14 if you have the correct matting?

If OK, would you mount directly in the middle or asymmetrically with the photo more toward one end?
 
It is a matter of opinion, I think. I don't much like it, but it seems to be commonly done, so some people must like it.

You can usually get square frames at a frame shop, though the selection is more limited than with non-square-rectangular frames.
 
I don't see the problem. Looks great!
 

Attachments

  • MountingSquare.jpg
    MountingSquare.jpg
    5.7 KB · Views: 988
If a square frame looks better, that is what I get. I have my frames made for me; I do not use the off the shelf ones.

Steve
 
It probably does not matter, however, I would think some viewers would wonder why you didn't print the larger rectangular picture. May depend more on the strength of the image itself. Then again, I am not an artsy type and if it were me, I would do what ever I wanted.
 
I agree, the composition would need to work for the square format but I also want variation in the proportions of the photos to add interest in a group of framed pictures on a wall.
 
I do 10.5 inch square prints in 16 x 20 frames all the time.

medium.jpg


But I might add, assuming you cut your own mats, some stores carry frame sections in pairs, available in lengths at one inch increments. You can create a wide range of aspect ratios.

The reveal at the bottom of the double mat is a little wider for a signature.
 
I approach it the other way. For walls with more than one photograph on them, I like using square frames, with photographs of differing sizes (square, rectangular-vertical, rectangular-horizontal) mounted in them. This results in the frames having the same footprint (wallprint?) and, where there is a row or column of them, they look organized, and like they belong together.
 
Generally I mount square prints almost identically to DWThomas, same image & frame size except with no white border around the prints, matting to the edge of the image.

How much I offset from top & bottom (which I think is your question Ralph) depends on how the image is going to be displayed. My exhibition work is a mixture of negative formats 5x4(10x8), 6x6 and 6x17 (all full frame) in the same 20x16 frames so I spent some time doing visual comparisons of image size and in frame positioning with each format, first on the PC like Ralph's drawing, then made actual prints. It works out that the vertical centre of each image size is constant for landscape format, because that seems to work best visually.

More recently I've been selling some square images in square frames, initially because a local store (UK) has some very nice square frames at bargain prices, but they great when finished and hung on a wall.

Ian
 
I prefer the square image set towards the bottom, leaving a larger, white area above, for more "air", no matter what the subject.

To me doing it the opposite way looks weird.
 
As mentioned, ready-made square frames are not very common but whole frame supply companies for do-it-yourself framers like my company have no problem providing square frames or heavily bottom weighted mats such as in the examples above. In general, larger mat borders tend to give the image more of a gallery feel. For a square image 11x11 image, equal 4.5 inch mat borders resulting in a 20x20 inch frame would have nice gallery feel. Off the shelf frame sides are commonly available in 20 inch segments although still need a custom mat.

The heavy bottom weighted mat, where the bottom border is significantly larger than the top and side borders will also offer a nice gallery flare and in fact Nielsen actually makes a couple ready-made frames for 8x10 images in 16x20 frames. You can see pics here, and I have included the mat border dimensions at the bottom of the text on these two pages:

Nielsen Gallery Collection 8x10 (16x20) GF1950E
Nielsen Gallery Collection 8x10 (16x20) GF1950D

Nielsen use to carry an 11x14 frame with 5x5 opening but they discontinued it. Bottom weighted mats are almost never offered in ready-made frames because as you notice with the 8x10 you have to manufacture and stock two different sizes.

If you are going to bottom weight the top and side borders should be equal, or the top border should be within an inch of the side borders. If the frame is 11x14 or smaller I would suggest the top border be less than 1 inch larger than the side borders if not equal.

Cheers,
Mark
 
Last edited by a moderator:
As posted earlier, the best way is to line it by eye. There are no nifty formulae. To only guide line is that more room needs to be below the photograph than above because if above and below are equal, the eye and brain preceive the photograph as being too low and appearing to "slide off the bottom".

Steve

Steve, looking at the link John's just posted that's quite a neat guide that pretty much mirrors what we do visually.

Ian
 
Thanks for the compliments. I was targeting "optical centering" which raises the image a little bit above the centerline, purportedly adding weight to the bottom (so it doesn't get hung upside down!) It can be done graphically, or I have used a handy html program from this guy (he shows the graphical method too). In all honesty, I am beginning to think I might lean toward positioning just a tad lower, some of that may come from whether or not one adjusts the calculated value for the overlap of the frame.

I should add, I have seen images that were almost panoramic horizontals mounted in a rectangular frame held vertical and with the bottom of the image almost on the centerline. There seems to be some occasional benefit in breaking conventional rules to achieve an effect. Somewhere years ago I heard of a competition that specified all work was to be in 16x20 frames too!

I occasionally frame square, but since I don't sell much work, I've lately made 16x20 a sort of standard that works for most of my photos and on the rare occasion, a quarter-sheet watercolor so I can recycle frames.

Edit: Oops! Looks like I got antsy and jumped in without reading to the end, sorry for the redundant info.
 
upper margin = (width of mat + height of mat - 2*(dimension of print) / 4

Sounds complicated, but is is simply the mean between the left/right margin and the value of the upper/lower margin if the picture would be placed vertically in the middle of the mat. Thus the larger lower margin does not get so prominent.

Example:
width of mat ( w) = 40cm
height of mat (h) = 50cm
dimension of print (d) = 29cm
upper margin (u) = (40cm + 50cm - 2*29cm)/4 = 8cm

Or the long way:

left/right margin = (lr) (40cm - 29cm)/2 = 5.5cm
upper/lower margin if picture is placed in the middle (ul) = (50cm - 29cm)/2 = 10.5cm

u = lr + (ul - lr)/2 = 5.5cm + (10.5cm - 5.5cm)/2 = 8cm
lo = ul + (ul -lr)/2 = (10.5cm + 2.5cm) = 13cm

Ulrich
 
Interesting link, I didn't notice. But it can not be the same equation. I'll try it out. May be it will give even more pleasing results.

Ulrich

I think maybe you are assuming a square print? The original effort accepts rectangular images. I note he also has improved it quite a bit since I downloaded a copy for safekeeping a while back. Cotrell's implementation does some warning checks and offers vertical centering or top and sides equal as options too. Plus he now has input for the frame overlap. I had started to hack a copy of the old one to do that, but as usual the project of the moment didn't allow time to play with the tools!

(There is a lot of Javascript in there!)
 
Photrio.com contains affiliate links to products. We may receive a commission for purchases made through these links.
To read our full affiliate disclosure statement please click Here.

PHOTRIO PARTNERS EQUALLY FUNDING OUR COMMUNITY:


Ilford ADOX Freestyle Photographic Stearman Press Weldon Color Lab Blue Moon Camera & Machine
Top Bottom