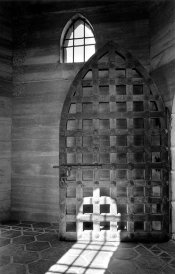
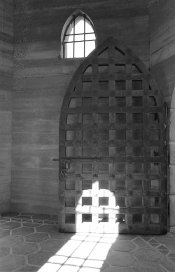
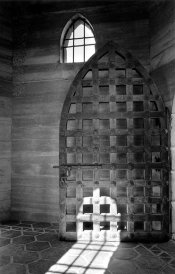
A massive improvement. Can you say how you went about achieving this? This could be a good learning example for all of us with difficult negs. Thanks
pentaxuser
Sure! One thing I make sure to do is keep notes about about times, contrast settings and any burning/dodging I do to a print. That way it's easier to replicate (or modify) if I want to reprint the image later on.
An 11x14 print of this one was approached as follows:
1. Base exposure of 22 sec at f:8, grade 4.5. This transformed the overall image and emphasized the texture of the stone walls and door. I'm using a dichroic enlarger head, so it would probably equal grade 4 with a condenser enlarger.
2. During the base exposure, dodged the center of the upper half of the door for 6 sec.
3. At grade 3, burned in the floor for 10 sec, the upper left corner for 10 sec and the upper right corner for 12 sec. Then burned the left 1/3 of the image (except the floor) for 10 sec.
4. At grade 0, burned the sunlight area on the floor and the door for 60 sec, using a cardboard mask cut to match the shape of this area. It's important not to overdo the exposure, as dark halos will start to appear.
5. Also grade 0, burned-in the window at top for 45 sec using another mask cut to shape. Just to give some density to the window frame and surround, as it was just a clear sky outside with no detail to be seen.
I always keep in mind that the lower grade filters will affect the lighter tones, and the higher grades will affect the darker tones. This one took a bit of time to finally get right, but I'd rather start with a well-exposed "flat" print than with one that's too thin, or has highlights that are completely blown. Next time I print this I'll possibly make some changes, as there's always more than one way to get to a satisfactory print.


