Solarization with Ilford paper and developer?

S/S 2025

A
S/S 2025

  • 0
  • 0
  • 11
Street art

A
Street art

  • 0
  • 0
  • 14
20250427_154237.jpg

D
20250427_154237.jpg

  • 2
  • 0
  • 63
Genbaku Dome

D
Genbaku Dome

  • 7
  • 2
  • 81
City Park Pond

H
City Park Pond

  • 0
  • 1
  • 73

Recent Classifieds

Forum statistics

Threads
197,509
Messages
2,760,136
Members
99,522
Latest member
Xinyang Liu
Recent bookmarks
0

cliveh

Subscriber
Joined
Oct 9, 2010
Messages
7,487
Format
35mm RF
I am not arguing any semantics, hope this helps with your demand.

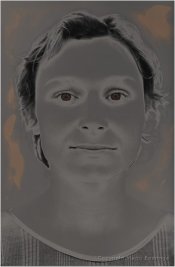
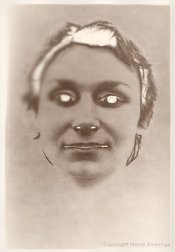
Man Rays solarizations were done primaraly to the film, All black makie lines are a film solarization.. Print solarizations will create a white makie line.
Following is what I think is the way to do this with film or print for that matter


1- Metol only developer , no hydroquinnone
2- flash at mid point
3. I use a point light source on a timer with different stop settings about 4 ft above the developer tray or where I lay the film .
4. for prints I use a grade 4 filter with Ilford Warmtone, a softer filter if I want a moodier effect
5. for negatives I use Ilford FP4 with a slight underexposure and I flash at the mid point.
6. In both cases a contrasy lighting scene is usually better for image capture than flat lighting.
7. When you flash film or print the sequence must be repeatable and it is repeatable, and you must get the film or paper agitated quickly post exposure or you will get flow lines.
8. The source of flash will determine the effect , stronger intensity will make the print almost normal with no effect, less flash will give you more effect
9. Same goes for initial print exposure, more intensity the image will look real,less intensity will give you more effect.
10. The balancing act between filter, exposure, flash strength , duration,, agitation is repeatable with practice, I never deviate with the process time and pull the print early, this will lead to inconsistant results.
11. You can use a second developer tray with tons of potassium bromide which will give you a different grain structure for the solarized area which in turn gives you more colour options when toning.
12. Same developer for film or paper can be used.
13. Did I mention no hydroquinnone????????
14. For prints the perfect flash time is when the print is slightly flat and light by normal standards... judging by what I see in the brief 2 seconds of negative flash the same rule applies.
15. Dodging and burning have the exact opposite result than regular printing.
16. Flat objects or surfaces are more interesting than very complicated scenes.... to many lines achieved.
17. I use lots of chemicals and make sure the paper is floating on top during the flash.
19. I do not agitate the film as strongly as I would with regular film.
20. Good darkroom techniques are critical for solarization.

You need to do some legwork of your own rather than someone else spell it out for you, the above is after 10 years of playing around with this amazing process,,,, read Dr Jolly's paper on Solarization and make a few hundred attemps, and it will all be clear. His notes are exact and after a few thousand attemps in my darkroom, I am amazed at how well written his paper was.
He really nailed it.


Bob

Bob, thanks very much, this is most informative. I also appreciate it needs much practice, but your info helps as a starting point.
 

Marco B

Subscriber
Joined
Jan 13, 2005
Messages
2,713
Location
The Netherla
Format
Multi Format
Is it possible?

...

Can Ilford RC-paper and Ilford MG-developer be used succesfully? (It's what we use at the school now). We have EFKE 25 ISO 4x5" film, so maybe that is a good one to try for film?

Any tip and experiences you have would be great, thanks!

Marius

I only tried paper "solarization" / Sabattier once. Paper used was standard Ilford MGIV FB and I just used plain Ilford Multigrade developer and used a small probably 10W tungsten light source / lamp above the paper developer tray. I don't remember the exposure time, probably a few seconds at the most. As you can see (left image), the image is low contrast and fogged (brown colors is from brush applied sepia toner), but it was just a single darkroom session where I experimented with it. I still kind of like the image though. The right image is a reverse contact printed copy of the left (paper-on-paper), entirely sepia toned.

DN1_144_22_1.jpg DN1_144_22_2.jpg
 

Bob Carnie

Subscriber
Joined
Apr 18, 2004
Messages
7,734
Location
toronto
Format
Med. Format RF
For me the key point was when I read Mr Jolly's paper about this process.. Following his chemical mix to the letter was very important. I use his two developer method for prints and one developer method for film.

Did I mention Metol only , not Hydroquinonne..... probably the most important factor.

Many papers work well, I just gravitated to Ilford Warmtone.

If you are in Toronto in May I will be showing my new work at the Contact Festival, and if you are in Alberta in Feb 2013 , I will be showing this work there as well during their photo festival.
I am concentrating my efforts now on film solarizations and printing them big on Art 300 paper. I have been using an old 8x10 Studio camera as well as 4x5 and really like the simplicity of the quick flash smack dab in the middle of development.
 

cliveh

Subscriber
Joined
Oct 9, 2010
Messages
7,487
Format
35mm RF
Bluejeh, thanks for the book reference and do you know if there is a metol only film developer available to buy, or do I have to make one?
 
OP
OP
masimix

masimix

Member
Joined
Dec 28, 2006
Messages
72
Location
Oslo, Norway
Format
Medium Format
Thanks for all this brilliant information, especially Bob Carnie. I tried to post here earlier, but nothing showed up for some reason (to be looked at by moderators before, it said).

To cliveh: This developer, Solarol, should work.
 

Marco B

Subscriber
Joined
Jan 13, 2005
Messages
2,713
Location
The Netherla
Format
Multi Format

Niall Bell

Member
Joined
May 7, 2005
Messages
12
Location
Aberdeenshir
Format
Medium Format
Masimix,
attached a scan of a somewhat dog-eared print from a Sabattier-ised negative (or solarised - take your pick). 120 format film, shot in dark on flash. About half way through development I switched off the darkroom lights and removed film from tank and took it off the reel. When holding it horizontally in from of me, I got my wife to switch on a shaded table lamp and off again after counting to two seconds.

I then re-loaded the film to the reel, replaced in tank, switched on darkroom lights and finished the development. This prints as normal negative.

It's actually pretty easy, but I'd say that I was probably lucky in not over-exposing with the flash.

I've tried a few times to create sabattier effect by flashing prints when in developer, but with varied success.

I attach an example print (erroneously entitled blue solarisation) which was done using toners and not through exposure to light.

Hope all this helps,
Niall
 

Attachments

  • Sabattier.pdf
    243.7 KB · Views: 193
  • Blue solarisation.pdf
    313 KB · Views: 232

Bob Carnie

Subscriber
Joined
Apr 18, 2004
Messages
7,734
Location
toronto
Format
Med. Format RF
Late 80's I met a dude who really wanted to go back to his Timothy Leary days with his colour work.
This was before photoshop actions ..

At the time I was working in a E6 C41 lab.... what we would do is load up his film on the racks , make sure all other client film was past the critical point and then wait for the lift action to raise the film completely out of the dev about half way and flick on the room lights... this was colour negative film and the effect was pretty cool. Because it was colour negative printing different effects was very easy.

We all have heard of cross process C41 in E6 chemicals.... one of our clients had a formula that had us pushing the development 4 stops which meant he would have a real under exposing situation... The effect was very surreal positive images, many tried to match his look but few were successful.. I believe the severe under expose and severe over dev and picking the right film was the trick.
 

Bob Carnie

Subscriber
Joined
Apr 18, 2004
Messages
7,734
Location
toronto
Format
Med. Format RF
If you are using a regular developer you will have varied success... a Metol based (Soloral) developer is what needed.

Masimix,
attached a scan of a somewhat dog-eared print from a Sabattier-ised negative (or solarised - take your pick). 120 format film, shot in dark on flash. About half way through development I switched off the darkroom lights and removed film from tank and took it off the reel. When holding it horizontally in from of me, I got my wife to switch on a shaded table lamp and off again after counting to two seconds.

I then re-loaded the film to the reel, replaced in tank, switched on darkroom lights and finished the development. This prints as normal negative.

It's actually pretty easy, but I'd say that I was probably lucky in not over-exposing with the flash.

I've tried a few times to create sabattier effect by flashing prints when in developer, but with varied success.

I attach an example print (erroneously entitled blue solarisation) which was done using toners and not through exposure to light.

Hope all this helps,
Niall
 

GDEdwards

Member
Joined
Feb 28, 2012
Messages
1
Location
California
Format
35mm
To Marius,
I'm a new member on this site and I will share my preferred Sabatier print method. I use multigrade photo paper and whatever print developer, like Dektol. I start with a no. 2 1/2 or 3 filter and expose for a regular print and run the usual test strips. Then I raise the enlarger unit up some, take out the negative carrier, set the aperture wide open and put in the no. 5 filter, and put paper towels down all around. Then I throw the exposed paper in the developer for half the normal developing time. Have a tray of clean water ready and wash the print, then squeegee it off really good against a hard surface (do not put it in the stop bath or fixer) Be careful not to scratch it since the emulsion is wet and soft. I make sure I don't leave water drops on the paper because they'll make it look blurry in those areas. Then I run a second set of test strips perpendicular to the first set by blasting it with light from the enlarger already set up. I finish the developing time and fix the print as normal. I pick out the most interesting affects and note the exposure times for each filter. Then repeat the same procedure for each filter and exposure time for the final print (hopefully). -ge
 

cliveh

Subscriber
Joined
Oct 9, 2010
Messages
7,487
Format
35mm RF
Photrio.com contains affiliate links to products. We may receive a commission for purchases made through these links.
To read our full affiliate disclosure statement please click Here.

PHOTRIO PARTNERS EQUALLY FUNDING OUR COMMUNITY:


Ilford ADOX Freestyle Photographic Stearman Press Weldon Color Lab Blue Moon Camera & Machine
Top Bottom