Chris, thanks for the feedback. I'll address your points here and look at making a few modifications to the article. Let me know if I've missed your points.
I'd like to ask how (if its there I missed it) you are able to set base points for the black and white points (where there is only fog and where density maxes out).
I guess I should expand on this. By setting the exposure so that the histogram is moved towards the right you effectively normalize the film base, which should be the brightest portion of the frame. I think the part that I'm missing in the article is that I capture part of the non image area of the film. By including this and being sure not to clip it I lock in the black point (once reversed). The inverted white point will be dependent on the contrast of the negative and will vary from film to film. For this I think the simplest way is to adjust the Tone Curve by starting the upper left hand point farther to the right, which will stretch the negative's limited contrast range over the full image range.
Even if you don't expose to the right you could also set both black and white points with the Tone Curve, but you run the risk of more noise in your highlights.
Did you mention that the demosaic of the RAW file needs to be done in a linear manner or you'll be applying curves by default (as that's what cameras do). I may have missed that too.
My goal with this was really to get fast input for a lot of images. So I haven't experimented with linear demosaicing. My simple solution is to again adjust the Tone Curve with a simple S curve (inverted because I also invert using the Tone Curve). This restores a proper looking contrast curve to the image, and is good enough for proofing and LightRoom display. I think as long as the image is captured correctly in RAW format you could optimize an individual image with other techniques.
I haven't experimented with a linear conversion, but it makes sense that you could get a much more accurate representation of what's on the negative. But you would still need to adjust the final output curve by hand for most artwork, so I'm not sure there's likely to be an effective difference.
Also, the cost of the lenses and bellows for capture and lack of film holders makes this method perhaps unattractive when compared to a scanner. A V700 for instance can allow you to set and scan a whole roll of 35mm on a platern without needing to stand there. Probably the rapidity of shutter release is faster than the scan of a 35mm neg but what about film transport (acquisition transport)?
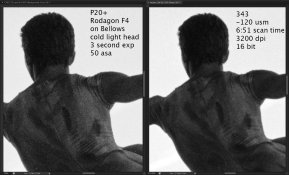
I have an Epson 4870 and I wasn't impressed with the software to batch capture. I found I sent a lot of time tweaking individual images if I set the black and white points wide enough to not clip, and if I set them correctly for one image the were invariably wrong for many others resulting in time needed for rescanning. But finally the 4870 doesn't scan as wide of an area as the 700 series Epsons. So it wouldn't have been as much of a labor savings. For me the cost of buying yet another scanner just to test it out wasn't as compelling as this method.
The lens I used was certainly not cheap, but I also have a Nikon 55 f/3.5 pre AI lens that works fine on the bellows (will damage the D800 if mounted). This worked pretty well, but the grain wasn't as sharp out to the corners. I paid $30 for this lens. So it can be done fairly cheaply. There are knock off bellows on ebay for dirt cheap as well. I bet it's possible t get a working solution for under $100, but I haven't tried. But you then need to rig up film holders as you say.
Also, as you scan progressively larger formats you are not getting the same DPI without stitching. So a capture of a 4x5 neg will of course still be the same number of pixels as a 35mm frame is.
Definitely an issue. I think the D800E would do well in single shot scanning up to a medium format (6x9 would fit the aspect ratio perfectly). Probably not close to the drum scanner, but probably about as good as the Epson lineup when you factor in their real resolution. Either way it would make good 16x24 prints, which is impressive. The hard part would be fabrication of a holder. I made a quick and dirty attempt at this with a negative carrier made from a 4x5 enlarger Speed Carrier (Carlwen, I think). Again 4x5 would work and should still make a decent 16x20 print, but larger would definitely need to better scanner. For me, I would just use the drum scanner, and probably will for anything that I plan on actually printing.


