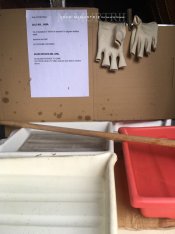
Last night I prepared 3 sheets of paper mixing a 30ml 2g mix of Sodium Chloride + 1g of Geletine and re-used my previously mixed Silver Nitrate and citric acid solution. I made a box with coat hanger wire pushed through it to make shelves to house 3 pieces of paper and left them to dry. Today in the UK it was very cloudy which apparently is great for better contrast than a sunny day. It was also humid which is worth noting. I also ensured the negative's had a slightly better D-Max than my first attempt.

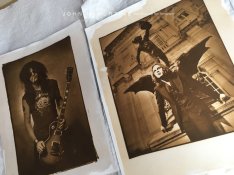
The first print of Slash I used a digital negative made from the original transparency. It is a shot I took a few years ago and knew this would work well in this medium. Print time was 10 minutes and I made sure I loaded the frame in safe light (I know it can be done in low light but a torch with a red filter on in the shed works for me). I also unloaded the frame in dark conditions and kept everything dark until 5 minutes into the fixing.


I also made a print of Ville Valo. Printing negative made from the original transparency.


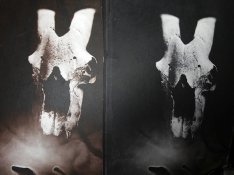
I am really happy with the results. Especially the paper coating which is starting to look consistent. I have one small area that did not receive any salt or silver Nitrate which is odd as I checked thoroughly after each coating. On that same print (above) I have 2 black spots on the right (is this contamination from the previous fixing?). The contrast levels are excellent. Taking the paper out in safe light conditions stopped any fogging and the contrast is good (especially on the Ville print).
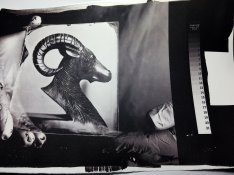
I also printed a view of Polruan on the river Fowey in Cornwall. This time I sensitised my paper all the way to the edge on both coatings. I think I could have given it a slightly longer exposure to burn in the sky. The tonal range is excellent.

All in all a great day Salt Printing. Will be interested to see how they look once fully dry and what discolouration occurs.


The first print of Slash I used a digital negative made from the original transparency. It is a shot I took a few years ago and knew this would work well in this medium. Print time was 10 minutes and I made sure I loaded the frame in safe light (I know it can be done in low light but a torch with a red filter on in the shed works for me). I also unloaded the frame in dark conditions and kept everything dark until 5 minutes into the fixing.
I also made a print of Ville Valo. Printing negative made from the original transparency.
I am really happy with the results. Especially the paper coating which is starting to look consistent. I have one small area that did not receive any salt or silver Nitrate which is odd as I checked thoroughly after each coating. On that same print (above) I have 2 black spots on the right (is this contamination from the previous fixing?). The contrast levels are excellent. Taking the paper out in safe light conditions stopped any fogging and the contrast is good (especially on the Ville print).
I also printed a view of Polruan on the river Fowey in Cornwall. This time I sensitised my paper all the way to the edge on both coatings. I think I could have given it a slightly longer exposure to burn in the sky. The tonal range is excellent.
All in all a great day Salt Printing. Will be interested to see how they look once fully dry and what discolouration occurs.