-
Welcome to Photrio!Registration is fast and free. Join today to unlock search, see fewer ads, and access all forum features.Click here to sign up
You are using an out of date browser. It may not display this or other websites correctly.
You should upgrade or use an alternative browser.
You should upgrade or use an alternative browser.
Rounded, imperfect edges on enlarger
-
A
- Thread starter hiroh
- Start date
Recent Classifieds
-
For Sale Fomapan 200, 100' Bulk Roll - In Date
- Started by chuckroast
-
For Sale Kodak 2465 microfilm
- Started by MCB18
-
Want to Buy Linhof Technika 4x5 240 cam.
- Started by Logical1
-
Free Free Darkroom Stuff
- Started by Reinhold
Forum statistics
This is not achieved on the easel. It's done by filing out the negative carriers to expose the full frame, and then projecting the entire image including these rough edges within the masked paper area.
When you say “filing out the negative carrier,” do you mean using masking materials like paper or cardboard, rather than the blades in the negative carrier? Because I’d assume using the blades in the negative carrier would result in straight but blurry edges.
When you say “filing out the negative carrier,” do you mean using masking materials like paper or cardboard, rather than the blades in the negative carrier? Because I’d assume using the blades in the negative carrier would result in straight but blurry edges.
The actual carrier the negative sits in. So not any additional masking blades that are above the negative stage to block stray light. The actual mask that the negative sits in, that touches the actual film.
I mean actually taking a file to the negative carrier. Mine are not adjustable, no blades. But I would assume filing the blades would create the same effect. The edges are not sharp because the carrier is not in the same plane as the negative. You could get soft edges with some artifacts if you just project the entire negative smaller than your easel opening, but not as dramatic as filing the negative carrier.When you say “filing out the negative carrier,” do you mean using masking materials like paper or cardboard, rather than the blades in the negative carrier? Because I’d assume using the blades in the negative carrier would result in straight but blurry edges.

You could try cardboard. It would be a simple non-destructive experiment.Ah, I see. I use ANR glass in my carriers and use only on the blades implemented in the carrier to mask off the negative. I’ll see if I can get these masks for my carrier.
View attachment 387805
But I would assume filing the blades would create the same effect.
No, it won't, it's not a good idea to file the masking blades, and it will in many cases not even work at all. The masking blades are too far away from the film plane to create a sufficiently sharp border; it'll be a fuzzy zone unless you're working with a point source enlarger. Furthermore, the masking blades don't always move all the way to the center of the light beam area (although this depends on the specific enlarger), in which case filing them will not make a difference to begin with. And, first but foremost: the masking blades are movable. There's no point in filing them - just move them to the desired position. But as said, this won't create the kind of borders OP is looking for.
You could try cardboard. It would be a simple non-destructive experiment.
Cardboard works; I've done that many times. 3D printed plastic (e.g. PLA) masks work, too, and give somewhat cleaner edges, although these can also be shaped at will.
Cardboard works; I've done that many times. 3D printed plastic (e.g. PLA) masks work, too, and give somewhat cleaner edges, although these can also be shaped at will.
If you're going to 3Dp them, use a fuzzy edge setting.
I've done ragged-edge and unsharp masks with solid-core cardboard, scrap mat, thick watercolor paper, etc. both on the negative stage and the paper. You can also create some interesting effects with edge dodges and burns; those are also hard to replicate between prints, so it gives a bit more uniqueness to each.
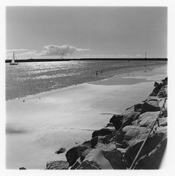
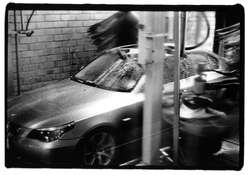
You can see the result here one gets from using the fairly thick and not necessarily blackened glassless negative carriers for the Omega D series enlargers and a diffused light source - an Ilford Multigrade 400 head in this case:

That 35mm carrier was not filed out and was undamaged.
The effect results from a mixture of reflection and diffraction.
That 35mm carrier was not filed out and was undamaged.
The effect results from a mixture of reflection and diffraction.
- Joined
- Feb 9, 2010
- Messages
- 9,464
- Format
- 4x5 Format
If you want “that look” you could get some used Omega or Beseler glassless negative carriers and file them.
The ghosts and fuzzy look comes from the hand work done to widen the openings.
What look do you get if you just open your blades a little?
The ghosts and fuzzy look comes from the hand work done to widen the openings.
What look do you get if you just open your blades a little?
I made several masks for both 35mm and 6x6, but I can only get them sharp at F/16. At F/11, they’re generally sharp but slightly blurry when looking closely. At F/8, which I use for most of my prints, the edges are too blurry for my taste. You wouldn’t notice it from a distance, but I don’t view my 8x10 prints that way, and the blurry edge is distracting.
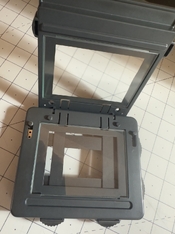
My enlarger has a film carrier where the negative is sandwiched between two glass plates. I place the mask on top of the bottom glass, with the negative resting above it. The mask is very thin, less than 1mm
Has anyone managed to achieve tack-sharp edges, as sharp as the grain in a negative? Is it even possible at F/8?
It probably depends on the distance between the lens and the negative, as well as the focal length. I’ll definitely keep testing various print sizes and lenses, but in order to adopt these edges, it must work consistently.
Has anyone managed to achieve tack-sharp edges, as sharp as the grain in a negative? Is it even possible at F/8?
I don't think so; I also don't think it's possible. Much of the 'naturalness' of the edges comes from the 3D shape of the edge of the mask itself. This means that part of the structure that makes the edge on the paper will always be slightly out of focus.
You can get sharp edges if you only use the natural edge of the negative and then mask sharply with the easel just outside the image frame. But this evidently won't create the natural edge I think you're looking for.
Another idea to try is creating a beveled edge so that only the very tip of the bottom edge masks the negative. But I’ll need a stronger and thicker material to shape it more precisely. Currently, I’m using very thin cardboard.
In addition to the many options listed, Beseler made a 35mm "full-frame" carrier for, at least, their 4x5 enlargers (#8302). The "cut" is 25x37mm. Perhaps other enlargers make similar negative carriers. These can also be 3D printed. In fact that's exactly what BitByBit Photo does --for Beseler, Devere, Durst, Omega, Saunders, etc. I got special, customized submini carriers from them -- no extra charge!
https://www.bitbybitphoto.com/
Other options, as mentioned are masking oversized GLASS or glassless carriers.
https://www.bitbybitphoto.com/
Other options, as mentioned are masking oversized GLASS or glassless carriers.
- Joined
- Nov 29, 2006
- Messages
- 343
- Format
- 4x5 Format
I'm with @koraks on this one; I don't think a sharp/ragged edge is gonna happen with the current methods being employed. A few thoughts:
- As mentioned earlier, the edge effect in question looks to be crafted on the negative carrier itself; I suppose it could also be created in-camera, but that's a ton of work...and both practices are going to create essentially identical borders from one negative to the next.
- If you're getting it sharper at 16 than 8, well, that kind of makes sense so there's nothing out of order with that observation.
- 1mm cardboard is MUCH thicker than film grain, so yeah...it also makes sense that the varying edge thicknesses and shapes are causing blurry areas to show up at various points. Think of it this way: if you scaled up the film grain to the thickness of a millimeter and scaled the cardboard along with it, the cardboard would be about a meter thick at that point, give or take the height of a soda bottle.
- I also agree with @koraks on the point of "part of the structure that makes the edge on the paper will always be slightly out of focus." It's just a thickness game at this point, and there's only so much that the lens can handle until it's stopped down.
- @xkaes makes a solid point about the full-frame carriers; they do have plenty of extra room in them. I use them to shoot uncropped black-border images, and you can create other, similar effects...but going to a full-frame carrier is similar to filing out a standard one, so all of the same rules apply to it.
- You can easily bevel the edges of the cardboard mask, but if that mask is sitting between the glass plates of your carrier along with your negative...what's the point of the glass plates, anymore? If you remove the planar surfaces that are supporting the negative, then it's going to be about as flat as a tomato sandwich with no bread. I can't see how that would lead to the sharpness it seems you're trying to create.
That’s a good idea worth trying—using gaff tape to mask the glass. Will try that!
I'm with @koraks on this one; I don't think a sharp/ragged edge is gonna happen with the current methods being employed. A few thoughts:
All of this being said, trying to resolve a ragged edge that's as sharp as the grain on the film means that the edge itself has to be created with grain-sized resolution...and that means deformations on the order of .0002" to .005", depending on your film stock.
- As mentioned earlier, the edge effect in question looks to be crafted on the negative carrier itself; I suppose it could also be created in-camera, but that's a ton of work...and both practices are going to create essentially identical borders from one negative to the next.
- If you're getting it sharper at 16 than 8, well, that kind of makes sense so there's nothing out of order with that observation.
- 1mm cardboard is MUCH thicker than film grain, so yeah...it also makes sense that the varying edge thicknesses and shapes are causing blurry areas to show up at various points. Think of it this way: if you scaled up the film grain to the thickness of a millimeter and scaled the cardboard along with it, the cardboard would be about a meter thick at that point, give or take the height of a soda bottle.
- I also agree with @koraks on the point of "part of the structure that makes the edge on the paper will always be slightly out of focus." It's just a thickness game at this point, and there's only so much that the lens can handle until it's stopped down.
- @xkaes makes a solid point about the full-frame carriers; they do have plenty of extra room in them. I use them to shoot uncropped black-border images, and you can create other, similar effects...but going to a full-frame carrier is similar to filing out a standard one, so all of the same rules apply to it.
- You can easily bevel the edges of the cardboard mask, but if that mask is sitting between the glass plates of your carrier along with your negative...what's the point of the glass plates, anymore? If you remove the planar surfaces that are supporting the negative, then it's going to be about as flat as a tomato sandwich with no bread. I can't see how that would lead to the sharpness it seems you're trying to create.
Ok maybe I exaggerated by comparing it to film grain. I just want it to be as sharp as the rest of the image when viewed from a normal distance, without noticeable blurry edges. Since I’m achieving that with f/16 and almost with f/11, maybe a thinner material like gaff tape could work at f/8.
About the glass—this cardboard is very thin and weak, and I think it would bend if inserted into the carrier without glass. If less than 1mm makes such a difference in sharpness, who knows how blurry the image would be if it bends in the middle without glass. So far, with glass on both sides and the cardboard in between, the image is tack sharp.
Ok maybe I exaggerated by comparing it to film grain. I just want it to be as sharp as the rest of the image when viewed from a normal distance, without noticeable blurry edges. Since I’m achieving that with f/16 and almost with f/11, maybe a thinner material like gaff tape could work at f/8.
Is there a reason that 16 won't work, then? If you already covered that, I'm sorry for missing it.
About the glass—this cardboard is very thin and weak, and I think it would bend if inserted into the carrier without glass. If less than 1mm makes such a difference in sharpness, who knows how blurry the image would be if it bends in the middle without glass. So far, with glass on both sides and the cardboard in between, the image is tack sharp.
I see differences at less than a millimeter of focusing depth; they're the bane of my existence. Negative pops, tiny focusing errors, coarse focal adjustments on the enlarger...all of them are pretty tiny, but they ruin sharpness for me consistently. But hey, if you're not seeing a problem: don't change anything. If it works, it works.
Is there a reason that 16 won't work, then? If you already covered that, I'm sorry for missing it.
Mostly because of the extended exposure times. Lately, I’ve been doing a lot of lith printing, and the times are quite long. I’m also not sure about defringing at f/16—I’ve never really tested my lenses for that. But f/8 always seems like a sweet spot.
I see differences at less than a millimeter of focusing depth; they're the bane of my existence. Negative pops, tiny focusing errors, coarse focal adjustments on the enlarger...all of them are pretty tiny, but they ruin sharpness for me consistently. But hey, if you're not seeing a problem: don't change anything. If it works, it works.
My current setup is well aligned, from the baseboard to the negative carrier. It’s just the mask border that’s a bit blurry.
Anyway, gaff tape sounds promising. I’ll report the results.
Something to try: make your easel blades the uneven, rounded borders you want by putting cardboard or other material under them, in direct contact with the paper.
| Photrio.com contains affiliate links to products. We may receive a commission for purchases made through these links. To read our full affiliate disclosure statement please click Here. |
PHOTRIO PARTNERS EQUALLY FUNDING OUR COMMUNITY:  |


