Rolleicord V part needed

Brirish Wildflowers

A
Brirish Wildflowers

  • 0
  • 0
  • 15
Classic Biker

A
Classic Biker

  • 1
  • 0
  • 16
Dog Walker

A
Dog Walker

  • 0
  • 0
  • 12
Flannigan's Pass

A
Flannigan's Pass

  • 4
  • 1
  • 57

Forum statistics

Threads
198,984
Messages
2,784,127
Members
99,761
Latest member
Hooper
Recent bookmarks
1

shutterfinger

Member
Joined
Feb 25, 2013
Messages
5,020
Location
San Jose, Ca.
Format
4x5 Format
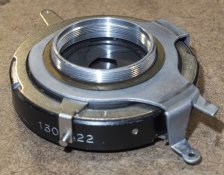
I need Washer item 15 which was missing from the camera I'm repairing.
Rollei part number is 03605.00.0
washer.jpg
Best I can measure its 27.8mm OD, 27.4mm ID, .2mm thick.

I don't have the tools necessary to make one and am not willing to have one machined as its likely out of my budget.
 
Last edited:

Dan Daniel

Subscriber
Joined
Jul 4, 2009
Messages
2,896
Location
upstate New York
Format
Medium Format
Uh, your diameter numbers, 27.8 and 27.4, leave a thickness of .2mm. Very very thin. Where are you getting your numbers from?

Can you take photos of what you have? Having just stripped down a Roleicord V this evening, the part I think you are referencing has very different dimensions than your numbers. Maybe send me a message.
 
OP
OP
shutterfinger

shutterfinger

Member
Joined
Feb 25, 2013
Messages
5,020
Location
San Jose, Ca.
Format
4x5 Format
Having just stripped down a Roleicord V this evening, the part I think you are referencing has very different dimensions than your numbers.
Its the washer that goes between the cocking/release lever and the face plate the shutter mounts to. Without it the cock/release lever, item 13, drags when the shutter and operating lever assembly are secured to the face plate item 17A. Item 13 should float.
Its impossible to photograph something you don't have or measure it. Measurements are of the ring lip at the point where it comes through the operating lever and thickness of the face plate/lens frame.
DSC_3095.jpg
diagram 2.jpg
 
Last edited:

Dan Daniel

Subscriber
Joined
Jul 4, 2009
Messages
2,896
Location
upstate New York
Format
Medium Format
So I think the brass washer shown here is what you want. I see where you got your measurements- you were measuring upper step on the dark flange.

The washer is not as tall as the flange step. That step is what indexes the shutter block on the lens board. So the washer itself is 0.2mm thick, allowing part of the flange to still project and center the shutter on the lens board. And the outer diameter of the washer isn't really very critical- it is, as you know, providing a smooth surface for the shutter cocking/release collar or whatever it is called to rotate smoothly.

The part I have has an inside diameter of ~25.86mm. The outside diameter of the upper step of the dark flange on the shutter body is ~25.77mm. Confirm this. If this looks like it would work, drop me a message and we'll figure out how to get one to you.

Oh, have you contacted Harry Fleenor? Your images are accurate and he'll be able to send you the right part from them, If he sells parts, etc. I don't have a real inventoary of spare parts, so if he can help you that'd be great. If not, contact me.
 

Attachments

  • cord washer 1.jpg
    cord washer 1.jpg
    699.5 KB · Views: 136
  • cord washer 2.jpg
    cord washer 2.jpg
    502.7 KB · Views: 131
OP
OP
shutterfinger

shutterfinger

Member
Joined
Feb 25, 2013
Messages
5,020
Location
San Jose, Ca.
Format
4x5 Format
Turns out I was assembling it wrong, sort of.:sad:
The correct order of assembly on the rear of the lens is MXV lever, plastic retainer, aperture lever, cocking/trip lever, brass washer, lens carrier, retaining ring. The bearing looks like a retaining ring and does not need to be removed from the shutter.
diagram 2.jpg
1. shutter; 2. MXV lever/plastic retainer washer; 3. aperture lever, not visible; 4. cocking lever; 5. bearing; 6. washer; 7. retainer, not shown.
I made 2 spacers from a scrap sheet of film, .007 each, to fit between the bearing and shutter case to get enough clearance between the shutter and lens carrier so the cocking lever would operate without binding.

Now there's a problem with the focusing and the retainer on the focus knob won't loosen. The left side of the camera has been hit and had some superficial damage that i was able to reform to acceptable but the right side moves out first followed by the left side when focusing. Nail polish remover is soaking on the focus knob.
 
Last edited:

Dan Daniel

Subscriber
Joined
Jul 4, 2009
Messages
2,896
Location
upstate New York
Format
Medium Format
Are we having fun yet?

The lens board on the V, Va, and Vb are pretty much the same, I think. I'd be really leery of being able to reform a lens board. So many points need to maintain position!
 
OP
OP
shutterfinger

shutterfinger

Member
Joined
Feb 25, 2013
Messages
5,020
Location
San Jose, Ca.
Format
4x5 Format
How does one remove the focus knob?
Diagram shows it threaded but it refuses to budge. I've soaked it in nail polish remover and tried pliers and a rubber strap but no budge.
DSC_3100.jpg focus knob.jpg
focus knob and diagram.
Do I need a blow torch or hacksaw?
The plate with the filter bayonets was deformed as was the left focus arm, had to add .020 shim between the lens frame and focus arm to get the lens to sit level/even.
cover.jpg DSC_3099.jpg
cover and focus arm with shims (#2 flat washers measured to be the same thickness).
 
Last edited:

Dan Daniel

Subscriber
Joined
Jul 4, 2009
Messages
2,896
Location
upstate New York
Format
Medium Format
I recently had good luck soaking the focus knob outer ring with Tri-flo oil overnight. Another possibility is to soak it in ammonia for a bit- ammonia can break up aluminum oxidation. But I am not certain what ammonia will do to the finish of the part. Jammed parts like that are always a problem. Try putting the camera in the freezer for a few hours, soak it in boiling water maybe? The goal is to break apart the binding parts, so if you use heat let things cool down and contract before any wrenching.

For the mechanics of removal I use a rubber stopper to twist the retaining ring off. If needed I'll put a slip joint pliers around the main body, with a heavy cloth wrap to protect it. In one very difficult case I ended up destroying the pin in the knob that serves as the infinity stop. Turns out that the wire in a push pin is just slightly bigger in diameter than the original (.06mm or so) so I broke away the plastic of the push pin and drove it into place and it worked fine.

It's rare that Rollei makes a misstep but every now and then- the Rolleicord V focus knob is one, the Rolleiflex 2.8C plastic tabs is another misstep.

You can pretty much install the bayonet ring best as possible and then use it as the leverage item to reshape the front.
 
OP
OP
shutterfinger

shutterfinger

Member
Joined
Feb 25, 2013
Messages
5,020
Location
San Jose, Ca.
Format
4x5 Format
I recently had good luck soaking the focus knob outer ring with Tri-flo oil overnight.
Well...... I filled the knob opening with Liquid Wrench Penetrating Oil and let it sit for 2 days. Drained, no budge. Filled with TriFlow for a few days. Drained, flushed with degreaser, but still no budge.
I bought a bag of rubber stoppers off ebay (anyone want some?) but it would not budge. Today I put the large end of a 5 1/2 stopper on the knob, placed a piece of 1/2 x 2 x 3 wood on the stopper, placed my body weight on the wood while standing and holding the knurled portion of the knob with the other hand and it broke loose.
Side-panel-removed.jpg
 

Dan Daniel

Subscriber
Joined
Jul 4, 2009
Messages
2,896
Location
upstate New York
Format
Medium Format
Every now and then, Rollei messed up big time. This design is one of them. The plastic tabs around the shutter release and flash sync on the 2.8C is another mistake.

I bought a used V some time ago that had a free-wheeling focus knob. Turns out the pin that serves as a stop had broken off, most likely when someone tried to open the knob. Fortunately the metal stud on a thumbtack was the right diameter to replace the pin.
 

Dan Daniel

Subscriber
Joined
Jul 4, 2009
Messages
2,896
Location
upstate New York
Format
Medium Format
Delrin. High-density polyethylene. UHMW polyethylene. Go to TAP Plastics. Take the part along so they see how big you need and they might just give you a shaving. Use heat to meld it into the opening.

Acrylic will crack, either from direct pressure or from slow decomposition over time. ABS just doesn't have the desirable wear and pressure qualities. Wood or fiber will compress over time (high density high oil wood might work, but oak ain't it).

Many plastic food storage containers are HDPE- look on the bottom- '2' If you want to sacrifice one you can probably find a section thick enough, usually a rim of some sort. Tic-Tac container top is HDPE. UHMW is the best but probably overkill for this level of pressure and wear.
 
Last edited:

Dan Daniel

Subscriber
Joined
Jul 4, 2009
Messages
2,896
Location
upstate New York
Format
Medium Format
No, I disagree. Acrylic fails 'catastrophically,' meaning that it will crack and fall into pieces. It is simply not made to be under pressure. And getting the arcylic to stay will be difficult and so it will be prone to pop out of place (pressure again). Also no lubricating quality.

If your only choice is acrylic or ABS, use ABS. Or as I suggested, cut a piece of HDPE from a food container.

Of course if you are the only one who will be using the camera, do what you want. But if you plan to sell or pass it on, please don't use acrylic.
 

Dan Daniel

Subscriber
Joined
Jul 4, 2009
Messages
2,896
Location
upstate New York
Format
Medium Format
Alrighty then, you probably should listen to the other suggestions you get from people who have done this a few times before, and who have spent the last couple of decades working with plastics in prototyping and machine work. Best of luck in your various endeavors.
 
OP
OP
shutterfinger

shutterfinger

Member
Joined
Feb 25, 2013
Messages
5,020
Location
San Jose, Ca.
Format
4x5 Format
You can breathe easier as the acrylic with a touch of Pliobond and JB Weld would not stay in place. I cut a piece of ABS and tried to heat mount it but no go so I trimmed an edge to fit snugly and applied a small amount of E6000 https://www.amazon.com/E6000-237032-Craft-Adhesive-Clear/dp/B004BPHQWU . I will cut off the excess tomorrow and check it for hold.

There's an ebay seller listing new old stock parts and said he probably has a new one but has not gotten back to me after 3 weeks.
 
Photrio.com contains affiliate links to products. We may receive a commission for purchases made through these links.
To read our full affiliate disclosure statement please click Here.

PHOTRIO PARTNERS EQUALLY FUNDING OUR COMMUNITY:


Ilford ADOX Freestyle Photographic Stearman Press Weldon Color Lab Blue Moon Camera & Machine
Top Bottom