Frankly, I don't see how you could ever prevent some sort of marks, density variation etc. by taking this approach. In fact, I think you got about as far as humanly possible the way you're doing it.
For further improvement, I would suggest looking at paper sizing mostly to manage the absorbance and adherence of the silver chloride to the surface. Trying different papers will help as well.
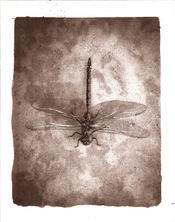
Very nice print BTW! Is that a salt print? It looks like a different kind of sensitizer; Van Dyke Brown perhaps?
Btw, contrary to
@Vaughn, I do always do passes in opposite directions with the rod. Using a small excess of sensitizer helps to create a puddle that can be pushed back in the opposite direction after the first pass, filling in any gaps that might have occurred. This is the balancing act, as well: you either run a little lean on the sensitizer/silver nitrate and you run the risk of coating gaps. Or you use a little excess, but then you have a puddle to clean up and the point where that puddle collects after your last pass generally shows up in one way or another on the print. I tend to keep the start and end positions of the rod outside the image area to deal with this. Not an option if you want to coat everything within the image area, of course...
And you get no staining? If you don't, how can you tell if you don't print with masked borders? Just curious; I never managed to make a salt print that did not fog without adding some citric acid to the sensitizer. It doesn't necessarily show unless I mask the borders. It's the only way I know of to ensure I've got the process right.