My primary interest is for a fill flash to soften shadows, give shadow detail. Good examples being Blansky's selfie and Ken's shot of the B17 motors.
Can't speak to blanksky's image, but here's the very simple fill procedure I use outdoors with my antique all-manual cameras...
(1) Frame the subject composition.
(2) Determine the distance to any significant shadows near the main subject.
(3) Use the flash Guide Number to set the aperture for a full flash exposure at the measured distance.
(4) Close the aperture down 1-2 stops from full exposure. This gives minus 1-2 stops fill to the shadows.
(5) Adjust the shutter speed against the above now-fixed fill aperture to give a full ambient light exposure.
Then just make the picture. The basic details...
* Works best with leaf shutters since they sync at all speeds.
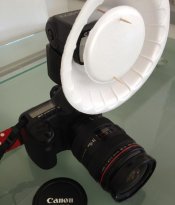
* Mount flash on camera to fill in the shadows that the camera sees.
* Use full manual mode for each fill. Have extra batteries if needed.
* Determine subject distance from the focus scale, or see below.
* No red eye from axis fill since it's usually bright ambient conditions.
* Use -1 stop for bright fill, -2 stops for dim fill, or something in between.
* Parameters not super critical for b&w, but more so for transparencies.
My own personal cheat sheet tricks...
* Wherever possible I use a small handheld carpenter's laser rangefinder for determining shadow distances. Originally purchased for something else, it now stays in my camera bag. Focus rings can be hard to interpolate when accuracy is needed for transparency film. And while I love everything else about my Mamiya C330S TLR, the design and accuracy of the subject distance scale (that rod thingy) is abysmal. Most fill subjects are within 25 feet or less of the flash. So much easier to just pull out the small laser from a sweatshirt, point it at the shadows, then click on, read, and click off. Done in five seconds. Accurate to one-sixteenth of an inch when all I need is full feet.
* Find or rent a flash meter and test your flash's true output. I've never owned an on camera portable flash unit that was anywhere near its manufacturer's rating. They are all one or more stops less powerful. Especially if they are older and their 30+ year old capacitors have aged. Figure out what guide number yours really produces before using that number to calculate distances and apertures.
* And to make it easier to match those distances and apertures, I make a small paper table that replaces the also hard to interpolate flash unit sliders and rings and whatnot. Years ago when I started using flash bulbs that don't come with handy distance sliders and rings, I wrote a small old-school command line software utility to help me do this, since hand calculating full tables is a pain in the butt. I first print, then tape these tables to the back of my Crown Graphic, or keep folded ones in my shirt pocket for reference. Then I just quickly laser the distance, read and set the aperture from the table, and expose.
Here's a sample table I just created. Green is for nostalgia. It's for my own Vivitar 285HV with a flash meter tested GN of 92 (not the manufacturer's 120, mine is about 4/5-stop less), EI 400 film, and a selectable aperture resolution of one-third stops. The five distance columns are in feet. They represent, in order left-to-right, the 285's TELE, NORM, and WIDE zoom modes, in addition to the NORM mode when using a StoFen diffuser cap in both horizontal and vertical flash head orientations. This whole table fits conveniently in a shirt pocket.

Ken


 There are currently 3 folders on the desktop for just such purposes.