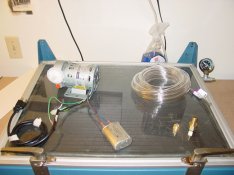
Yesterday I acquired a vacuum frame and pump from Jeremy Moore.
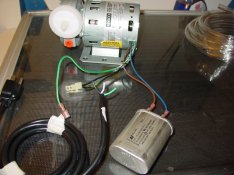
I believe I have everything thats needed. Went to Home Depot early this morning and got all the various items Id need to finish it up and getting it running. The home depot employee in the elec dept was convinced I was going to blow my hand off from the convertor or whatever is connected to the pump with the red and blue wires (see image below).
Does anyone have experience with this? He mentioned I should blanket it in rubber and also box it out so that it will be protected. Ill splice together the power cord and the white/black and green ground wires soon.
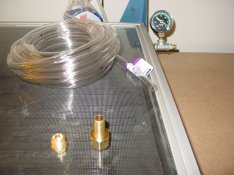
Also, is the tubing adequate or do I need the metal braided tubing because of the vacuum pressure?
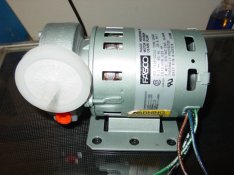
Don Bryant sent over some images to Jeremy that he forwarded to me where the convertor is just lodged into the wood next to the pump. but given what the home depot electrical gent told me Im wondering if Im setting myself up to get my fillings shocked out.
Thanks in advance, Ive posted a bunch of digishots of the setup I have at present.
I believe I have everything thats needed. Went to Home Depot early this morning and got all the various items Id need to finish it up and getting it running. The home depot employee in the elec dept was convinced I was going to blow my hand off from the convertor or whatever is connected to the pump with the red and blue wires (see image below).
Does anyone have experience with this? He mentioned I should blanket it in rubber and also box it out so that it will be protected. Ill splice together the power cord and the white/black and green ground wires soon.
Also, is the tubing adequate or do I need the metal braided tubing because of the vacuum pressure?
Don Bryant sent over some images to Jeremy that he forwarded to me where the convertor is just lodged into the wood next to the pump. but given what the home depot electrical gent told me Im wondering if Im setting myself up to get my fillings shocked out.
Thanks in advance, Ive posted a bunch of digishots of the setup I have at present.