• Welcome to Photrio!
    Registration is fast and free. Join today to unlock search, see fewer ads, and access all forum features.
    Click here to sign up

printing black borders

Watering time

A
Watering time

  • 0
  • 0
  • 19
Cigar again

H
Cigar again

  • 1
  • 0
  • 40

Recent Classifieds

Forum statistics

Threads
203,174
Messages
2,850,861
Members
101,709
Latest member
blausitchko
Recent bookmarks
0

meltronic

Member
Allowing Ads
Joined
Dec 22, 2005
Messages
118
Location
Austin, Texa
Format
Medium Format
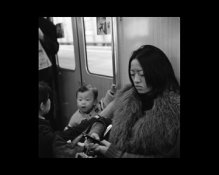
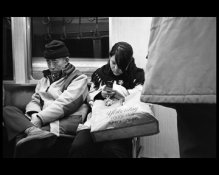
I need to print about 60 images for an exhibition, and rather than matting in black I want to print the whole paper area black, aside from the photo in the center. I've attached a couple of jpegs below to illustrate what I'm looking for. Most of the images will be square, but a few are wide.

I'm not looking for black lines, but black paper background.

Any ideas for the easiest way to achieve this effect in the darkroom?

Thanks!
 

Attachments

  • square1.jpg
    square1.jpg
    28.4 KB · Views: 279
  • long1.jpg
    long1.jpg
    37.5 KB · Views: 284
I've never done this before...so Im taking a stab in the dark here....But what if you were to cut out a piece of material that would be your image size, overlayed it onto your photo paper, and preflashed the paper until you achieve dmax for your border - then removed the cardboard, and made your photo exposure ? This would give you sharp lines inconsequentially of your border around your negative carrier, etc.
Beyond that, you could file your negative carrier, but I don't think the lines would be as sharp, and cropping, etc would be an issue.

Maybe ?
 
Thanks, Steve. I'm sure that's what I'll end up doing (flashing around a cardboard mask). I'm just worried about alignment and how much time this might take for 60 prints. I need the top and bottom borders to be the same width on each print, as they'll butt against each other in the installation, creating a continuous strip around the room. I wonder if there's a fast way to get things centered and straight.
 
Use a borderless type easel and a mask. Push the mask to the upper left to expose the lower margin and right side, then push the mask to the lower right to expose the upper and left margin. It helps to have a very flat mask, or a weight to keep it in contact with the paper. Because the mask will be alined with the edge of the paper, the borders will be even.
 
A quick alternative -

Print your image on a normal easel. Place a mask cut to just smaller than the image size on the paper and use weights or magnets at the corners to keep it flat and aligned (as if you were going to do a pinline border). Lift the easel frame. Flash.

The mask being smaller than the image prevents you ending up with any white paper showing between the image and the black border. The approach saves you an exposure, but you may lose time aligning the mask.

Best of luck with whatever approach you use.

Frank
 
I used to do this in a different way.
Had a larger piece of black cardboard than the image itself, then after exposing the picture I just exposed one side at a time.
That allowed me to make not only rectangle masks but also "odd" sides which looked cool.
 
I tried this a few months ago. I cut out some ~ 1/8" aluminum sheet on the shear at work and placed it on my prints and flashed after exposing the print. I was unhappy with the results because the edge, despite being straight was not as crisp as i had wanted. Perhaps if I flashed longer or had thinner sheets it wouldhave been better. I even tried using a LED flashlight to burn in the black border.

I was hoping to get a black border between the white border from my easel and the exposed image. I eventually gave up though i see no reason that I couldn't have gotten it to work.
 
rmann's idea sounds good and so does FranksB's espeically the idea of a mask smaller than the image. whatever route you go some other tips that may help: use a red filter (either under the lens or in the filter stage) turn the enlarger on so you can see the image area and align your mask with greater precision. Also, you may consider using rubylith as a masking material cut with an accurate paper cutter for a straight-edged mask.
 
g'day Mel
i do this all the time
just keep it simple & cheap & versatile
thin black card/cardboard
straight edge + snap knife
or rotary trimmer
card masks light = white
no card = black
print thru card with cut out over paper = white border
expose then black card over image area, remove neg, expose for same time = black border
 
Thanks for the great ideas everyone. This kind of forum represents one of the best uses of internet technology.
 
I would try using 4-8 ply mat board, maybe stained black at least on the borders. I would cut a window (just like for mounting) with a beveled edge. I would make the dimensions of the inner cutout just a tad smaller than your print size to use as the mask. I would tape a small piece of scrap board to the top of the mask so that it is easy to lift. Then I would expose the print in my 4-blade easel, then place the mask on top of the paper, then open the blades of the easel, then open the lens for a brighter light, dial in maximum magenta for maximum black, and expose the black border. Should give a clean line around the print. Obviously, this would work best when printing numerous prints of the same size.
 
I have done this by printing using a 120 neg in a glass 5x4 neg holder. You then have the entire sheet of paper covered.
 
Photrio.com contains affiliate links to products. We may receive a commission for purchases made through these links.
To read our full affiliate disclosure statement please click Here.

PHOTRIO PARTNERS EQUALLY FUNDING OUR COMMUNITY:


Ilford ADOX Freestyle Photographic Stearman Press Weldon Color Lab Blue Moon Camera & Machine
Top Bottom