

Hello, I know this is a long shot, but maybe someone will know it or have a disassembled MX at hand and could check it.
I bought a semi-broken Pentax MX with an intention to put it back to life.
I was following the Pentax MX Service Manual (Product No. 23800) for the procedure. I even took the time to make the Pentax MX manual figures searchable. Already during the disassembly I have noticed that there are some disagreements between the manual and the reality, but I was able to take it apart anyway. I think there are two problems with the manual - one is that Pentax have apparently did some changes during the production (it seems I have one of the later units based on a differences in the electronics that no longer has four variable resistors for calibration). The other one is that the manual is not even listing some of the parts visible in the exploded diagram separately and vice versa.
However, at the late stages of the disassembly procedure a small washer fell out and I'm completely lost where it belongs. Given it was at the later stages, I guess it might have been used in something after the step 40 of the manual or so. Likely in later steps, but I don't want to rule out the possibility that I removed a piece that held the washer earlier and it just took while before it actually fell out.
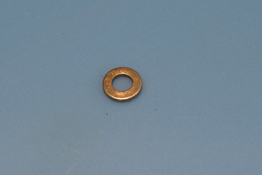
I know there's a ton of washers in this camera, but there is one thing that sets it apart - it's the thickest (0.4mm thick) of the small brass washers (diameter 3.5mm) I've encountered - in fact it's visibly thicker than other small washers.
I spent hours (actually it's probably days by now) examining the manual, the camera itself and every image of a disassembled MX I found and I still have no idea where it belongs. The problem with the manual is that it's not one of the listed 0.4 mm nor 0.3 mm washers, because they are either in the camera, or the washer cannot fit because it has too small inner diameter. I though I might be able to match it by inner diameter, but the problem is that it fits 90% of the screws in the camera.
Attached is the picture of the washer, although it doesn't look like anything special. Only it's thickness makes it distinguishable.
Any help in finding where this washer belongs is appreciated.
I bought a semi-broken Pentax MX with an intention to put it back to life.
I was following the Pentax MX Service Manual (Product No. 23800) for the procedure. I even took the time to make the Pentax MX manual figures searchable. Already during the disassembly I have noticed that there are some disagreements between the manual and the reality, but I was able to take it apart anyway. I think there are two problems with the manual - one is that Pentax have apparently did some changes during the production (it seems I have one of the later units based on a differences in the electronics that no longer has four variable resistors for calibration). The other one is that the manual is not even listing some of the parts visible in the exploded diagram separately and vice versa.
However, at the late stages of the disassembly procedure a small washer fell out and I'm completely lost where it belongs. Given it was at the later stages, I guess it might have been used in something after the step 40 of the manual or so. Likely in later steps, but I don't want to rule out the possibility that I removed a piece that held the washer earlier and it just took while before it actually fell out.
I know there's a ton of washers in this camera, but there is one thing that sets it apart - it's the thickest (0.4mm thick) of the small brass washers (diameter 3.5mm) I've encountered - in fact it's visibly thicker than other small washers.
I spent hours (actually it's probably days by now) examining the manual, the camera itself and every image of a disassembled MX I found and I still have no idea where it belongs. The problem with the manual is that it's not one of the listed 0.4 mm nor 0.3 mm washers, because they are either in the camera, or the washer cannot fit because it has too small inner diameter. I though I might be able to match it by inner diameter, but the problem is that it fits 90% of the screws in the camera.
Attached is the picture of the washer, although it doesn't look like anything special. Only it's thickness makes it distinguishable.
Any help in finding where this washer belongs is appreciated.
 . Fortunately I did the mirror box and the front and top panels separately. Other than that, the winding seat assembly, slow governor assembly and the self timer assembly are the only things I didn't disassemble to the last part. I mean I removed, cleaned and lubricated them, but I didn't take them apart, because it seemed more like a watchmaker's job.