I searched the threads back to about 2008 and found bits and pieces of good info scattered about, but nothing all in one thread. @jimgalli has a pretty good Packard thread. Based upon my searching and my own current problem, here is another thread.
The camera: KB Canham 8x10 wood/metal field old style (158mm square lens boards)
the lens: 24" Goerz LD Artar
Shutter: Packard #6
Intended mount: behind the lens (inside the front standard).
Here is a video showing what I am trying to accomplish.
Packard-Ideal has been in business for a long time and is still in business. if one were flush with funds, a custom shutter could be ordered with the exact shutter diameter and overall size to suit almost anything. For this thread (and many scattered throughout the forums), we are dealing with used shutters in sizes that can be made to work.
While my Canham takes 158mm (6.22 inches) lens boards, the interior opening of the lens stage frame is a bit shy of 5" (127mm) that's an immediate loss of useable space.
In my usual fashion, I'm starting on a somewhat technical thread with zero pictures. I will try and rectify that soon.
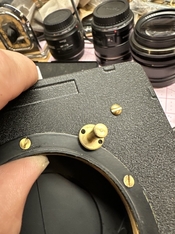
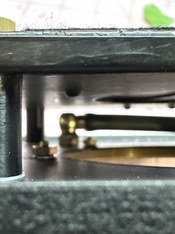
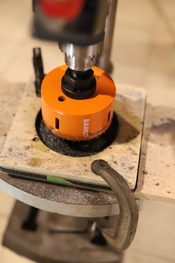
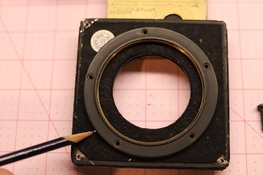
I have a shutter that fits. My issue while trying to assemble the whole mess is the Goerz retaining ring in relation to the overall size of the shutter and its opening. It looks like I will have to drill a hole in the retaining ring for the #6 pin which also leads to the #6 pin mount flange having to be mounted to the retaining ring. This seems far from ideal, but maybe it's less an issue than I am thinking?
My only other concern is for the lens mounting itself and I think I expressed this concern somewhere else within Photrio and cannot remember the consensus. The Toyo Lens boards that fit my Canham are 3mm thick where the lens mounts. I do not plan on trying to drill and tap threads into 3mm material, instead I will simply bolt the retaining ring to the Toyo board. I'm welcome to any thoughts regarding the pro/cons of this plan.
The camera: KB Canham 8x10 wood/metal field old style (158mm square lens boards)
the lens: 24" Goerz LD Artar
Shutter: Packard #6
Intended mount: behind the lens (inside the front standard).
Here is a video showing what I am trying to accomplish.
Packard-Ideal has been in business for a long time and is still in business. if one were flush with funds, a custom shutter could be ordered with the exact shutter diameter and overall size to suit almost anything. For this thread (and many scattered throughout the forums), we are dealing with used shutters in sizes that can be made to work.
While my Canham takes 158mm (6.22 inches) lens boards, the interior opening of the lens stage frame is a bit shy of 5" (127mm) that's an immediate loss of useable space.
In my usual fashion, I'm starting on a somewhat technical thread with zero pictures. I will try and rectify that soon.
I have a shutter that fits. My issue while trying to assemble the whole mess is the Goerz retaining ring in relation to the overall size of the shutter and its opening. It looks like I will have to drill a hole in the retaining ring for the #6 pin which also leads to the #6 pin mount flange having to be mounted to the retaining ring. This seems far from ideal, but maybe it's less an issue than I am thinking?
My only other concern is for the lens mounting itself and I think I expressed this concern somewhere else within Photrio and cannot remember the consensus. The Toyo Lens boards that fit my Canham are 3mm thick where the lens mounts. I do not plan on trying to drill and tap threads into 3mm material, instead I will simply bolt the retaining ring to the Toyo board. I'm welcome to any thoughts regarding the pro/cons of this plan.