OH NO.... scratched negs help?

Recent Classifieds

Forum statistics

Threads
199,132
Messages
2,786,744
Members
99,819
Latest member
EchoesOfThePast
Recent bookmarks
0
OP
OP

angrykitty

Member
Joined
May 24, 2010
Messages
80
Format
35mm
ok so bout this whole wet mount thing

What is this nose oil you guys keep talking about... I googled it and ummmm... really?!

I would like to attempt the whole wet film thing on this cheap little scanner of mine and see if that helps... but I have no idea how to do a wet mounted scan, or a nose oil scan, lol. If not I can always send them out.

Doesn't a wet mount require glass? I'm not sure if it's possible on this scanner. you just slide the film across a little light square, snap down a plastic frame and scan each shot one at a time. There's no glass or tray, its just film straight over an empty hole with light behind it, and a little light thingy comes out and scans over the top.

Can I just wet my negs with something (and if so with what?) and then scan them?
 
Last edited by a moderator:

Worker 11811

Member
Joined
Jan 18, 2010
Messages
1,719
Location
Pennsylvania
Format
Multi Format
BTW: This History Brush trick isn't mine. I learned it from reading "Photoshop for Photographers" by Martin Evening.

You can see a description of the History Brush tool on-line: http://www.adobepress.com/articles/article.asp?p=685045

The trick is to use the "blending mode."
If the blending mode is set to "Normal," the history brush paints from the buffered state of the image into the current state on a pixel-for-pixel basis. Whatever was in memory goes into your picture. However, changing to "Darken" or "Lighten" tells the computer to determine which pixels in the buffered state are darker or lighter than the existing pixels and paint ONLY those pixels.

If you set the blending mode to "Darken," the computer figures out which pixels in your picture are lighter than the remembered state and only paints pixels that will darken the current image. Thus, you can cover the white marks and ONLY the white marks with the history brush set to "Darken." Of course, you can switch to "Lighten" mode and this will allow you to cover up black spots.

When you do this trick, some of the "disturbed" pixels might be visible after you paint out out the marks. Use the "Healing Brush" tool to blend the pattern back into the image. Just work carefully and you can probably do a good enough job that nobody will be able to tell unless they squint. Work really carefully and maybe blow the image up to 500% or more and you might be able to make a truly invisible repair job.

If a dumbass like me can do it, anybody can! :wink:
 

tkamiya

Member
Joined
Oct 3, 2009
Messages
4,284
Location
Central Flor
Format
Multi Format
Wow... the what tool? Sounds like an actual darkroom lol. Wish I had a color one right about now...

It looks good scratch wise but damn it, its just not the same...i want the smooth creamy silken texture the original film had... :wink:


Well.... most places no longer print with all optical method these days anyway. I noticed the posted image was maybe scanned by a consumer flatbed scanner. Starting with better scan, you still may be able to do quite good.

I wish you luck.
 

tkamiya

Member
Joined
Oct 3, 2009
Messages
4,284
Location
Central Flor
Format
Multi Format
... and I really meant "darkroom grain visualization and recording tool, easel, Dektol, Xtol...."
 

anikin

Member
Joined
Nov 16, 2009
Messages
935
Location
Capital of O
Format
Multi Format
no ICE :-( I have a primefilm 3600u

This is actually good news. It probably means that most of the scratches are just fine surface ones and will likely disappear when using ICE, wet mounting or printing under enlarger. It sounds like a good reason for you to try RA-4 printing :tongue:.

One thing: please don't try wet mounting with your scanner if it was not designed for it. You may damage it. The best way is to take it to a lab that knows how to do it and has the right equipment. It will not be cheap, but well worth it for the very best shots. And looking at your example, you have a few of those.

Yes, nose grease is exactly what you found on google :smile: It's an old printer's trick. It works really well under enlarger. However, when I tried it with a scanner, I was disappointed - scanner picks up the smudge and photo actually looks worse. IMO, not worth the trouble.
 
OP
OP

angrykitty

Member
Joined
May 24, 2010
Messages
80
Format
35mm
Thank you so much for all the advice!

So because I simply don't have access to wetmount scanning at the moment I went ahead with the photoshop, so at least I'll have something clean to present in the meantime.

And I did it! Also taught myself quite a bit of photoshop in the process :whistling:

I thought I'd share my process in case anyone else here ends up with the same problem.

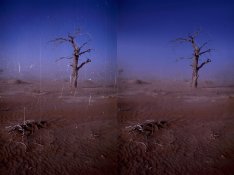
1) worker 11811 I can't thank you enough! Your history brush with the noise and dust filter worked magic on the initial scatches. I also used healing brush in content-aware mode for spots where it didn't quite fit in, which also worked out quite nicely.

2) after getting all the bright white scratches out, I ended up with a lot of blotchiness, particularly in the sky. So I used this tutorial: http://www.phong.com/tutorials/mask.tree/ to remove my tree and ground from the sky.

3) I put my sky on it's own layer to make the new background. With just the blotchy sky, I took the mixer brush, and set it to wet. I set it to a gigantic diamater (about a quarter of the sky) and went across the top in one sweeping horizontal stripe. Then I went down and did another horizontal stripe below it, continuing until the sky nice and even.

4) I then placed my tree/ground back over the new sky. It took quite a few tries to get a nice clean cut tree... that tutorial is pretty tough when you have as little photoshop experience as me!

5) I used a small blur tool to soften the final tree outline, to make it blend more smoothly with the new sky.

6) I used worker11811's history brush, as well as the healing brush in content aware mode on the final spots on the ground.

7) I used unsharp mask (or sometimes the 'sharpen' or 'sharpen more' filter) to clean up any remaining blurry spots image.

I also discovered that noise ninja is a really great noise removal plugin.

*note that I was lucky not to have clouds in the sky! If you do, I imagine you'd have to do the same thing with them as with the tree.

I'd say I'm satisfied with the final result, and glad I learned a little photoshop as well! I'll be doing wet mount scans and potentially giving the original negs a run on an enlarger when I get a chance, but for now at least I've got something to show for them. Thank you guys for all your suggestions! :laugh:Dead Link Removed[/ATTACH]
 

Attachments

  • Untitled-1.jpg
    Untitled-1.jpg
    762.2 KB · Views: 111
Last edited by a moderator:

hitcher

Member
Joined
Jan 6, 2004
Messages
83
Location
Michigan
Format
35mm
Many years ago, someone made a liquid that could be wiped onto the negative that would sort of heal over scratches. I do not know if it is still available or not. However, Fluid scannin does much the same thing with that fluid one uses for that process. Try fluid scanning.


Edwal No Scratch, I have seen that save the day many a time on some major scratches when forehead grease just wouldn't cut it. Also there was a process that was used on larger scale in a wholesale lab I worked at that was like a more permanent coating, but I don't remember where they would send it for that process.
 
OP
OP

angrykitty

Member
Joined
May 24, 2010
Messages
80
Format
35mm
Edwal No Scratch, I have seen that save the day many a time on some major scratches when forehead grease just wouldn't cut it. Also there was a process that was used on larger scale in a wholesale lab I worked at that was like a more permanent coating, but I don't remember where they would send it for that process.

hmmm will keep that in mind for actual prints... thanks!
 

cs_foto

Member
Joined
Dec 1, 2009
Messages
34
Format
Medium Format
Can I ask, is the neg underexposed? I have seen these kind of exaggerated dust and scratch effect appearing when scanning very underexposed film: by trying to bring detail and contrast to a normal level, scratches and dust is accentuated!

also I can see it in the tonal gradation in the sky (uneven light to dark blue)

Cheers
 

Athiril

Subscriber
Joined
Feb 6, 2009
Messages
3,062
Location
Tokyo
Format
Medium Format
There shouldn't be scratches to begin with... dust I can understand.. and can be remedied prior to scanning or printing.

It's a shame since it's such a great photo.. great you were able to restore it though albeit a non-archival digital copy (flatbed scans hold little detail from the original).
 
OP
OP

angrykitty

Member
Joined
May 24, 2010
Messages
80
Format
35mm
Can I ask, is the neg underexposed? I have seen these kind of exaggerated dust and scratch effect appearing when scanning very underexposed film: by trying to bring detail and contrast to a normal level, scratches and dust is accentuated!

also I can see it in the tonal gradation in the sky (uneven light to dark blue)

Cheers

The neg is exposed perfectly... the problem is the film scanner. It's a primefilm 3600u, which is very outdated and has a tendency to overexpose anything you put in it. I have to compensate for this by manually changing the exposure callibration... as well as color levels and contrast... but even on auto scan the scratches are just as prevalant. The scanner has no ICE, so it will always enhance scratches... which then throw off it's exposure levels due to all the bright white. The rolls that have no scratches come out fine, however the scanner simply can't handle this kind of damage :pouty:
 
OP
OP

angrykitty

Member
Joined
May 24, 2010
Messages
80
Format
35mm
There shouldn't be scratches to begin with... dust I can understand.. and can be remedied prior to scanning or printing.

It's a shame since it's such a great photo.. great you were able to restore it though albeit a non-archival digital copy (flatbed scans hold little detail from the original).

lol it's actually a film scanner, just a poopy one... but thanks for the compliment! :tongue:
 
Photrio.com contains affiliate links to products. We may receive a commission for purchases made through these links.
To read our full affiliate disclosure statement please click Here.

PHOTRIO PARTNERS EQUALLY FUNDING OUR COMMUNITY:


Ilford ADOX Freestyle Photographic Stearman Press Weldon Color Lab Blue Moon Camera & Machine
Top Bottom