Resource icon

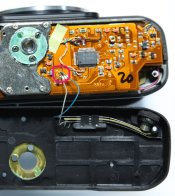
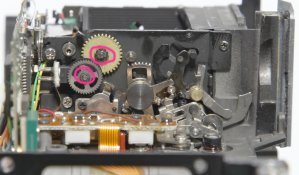
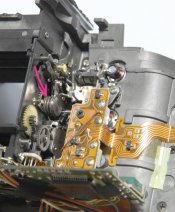
Nikon F4 aperture lever repair

Flowering Chives

H
Flowering Chives

  • 2
  • 0
  • 47
Hiroshima Tower

D
Hiroshima Tower

  • 3
  • 0
  • 41
IMG_7114w.jpg

D
IMG_7114w.jpg

  • 2
  • 0
  • 75
Cycling with wife #1

D
Cycling with wife #1

  • 0
  • 0
  • 69
Papilio glaucus

D
Papilio glaucus

  • 2
  • 0
  • 59

Recent Classifieds

Forum statistics

Threads
198,198
Messages
2,770,935
Members
99,574
Latest member
Model71
Recent bookmarks
0

F4user

Member
Joined
Jun 2, 2014
Messages
80
Format
35mm
F4user submitted a new resource:

(there was a url link here which no longer exists) - Nikon F4 aperture lever repair

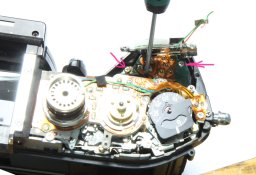
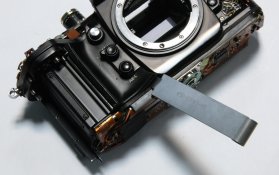
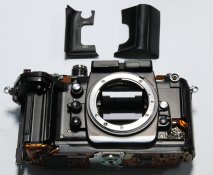
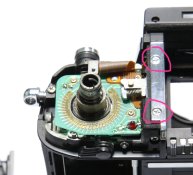
WARNING : Those instructions are for skilled persons with some knowledge of mechanics and electronics. Don't follow if you are unsure about your skills.

F4 Aperture lever problem driving the lens down.

This will be a long thread with ~100 pictures. please be patient, i don't have enough time to edit all in one day so return after few days. PLEASE KEEP THIS THREAD CLEAN. Post your questions & comments here :...

(there was a url link here which no longer exists)
 
Last edited by a moderator:
OP
OP

F4user

Member
Joined
Jun 2, 2014
Messages
80
Format
35mm
Episode 2 - right side cover

Right side
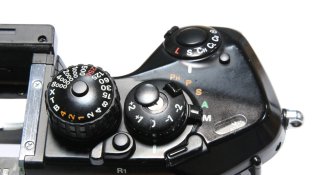
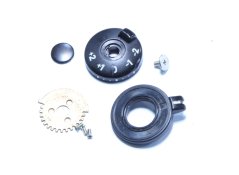
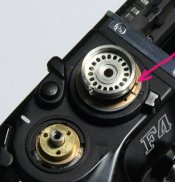
5: Remove ornament cap of exposure compensation knob
5.1: Remove the screw & knob
5.2: Remove 3 screws of indexing plate.
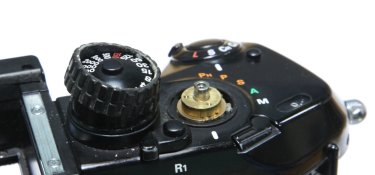
5.3: Remove mode selector.

IMG_r01.jpg IMG_r02.jpg IMG_r03.jpg

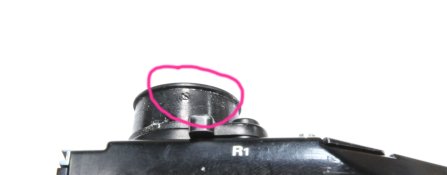
6: Remove shutter speed selector rubber. Attention do not scratch paint of knob. Insert slot screwdriver at the bottom of knob and use a round tooth stick to remove the rubber
IMG_r04.jpg
7: Remove 3 screws placed at 120 degrees around. Use 1mm slot screwdriver. Do not loose too much, one turn at a time each until the knob is free. Pay attention the screws are very small. Do not loose the spring inside.
IMG_0016.jpg IMG_0021.jpg
8: Using two 1mm slot screwdrivers remove clip ring 8.1: Remove illuminator lever
IMG_0022.jpg IMG_0023.jpg IMG_0024.jpg IMG_0025.jpg
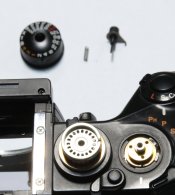
9: Remove red dot and the screw.
IMG_0026.jpg
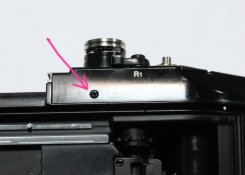
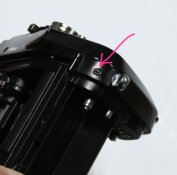
9.1 Remove right side cover screws and right cover
IMG_0028.jpg IMG_0029.jpg IMG_0031.jpg IMG_0032.jpg
Mandatory - see the next post. Forum's limit is 15 pictures per post.
 
Last edited by a moderator:
OP
OP

F4user

Member
Joined
Jun 2, 2014
Messages
80
Format
35mm
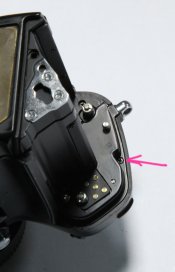
Attention to this pin. Do not loose.
IMG_0040.jpg
 
OP
OP

F4user

Member
Joined
Jun 2, 2014
Messages
80
Format
35mm
Episode 3 - more work

Bottom cover

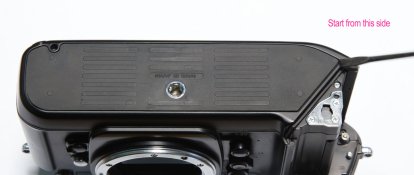
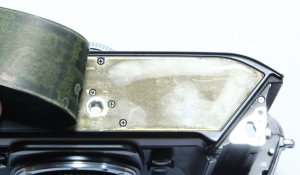
10: Peel bottom rubber. The rubber is attached using double adhesive tape. Start from battery side, start gently. Insert a small slot screwdriver between the rubber and brass sheet. Between rubber and the bottom case there is a brass sheet also attached with adhesive tape. Pay attention and do not peel the brass sheet, you will have more work to do. Press the brass down with a slot screwdriver. Plastic knife can be used.
IMG_0010.jpg IMG_0011.jpg

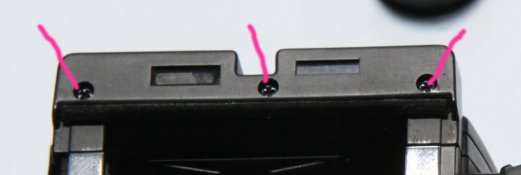
11: Remove bottom cover screws
IMG_0012.jpg

12: Remove bottom cover. Start from battery side. Lift gently and with care. There is adhesive between brass sheet and tripod nut and allow time to peel off. Pay attention to the wires. Do not insert any tool between bottom cover and the rest of the case, most of the electronics are there.
IMG_0016a.jpg

13: Using soldering iron remove the connections. Pay attention to static electricity. Do not wear plastic fabrics, use only cotton and do not wear plastic shoes. For ex: touch metal case of a running PC to discharge static electricity. Avoid excessive movement on the chair where you stay to avoid recharge with static electricity. From this step forward this precautions apply to all steps because the electronics will be exposed.
IMG_0016_.jpg

14: Remove tripod socket plate. Pay attention: the screws have thread blocking paste. Apply increasing force until they start to move.
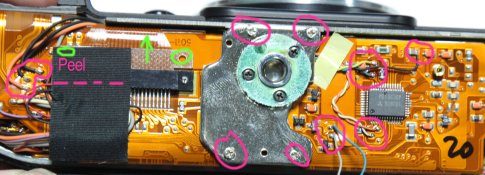
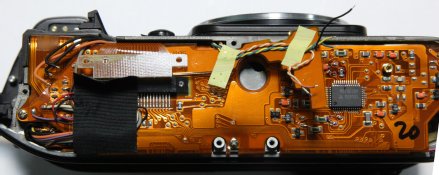
14.1 Remove more connections ( 2 black & 1 orange wires on left side and all on the center ). Peel black acetate tape up to the dotted line only. Remove flexible band connector with small movements ( green markings ) keep parallel to the socket. Pay attention to flex cable.
IMG_0016.jpg IMG_0043.jpg

Top .. less.

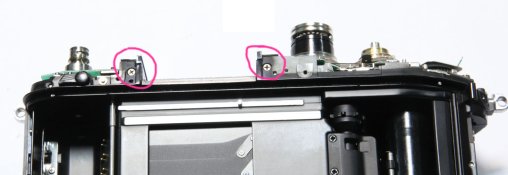
15: Remove shutter button assembly screws. Keep them close for reassembly. Remove LED connections ( green and orange ) .
IMG_0040.jpg

15.1 : Gently lift shutter release button assembly ( screws side ). Pay attention to the flex cable on the front. Lift as much is need to insert a screwdriver to remove battery plate screws. Reattach shutter button assembly using the screws
IMG_0049.jpg
 
Last edited by a moderator:
OP
OP

F4user

Member
Joined
Jun 2, 2014
Messages
80
Format
35mm
Episode 4 - Big split

I recommend the back film cover to be in place to protect shutter blades.

16: remove right side and left side rubbers
IMG_0033.jpg IMG_0035.jpg

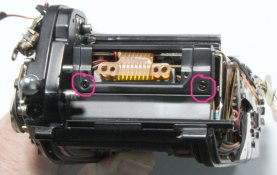
17: Remove right & left side rails and the screw near right side rail. The right side rail have some light seal sponge over it. Cut it clean after screws removal.
IMG_0008.jpg IMG_0047.jpg

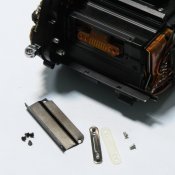
18: remove cover and pressure plate over flex cable contacts
IMG_0037.jpg IMG_0039.jpg

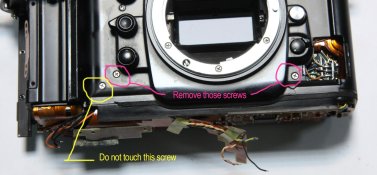
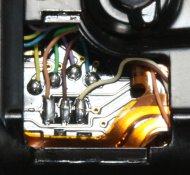
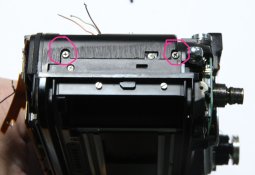
19: Remove front screws. Don't touch the screw with yellow marking. Remove all ( 7 ) electrical connections near focus mode selector
IMG_0044.jpg IMG_0046.jpg

20: Remove side screws ( left & right ) and back
IMG_0053.jpg IMG_0055.jpg IMG_0057a.jpg

21: Remove LCD - LED assembly screws. Gently lift the assembly starting from grip side no more than 3-4 mm. Pay attention to the flex cable on the ISO side, the flex cable is short . Lift the assembly until is free from its position.
IMG_0021.jpg

Take a break. You need it

22: Now you can start split the camera. Pay attention to the flex cables on battery side. Keep them inside the case with fingers or a small plastic tab. When the cases start to split swap over the case the flex cable of LCD-LED assembly. Pay attention don't break it.
IMG_0002.jpg IMG_0001_1.jpg

Gently move the front case up, down left & right until complete split. Now you can admire Japanese technology.
IMG_0059.jpg
 
OP
OP

F4user

Member
Joined
Jun 2, 2014
Messages
80
Format
35mm
Episode 5 - Who killed JR Ewing

Inside job.
As you can see the mirror mechanism and aperture lever are pure mechanical with no motor.
IMG_0005.jpg
The mechanism from back side of the F4's body push 2 levers toward front of the body , one for charge ( green ) and another for shoot ( blue ) releasing mirror mechanism and aperture lever mechanism, both are spring actuated. Pushing the lever ( green arrow ) will charge the mechanism. Push release lever ( blue arrow) for shoot mode. The aperture mechanism must follow the mirror mechanism and is more complicated having a lot of toothed gears.

IMG_0004b.jpg

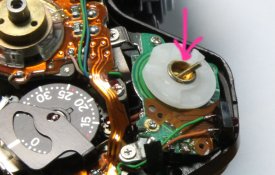
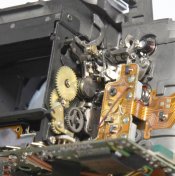
The culprits for defective work are: aperture lever spring and hardened shaft grease of toothed gears.
The aperture spring is under PC board and is hard to take a photo of it. Will come.

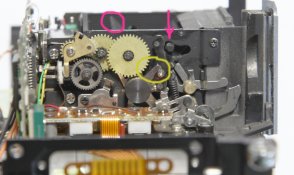
Charged position look like this:

IMG_0004a.jpg

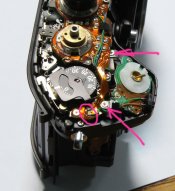
Observe mirror lever ( pink arrow ) secondary mirror ( purple circle ) and aperture mechanism ( yellow circle )

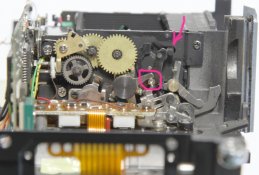
Release position:

IMG_0007a.jpg

Observe mirror lever ( pink arrow ) and aperture mechanism ( pink circle ).
The lever is in touch with the aperture lever adjusting screw.
When all mechanics are in released position you can play ( move ) the aperture lever with your finger to see if the movement is fast. Also you can charge - discharge mechanism to see if the aperture driving mechanism is fast enough to follow mirror mechanism. Pieces shown as in the picture above must move together or very close. Total time must be under 20 ms and that's fast, hard to see.

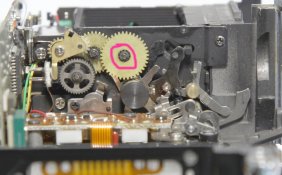
Faulty position because stuck gears:

IMG_0008a.jpg

Observe " mirror up " position ( green ) and aperture mechanism in charge position behind adjusting screw.

The repairs.

First remove the circle clip of the first gear and remove the first gear.
Pay attention to the rest of gears, they start to spin up fast.

IMG_0006c.jpg

Remove screw of the plate. Be careful there is a spring under brass gear and can escape in the room.

IMG_0010.jpg

Clean the remaining gears shaft pouring some cleaning fluid. Also clean riveted mechanism
I use for everything, even for lens, MOTOREX brake cleaner. http://www.motorex.com/index.cfm?oid=1147&lang=en&eintragId=123&webtoolDbTemp=eintragDetail
IMG_0011.jpg IMG_0012.jpg

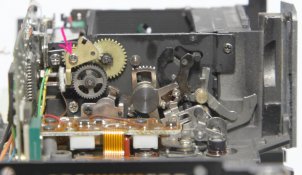
Repeat until gears and levers move easy. Oil with clock oil a very very small quantity
I think is not necessary to say removed gears need also cleaning.

Aperture mechanism:

IMG_0013.jpg

The aperture spring soften with time so there are 2 possibilities : change or adjust the mechanics. ( next episode )
 
Last edited by a moderator:

frank

Member
Joined
Dec 6, 2002
Messages
4,359
Location
Canada
Format
Multi Format
Wow, thanks for posting this. I paid $100 to have this repair done on my F4. Money well spent in my case. :smile:

This damage was caused to my camera by using a lens with a sticky aperture.
 

camtec

Member
Joined
Jun 18, 2014
Messages
59
Format
Medium Format
Excellent article. Very well done. Larry Lyells would be proud. BTW, I am a camera technician.
 

NiCad

Member
Joined
Nov 20, 2016
Messages
1
Location
Los Angeles
Format
35mm
Thank you for taking the time to write these instructions.

Is the aperture spring available to purchase somewhere? Any stores that sell Nikon parts?
I assume fitting a spring with OEM specifications in order to maintain the correct spring rate would be advisable.
 

EIJU YUASA

Member
Joined
Jun 5, 2017
Messages
1
Location
chiba-ken JAPAN
Format
35mm
Episode 5 - Who killed JR Ewing

Inside job.
As you can see the mirror mechanism and aperture lever are pure mechanical with no motor.
View attachment 68909
The mechanism from back side of the F4's body push 2 levers toward front of the body , one for charge ( green ) and another for shoot ( blue ) releasing mirror mechanism and aperture lever mechanism, both are spring actuated. Pushing the lever ( green arrow ) will charge the mechanism. Push release lever ( blue arrow) for shoot mode. The aperture mechanism must follow the mirror mechanism and is more complicated having a lot of toothed gears.

View attachment 68910

The culprits for defective work are: aperture lever spring and hardened shaft grease of toothed gears.
The aperture spring is under PC board and is hard to take a photo of it. Will come.

Charged position look like this:

View attachment 68911

Observe mirror lever ( pink arrow ) secondary mirror ( purple circle ) and aperture mechanism ( yellow circle )

Release position:

View attachment 68912

Observe mirror lever ( pink arrow ) and aperture mechanism ( pink circle ).
The lever is in touch with the aperture lever adjusting screw.
When all mechanics are in released position you can play ( move ) the aperture lever with your finger to see if the movement is fast. Also you can charge - discharge mechanism to see if the aperture driving mechanism is fast enough to follow mirror mechanism. Pieces shown as in the picture above must move together or very close. Total time must be under 20 ms and that's fast, hard to see.

Faulty position because stuck gears:

View attachment 68913

Observe " mirror up " position ( green ) and aperture mechanism in charge position behind adjusting screw.

The repairs.

First remove the circle clip of the first gear and remove the first gear.
Pay attention to the rest of gears, they start to spin up fast.

View attachment 68914

Remove screw of the plate. Be careful there is a spring under brass gear and can escape in the room.

View attachment 68915

Clean the remaining gears shaft pouring some cleaning fluid. Also clean riveted mechanism
I use for everything, even for lens, MOTOREX brake cleaner. http://www.motorex.com/index.cfm?oid=1147&lang=en&eintragId=123&webtoolDbTemp=eintragDetail
View attachment 68907 View attachment 68908

Repeat until gears and levers move easy. Oil with clock oil a very very small quantity
I think is not necessary to say removed gears need also cleaning.

Aperture mechanism:

View attachment 68918

The aperture spring soften with time so there are 2 possibilities : change or adjust the mechanics. ( next episode )
 

Andreas Thaler

Subscriber
Joined
Nov 19, 2017
Messages
4,677
Location
Vienna/Austria
Format
35mm
A follow up to this thread see here:


Andreas Thaler

Subscriber
Joined
Nov 19, 2017
Messages
4,677
Location
Vienna/Austria
Format
35mm
More follow-ups:


Last edited:
Photrio.com contains affiliate links to products. We may receive a commission for purchases made through these links.
To read our full affiliate disclosure statement please click Here.

PHOTRIO PARTNERS EQUALLY FUNDING OUR COMMUNITY:


Ilford ADOX Freestyle Photographic Stearman Press Weldon Color Lab Blue Moon Camera & Machine
Top Bottom