• Welcome to Photrio!
    Registration is fast and free. Join today to unlock search, see fewer ads, and access all forum features.
    Click here to sign up

New Richeson brush question

Watering time

A
Watering time

  • 0
  • 0
  • 23
Cigar again

H
Cigar again

  • 1
  • 0
  • 40

Recent Classifieds

Forum statistics

Threads
203,174
Messages
2,850,874
Members
101,710
Latest member
tparuy
Recent bookmarks
1

dpurdy

Member
Allowing Ads
Joined
Jun 24, 2006
Messages
2,689
Location
Portland OR
Format
8x10 Format
Hopefully my photo attaches. It shows what happens to my old Da Vinci Brushes. I have gone through 5 of them now. I wonder what I can do to not have that happen to my new Richeson. It seems to have a higher quality ferrule. Does anyone or everyone coat the ferrule?
thanks Dennis
 

Attachments

  • New-brush.jpg
    New-brush.jpg
    112.5 KB · Views: 191
Is that a coating you put on the ferrule?

I have a Richeson 9010 I have been using for a few years, mostly kallitype and some pd as well. The bristles near the ferrule have a similar stain, but the ferrule is in far far better condition. Slight corrosion. I did not put any protective coating on the ferrule.

Nice brush, is that a 3"? I picked up one the 3" Sterling brushes from B&S. It's works just fine, but does not have the feel of the Richeson.
 
Is that a coating you put on the ferrule?

Yes I have always coated the Da Vinci. One of those pictured is coated with fingernail polish and the other is an experiment with Rubber Cement.
Actually the Da Vinci brushes still work fine but they are so ugly!!

thanks
Dennis
 
Hopefully my photo attaches. It shows what happens to my old Da Vinci Brushes. I have gone through 5 of them now. I wonder what I can do to not have that happen to my new Richeson. It seems to have a higher quality ferrule. Does anyone or everyone coat the ferrule?
thanks Dennis

I've coated the ferrules of my Da Vinci brushes with brushed on Plasti-Dip (http://www.plastidip.com/home_solutions/Plasti_Dip). I tend not to with the Richesons.

But whichever brush I use, after coating I rinse it with distilled water and immediately dry it with a paper shop towel.
 
Nice art work there Denis :smile:
I have heard about dipping the brush in two component epoxy but have no yet had the courage to try it. The ferule on the Richeson brush will eventaully also start to show some rust if not prepped. Great brush though.
 
Project Basho was selling some handmade synthetic brushes similar to a hake brush. These are made in Japan. I should probably purchase some but my Richeson brushes are holding up.
 
I use the DaVinci brushes for pt/pd and have never had problems with rusting or corrosion after hundreds of prints. Are you dipping the whole brush including the ferrule into the solution? Or soaking the brush in water up to the handle? No offense, but you need to take better care of them...
 
I generally use a total of 48 drops of combined FO and Pd/Pt for an 8x10 print. I am not sure how I would dip my entire brush in. But then you are trying to be funny I guess.
No offense but if you have nothing useful to add. don't.
Dennis
 
Not trying to be funny at all, just wondering how the brush gets so trashed. Those brushes are expensive...!
 
I mount my Richeson brush with a japanese brush handle like that no metal at all and brush is much lighter.
 

Attachments

  • Richeson amĂ©liorĂ©e.JPG
    Richeson améliorée.JPG
    408.5 KB · Views: 168
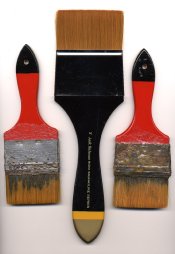
Same for me, I have 5 Da Vinci brushes averaging 5 years of extensive using. Except one which the red paint on the handle blistered here and there - because I left it wet! They're almost in a like-new condition.

The "secret" is:

- Never leave the brushes with emulsion on the bristles, rinse immediately after coating!
- Never leave the brushes wet, dry them (bristles, ferrule and handle) with a paper towel immediately after rinsing!
- Never leave the brushes to dry bristles up, because some water remaining in the bristles may (or "will" if you like) emigrate to the ferrule and maybe to the hande, causing the ferrule retaining rivet to rust - as I experienced with my very first brush. (Can still use it for pt/pd, it's safe as long as you don't wet the rusty rivet...) Leave the brush in horizontal position or hang it from the handle (from the hole in the handle or using a clothes peg) instead, in order to let them dry completely.

Working clean is the key here... (EDIT: I mean you don't really need to coat the ferrule with something - unless you really need the comfort of extra safety. I didn't coat the ferrule of mines with something.)

Hope this helps,
Loris.

P.S. Moisten the brush with (distilled - depending on process) water before coating; you won't have too much emulsion sucked in the bristles that way - we need the emulsion on paper, not in the brush... And, hold the brush perpendicular to the paper while coating, just touch the paper with the tip of the brush; same reason as above...
 
Last edited by a moderator:
Some more picture with my 3" Richeson brush to get what I call an "Improved Richeson Magic Brush"
 

Attachments

  • Magic Richeson Hake Brush.JPG
    Magic Richeson Hake Brush.JPG
    719.2 KB · Views: 154
I love that idea payral. It seems to me it would be very difficult to do perfectly though. Also interesting to note that your brush had a natural wood handle. Is the "magic" brush different than what I just got?
As to the clean working methods. Ok clearly my method causes my problem. I don't like coating with a brush full of water or washed and squeezed. I find it much better to coat with a brush that has sensitizer already in it.. In fact I start my printing sessions by first washing the brush.. even though I did wash it after the last printing session, and squeezing as much water out as possible and then putting 5 drops each of FO and Palladium mixed on a paper and soaking the end of my brush in it. Then I generally print whole days at a time and I only wash my brush if I am going to stop long enough for it to dry out. When I wash my brush I wash from the ferrule down (brush fibers only) with steaming hot water. I do it this way because it works best for me. My brushes last me generally about 4 years. The ones in my picture are at least that old. I realize that coating the outside of the ferrule does not stop the inside from corroding so it is probably a waste of time. The brushes in my picture still work fine as do the others in my cast off box. They are just ugly to look at. But from what I read here the corrosion clearly comes from the brush keeping sensitizer in it for hours on end. Even so that is worth it to me because I like the way it coats better than one just washed and squeezed. So I guess I look forward to the same thing happening to my new Richeson unless I get payral to re do it for me...
Thanks
Dennis
 
Also interesting to note that your brush had a natural wood handle. Is the "magic" brush different than what I just got?
Dennis

No it's the same but when I got them (more than ten years ago) I removed original paint and coat handles with some strong varnish. After that I used to paint metal part with Plasti-Dip and few months ago I changed original handle for a Japanese one.
It's not very difficult to do.
 
No it's the same but when I got them (more than ten years ago) I removed original paint and coat handles with some strong varnish. After that I used to paint metal part with Plasti-Dip and few months ago I changed original handle for a Japanese one.
It's not very difficult to do.

When you take off the original ferrule, do you find the brush fibers are held together with glue or something? Or do you have some way of clamping them tight so they don't become miss arranged when out of the ferrule? Is it only the thread of the split hake brush that keeps the fibers aligned? I hate to ruin a good brush by experimenting.
Dennis
 
Dennis, to me, improving the technique would be easier than trying to modify / manufacture brushes - but, then, each to their own...

Regards,
Loris.
 
When you take off the original ferrule, do you find the brush fibers are held together with glue or something? Or do you have some way of clamping them tight so they don't become miss arranged when out of the ferrule? Is it only the thread of the split hake brush that keeps the fibers aligned? I hate to ruin a good brush by experimenting.
Dennis

Brush fibers are glued together. I didn't change anything to that. The thread is just to fix the "pack" to the handle.
I modified two Richeson brushes, a 2" and a 3". Both were made the same way.

Loris I didn't want to improve my technique, just improve my tools
 
Loris I am an old dog been printing platinum 25 years and I like how I do it. I have worked with a lot of methods and have come to what works best for me.
Regards,
Dennis.
 
As I said; each to their own...

Philippe, that remark wasn't about you, BTW.


Regards,
Loris.

P.S. Dennis, I just saw your Pbase pt/pd gallery -> my compliments, very nice work!
 
Last edited by a moderator:
Photrio.com contains affiliate links to products. We may receive a commission for purchases made through these links.
To read our full affiliate disclosure statement please click Here.

PHOTRIO PARTNERS EQUALLY FUNDING OUR COMMUNITY:


Ilford ADOX Freestyle Photographic Stearman Press Weldon Color Lab Blue Moon Camera & Machine
Top Bottom