Konstruktor upgrades?

Exhibition Card

A
Exhibition Card

  • 0
  • 0
  • 0
Flying Lady

A
Flying Lady

  • 3
  • 0
  • 33
Wren

D
Wren

  • 0
  • 0
  • 24

Recent Classifieds

Forum statistics

Threads
199,035
Messages
2,785,054
Members
99,784
Latest member
Michael McClintock
Recent bookmarks
0

Donald Qualls

Subscriber
Joined
Jan 19, 2005
Messages
12,306
Location
North Carolina
Format
Multi Format
I've got a Lomography Konstruktor F (kit-build 35mm SLR, of all things) on the way to me, and I'm looking for ways to improve the use experience as well as the image quality.

The obvious thing is that I want to make an adapter to let me mount M42 lenses -- shouldn't be difficult, I just need to connect an M42 mount to a copy of the original lens mount and get the flange to film distance correct. I'll have to operate in preset mode (i.e. manual aperture close before exposure) but I've done that, fifty years ago, with an Exa II (the 50mm was auto diaphragm, but the 135mm wasn't).

I've seen a couple other nice customizations -- a window for reading the film cannister seems easy, and a cable release socket shouldn't be hard (other than finding a way to tap the tapered thread in the plastic top cover).

Another mod I've seen is to mount a focus screen from, um, a more expensive 35mm SLR. Fresnel with split prism or microprism, for instance, to aid in critical focus and give a brighter view (though a faster lens will do the latter, too). I'd also like to build a penta-mirror or mount a pentaprism that would slide on where the waist level and chimney finder go, to allow using the camera without the mirror imaged finder image (and at eye level).

Has anyone seen or built one of these, who might have a suggesting for allowing adjustment of the shutter speed? Even getting one stop faster or slower would be a big step...
 

4season

Member
Joined
Jul 13, 2015
Messages
1,993
Format
Plastic Cameras
I know of a mod which does all of those things: It's called "Zenit" :wink:.

I built Konstruktor years ago but ended up giving it away before ever using it, which was maybe a mistake. It's a fun build, and I thought the resulting camera was nicely compact and lightweight. The reflex mirror forms part of the shutter (there was a Fuji / Great Wall SLR which used similar) but I have no idea how you'd reliably change speeds with such a mechanism.
 
OP
OP
Donald Qualls

Donald Qualls

Subscriber
Joined
Jan 19, 2005
Messages
12,306
Location
North Carolina
Format
Multi Format
The reflex mirror forms part of the shutter (there was a Fuji / Great Wall SLR which used similar) but I have no idea how you'd reliably change speeds with such a mechanism.

Well, that's what I want to try to figure out. I think it'd be super cool if a $30 ($60 if you get the full accessory kit) camera could be made into something that's actually practical to use. Good lenses, improved viewfinder, perhaps a little tuning to the film advance system, what's left but to be able to adjust the shutter as well as the aperture (in the better lens)?

It just occurred to me, it ought to be possible to adjust the aperture with the original lens, by making a mod to replace the fixed aperture with a removable one, which you could then replace with other sizes. Like a slow, annoying version of Waterhouse stops. Some tiny magnets and a piece of "tin" can lid should do the job, combined with some small disks of black card or plastic punched with suitable holes. Could even give yourself a pinhole aperture like the one in the Diana F+. Alternatively, it might be possible to cut slots in the mount for a sliding strip with apertures in it (you'd want a click stop so you could get them aligned accurately, of course).
 
OP
OP
Donald Qualls

Donald Qualls

Subscriber
Joined
Jan 19, 2005
Messages
12,306
Location
North Carolina
Format
Multi Format
I found time today to go through the actual process of building my Konstruktor F. Not difficult for someone who fixes power tools for a living -- and I was quite pleased that the kit included one extra of each screw and the tiny shutter release return spring (especially when one of the 1.5mm plastic threading washer head screws dropped off my magnetic screwdriver and vanished). The advertising and instructions LIE about the time required, though; I spent at least three hours assembling the camera (including taking off parts I'd put on in order to get the assembly order right -- the instructions are quite vague on what order to install, for instance, the film counter gears). I suspect someone who doesn't routinely assemble complex collections of small parts anyway would take an hour or two longer than that. I have no doubt, however, that if I were to do another one sometime soon, with better light than what's available on my darkroom counter, I could in fact do it in an hour.

While doing the work I was examining the camera for options to install upgrades like the ones I've talked/asked about earlier in this thread. Looks like putting a better lens in the existing mount is probably possible, but an adapter to mount a preset M42 lens probably isn't practical and wouldn't allow much if any larger aperture or apterture adjustment, for the same reason making the shutter adjustable isn't practical: the actual shutter isn't formed by the slit between mirror and safety shutter below it (as is the case with, for instance, a Great Wall 6x6 SLR). Rather, there's a paddle shutter mounted in the safety shutter itself, quite visible from the front with the lens off and shutter fired.

Oddly, this doesn't show in any of the videos I've seen on assembling this camera; I suspect that's because it's an upgrade done when the flash sync was added to the Konstruktor. Rather than try to ensure correct X sync with a slit type shutter (which requires that it be fully open, at least relative to the light cone, for at least a couple milliseconds, up to about 20 to work with bulb flash), it was apparently cheaper, easier, or more reliable to install a sync-capable shutter that would fire after the mirror is fully up.

Unfortunately, adjusting the timing of a paddle type shutter requires changing the strength of the mainspring, and then ensuring that the trigger spring is still strong enough to give a full opening on faster speeds, and ensuring that the paddle doesn't overtravel and potentially jam on slower speeds (there are good reasons these shutters are never used for adjustable speeds -- changing the speed is possible, but amounts to a rebuild of the shutter). And since the shutter is in a trapezoidal aperture (optically square, I'm pretty sure) that seems to also form the final aperture stop for the lens (plus the mount bayonet is quite small, about 18-20 mm maximum clear diameter), it's unlikely even an f/1.4 lens adapted to mount on this camera would give useful apertures larger than about f/8, though you could still focus with the brightness of f/1.4 in that case.

The option does still exist to mount an upgraded ground glass screen -- the focusing screen is accessible with four screws even after the camera is fully assembled. I also think it should be possible to make an adapted housing to put a pentaprism where the waist level and chimney finder mount. Combining improved glass -- a 50mm triplet off a pre-War 127 or 35mm folder would be a huge improvement in image quality -- and improved focus screen and converting to pentaprism would make this an actual semi-practical camera: an SLR with fixed exposure plus B. Given the basic camera is only about $30 plus tax and shipping, I might well see if I can find a suitable lens. It needn't be fast at all, though something faster than f/5.6 would improve the brightness of the finder a lot.
 
OP
OP
Donald Qualls

Donald Qualls

Subscriber
Joined
Jan 19, 2005
Messages
12,306
Location
North Carolina
Format
Multi Format
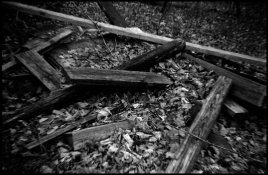
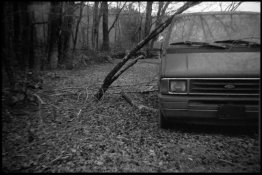
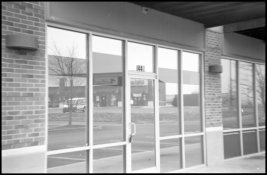
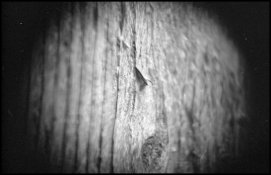
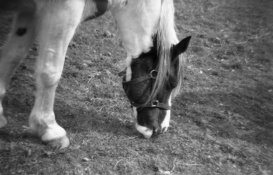
I finally got the first film processed and scanned from the Konstruktor.

Instructions recommend ISO 100 in bright sun, 200 to 400 in less bright outdoor conditions or for flash, and 800 for indoors (which I think would still be significantly underexposed). I chose to load Ilford XP2 Super and process it via bleach bypass, giving an effective speed of about EI 640-800 -- and depend on the tremendous latitude of XP2 to avoid having full daylight shots burnt solid black on the film. It pretty much worked.

A minor caveat: at least on mine, the selector for N (normal) or B (bulb mode) tends to work its way over toward B (because of the forces on the inner lever the selector connects to). It's possible this is an assembly problem, because it seems as if the detents, formed as small loops in the plastic inner lever, don't hold very strongly. I had a number of inadvertent B exposures as a result, though once I knew it was happening it was easy enough to check that the selector was on N before each exposure.

Focusing is difficult -- better with the chimney finder and its adjustable magnifier, harder without it (there's a flip-up magnifier in the waist level hood, too, but it's pretty small and the frosted screen is quite dim at around f/5.6 wide-open aperture. Further, the plastic lens seems to have a lot of field curvature, so in the best Lomographic tradition, one gets pretty decent focus and almost-sharpness in the center of the frame, when the focus was set correctly, but various added-up aberrations in the corners. Still, it's no worse than an original Diana.

The closeup and macro lenses that came with the Deluxe Bundle vignette a bit, but because the camera is an SLR you can at least see when you're in or out of focus. It is possible to take actual macro images with this kit -- but the in-focus area is so small it's more of a stunt than anything practical (I used to get better results than this with a slip-on diopter mounted to a Kodak Pony 135, scale focused and distance measured with a calibrated finger length).

The good news is, the frame spacing is good; the advance stop works correctly and releases correctly when the shutter release is fully bottomed out.

There's no provision for a cable release, despite having a socket for a standard 1/4-20 tripod screw -- though it shouldn't be difficult to add a socket during construction, if you can find the correct tapered thread tap.

Overall, I think the camera is probably worth the $60 I paid; I may at some point shell out another $30 for the basic kit, in order to build a body with cable socket (and install a better focusing screen during construction rather than take this one apart to do so) and have the lens parts to explore making the mount into an adapter for something like M42, just to see if there's anything gained by it. A cheap collapsible L39 mount Russian lens, like a copy of an Elmar 50/3.5, might supply the optics for an upgrade to go in the original lens body as well, and still be light enough to use the camera more or less normally (vs. holding the lens, not the camera, with something like my Super Takumar 50/1.4).
 

Attachments

  • 0009.jpg
    0009.jpg
    419.1 KB · Views: 186
  • 0010.jpg
    0010.jpg
    407.1 KB · Views: 167
  • 0018.jpg
    0018.jpg
    278 KB · Views: 149
  • 0028.jpg
    0028.jpg
    358.9 KB · Views: 158

ciniframe

Member
Joined
Jul 3, 2014
Messages
803
Format
Sub 35mm
I ordered one of the original Konstruktor kits when they first came out, about 6-7 years ago. My hope was that the shutter was a drum type, kind of like a one speed version of an Exa 1 shutter. Had the same idea as you, upgrading to a ‘T’ lens mount. That would give me a 55mm flange distance to work with. Alas, the shutter was unsuitable for any other lens.
That plus the frame counter would not work. Meh, what did I really expect for $35. Think I sold it at a photo swap for $10 and felt fortunate to get that.
My current infatuation is with 4x5 and paper negatives. Except that my homemade cameras are masked to 94X94mm. Still big enough, but no temptation to rotate the camera to vertical or horizontal. Just finished up one mounting a Vivitar series 5 plus 3 close up lens. A short tele on that format it doesn’t look too bad @ f64 and with paper in bright sun the exposure is 4-8 seconds.
 

radiant

Member
Joined
Aug 18, 2019
Messages
2,135
Location
Europe
Format
Hybrid
I also built Konstruktor when it was released. Pretty funny plastic thingy. I 3D printed an extender tube for the camera for macro shots. My best shot with the camera:


I really don't know why you want to use that crappy body for good lenses. :D
 
OP
OP
Donald Qualls

Donald Qualls

Subscriber
Joined
Jan 19, 2005
Messages
12,306
Location
North Carolina
Format
Multi Format
Honestly, the body is the best part. I forgot to mention, the actual counter on mine seems to move two frames for every one, but the advance stop works, so I get good spacing even if I'm a little in the dark how many frames I have left. Hmmm; next time I load, I should double check that I've set to 36 rather than to 1 -- I just recalled this camera runs a count-down frame counter...
 
OP
OP
Donald Qualls

Donald Qualls

Subscriber
Joined
Jan 19, 2005
Messages
12,306
Location
North Carolina
Format
Multi Format
My body eats the sprocket holes like a hamster :smile:

Tempting to suggest there's a misassembly of some sort. At least on the first roll, mine operated as well as if it were commercially made -- far better on both focusing and advance than my also-recent Recesky TLR.

Another contributor (beyond the somewhat unclear order of assembly for parts within a given instruction step) was that I was very careful taking my parts off the molding tree -- I used a small electronic flush wire cutter, then scraped off the remaining flash with a sharp knife.
 

ciniframe

Member
Joined
Jul 3, 2014
Messages
803
Format
Sub 35mm
By the way Donald, you seem to have obtained some reasonable results with yours. For cutting the parts off the tree I always use a sharp x-acto knife, cut close to the tree and then trim/sand to the part profile. It is really too bad these take so much custom fiddling to get them to work. They really are a neat idea. Wonder what it would take to copy an Exa 1 shutter? The one I had was whisper quiet at 1/25 sec. the slowest speed. Never had one apart to look at the timing mechanism but have always imagined it must be fairly simple compared to a separate mirror with roller blind shutter setup.
 
OP
OP
Donald Qualls

Donald Qualls

Subscriber
Joined
Jan 19, 2005
Messages
12,306
Location
North Carolina
Format
Multi Format
The Konstruktor is made the same way as plastic models, except some of the parts are ABS instead of all polystyrene. If it were being designed new today, you could 3D print most of those parts, like a Brancopan. If it were me, I'd probably be inclined to build the shutter like the one on an original Minolta 16 or Kiev 30 -- a pair of plates that slide sideways, spring driven, with their start times staggered by an escapement like the one in a leaf shutter. The timing parts would probably have to be metal, though the plates could be plastic. The advance mechanism is rather similar to that of a Brancopan.
 

Agulliver

Member
Joined
Oct 11, 2015
Messages
3,572
Location
Luton, United Kingdom
Format
Multi Format
I also have the earlier version of the Konstroktor without the flash sync....given as a Christmas gift perhaps 6 years ago? I put a couple of films per year through it when the mood suits me, and I find that it's OK for what it is....a fun, plastic camera that I made myself. I am far from the world's best mechanical engineer but I put it together in the time suggested without losing anything and it all works as intended - except the shutter is sluggish if the camera is pointing upwards....so no sky shots. With the latitude of modern films, 200ISO works for most conditions outdoors. I've used both colour and B&W film and found that the only time mine ate the sprocket holes was when I was turning the winding knob the wrong way!

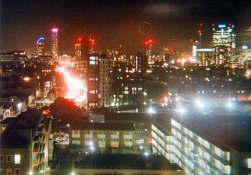
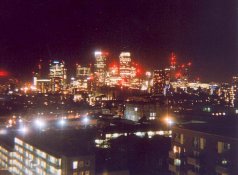
The lens is quite sharp in the middle for short distance shots, and middle distance shots it's quite pleasing everywhere except the edges. I did some colour long exposure shots over London's Docklands and they actually came out spectacularly well holding the camera against a balcony ledge overlooking the scene. It's in no way an instrument for serious photography but it's fulfilling it's function and it is a genuine working camera for £30 or so. And it's a camera I made myself, albeit from a kit....I'm not great at making things!
 

Agulliver

Member
Joined
Oct 11, 2015
Messages
3,572
Location
Luton, United Kingdom
Format
Multi Format
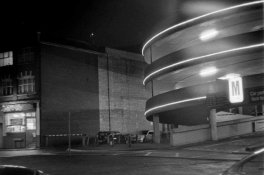
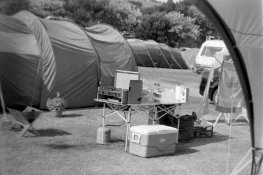
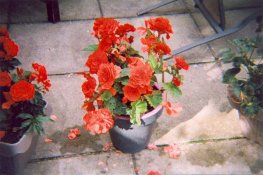
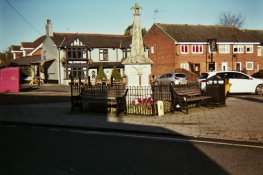
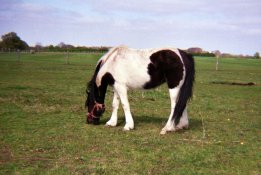
Here are a few of my favourite Konstruktor shots of the last few years. The shot of the flowers in the pot and the long night-time shots over Docklands were on horrendously expired Superia 400 and still came out OK.

FB_IMG_1619179334254.jpg FB_IMG_1619179346392.jpg FB_IMG_1619179350344.jpg FB_IMG_1619179354728.jpg FB_IMG_1619179359421.jpg FB_IMG_1619179373891.jpg FB_IMG_1619179408743.jpg FB_IMG_1619179414590.jpg FB_IMG_1619179426111.jpg FB_IMG_1619179433360.jpg
 
OP
OP
Donald Qualls

Donald Qualls

Subscriber
Joined
Jan 19, 2005
Messages
12,306
Location
North Carolina
Format
Multi Format
Nice. I need to load mine again and take it out. Color, this time, I think.
 

Agulliver

Member
Joined
Oct 11, 2015
Messages
3,572
Location
Luton, United Kingdom
Format
Multi Format
I shot a roll of expired Agfa Vista 200 over the weekend in my Konstruktor, my last roll of that film...the proper Agfa stuff. My local shop found a stash in their basement last year and were selling it off at £1 per roll, after first testing it. So I snagged 10 rolls! Back to Color Plus for me now.

The shot above of the war memorial with the pub in the background was shot in the expired Agfa film. Pretty good for 20 year old film in a plastic kit camera. I've certainly had fun with it.
 
Photrio.com contains affiliate links to products. We may receive a commission for purchases made through these links.
To read our full affiliate disclosure statement please click Here.

PHOTRIO PARTNERS EQUALLY FUNDING OUR COMMUNITY:


Ilford ADOX Freestyle Photographic Stearman Press Weldon Color Lab Blue Moon Camera & Machine
Top Bottom