• Welcome to Photrio!
    Registration is fast and free. Join today to unlock search, see fewer ads, and access all forum features.
    Click here to sign up

I've just ground my own glass

Recent Classifieds

Forum statistics

Threads
202,985
Messages
2,848,423
Members
101,578
Latest member
Gear_monkey
Recent bookmarks
0
This is a reprint from an article in Photo Techniques magazine about grinding your own glass.

http://www.dokasphotos.com/techniques/ground_glass/

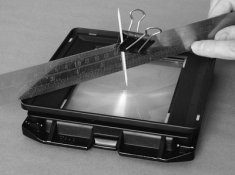
The author discusses using aluminum oxide as an abrassive. I used two different abrasive levels of automotive valve grinding compound which uses aluminum oxide. Just as in the article it took a lot longer than 20 minutes for mine IIRC.
 
Last edited by a moderator:
I've used an acid etch technique - I think it was hydrofluoric suspended in a manageable paste ...

Bright enough :wink:
 
The only thing that 'surprised' me was that after 20-odd minutes of grinding, there was still a small area of glass that was untouched. At first I thought it was me not grinding properly, then I realised that the glass couldn't have been perfectly flat to start with!

Here is a trick to grind a perfectly flat surface. You need three pieces of glass. You grind one against the other, swapping the pairs periodically so that every piece gets equal grinding time, and every piece gets ground against every other piece. (I think you are also supposed to periodically rotate the pieces by 90 degrees, but I am not 100% sure about this.) You do this until everything is evenly ground. The only mathematical surface that can survive this treatment is a plane, on all three pieces.

I have never actually done it, but I read about it in a telescope making book.

One more thing: glass is somewhat flexible, so if you did not give equal pressure across the surface then I think you might grind some areas more than other, and some areas might even remain un-ground for some time.
 
Thanks for the info. There does not seem to be an easier way. I'll just stick to adding them as attachments.

Let's go back to the ground-glass discussion. Sorry for hijacking the thread.

Ralph, it's real easy. Just upload a photo as an attachment. On the manage attachments window just right click on the link to the attachment you uploaded and choose "copy link destination/target/etc." or open it in a new window and save the location in your cut/paste buffer.

Then in the post you're still on, write [ IMG ] and then paste the link you copied and then write [ /IMG ] (remove the spaces between the brackets and IMG).
 
The only mathematical surface that can survive this treatment is a plane, on all three pieces.

Nice !

I could imagine the middle piece not being parallel, but we wont use that bit anyhoo right ?
 
Here is a trick to grind a perfectly flat surface. You need three pieces of glass. You grind one against the other, swapping the pairs periodically so that every piece gets equal grinding time, and every piece gets ground against every other piece.

If you did that, wouldn't both sides of the glass get ground?
 
Only grind one side if memory serves correctly. The ground side faces the lens and catches the light for focusing and is view through the smooth, unground side which faces the photographer behind the camera.
 
Ralph, it's real easy. Just upload a photo as an attachment. On the manage attachments window just right click on the link to the attachment you uploaded and choose "copy link destination/target/etc." or open it in a new window and save the location in your cut/paste buffer.

Then in the post you're still on, write [ IMG ] and then paste the link you copied and then write [ /IMG ] (remove the spaces between the brackets and IMG).

Let's give it a try:

attachment.php


You are a genius!
 

Attachments

  • FocusGlass.jpg
    FocusGlass.jpg
    21.8 KB · Views: 185
That three pieces of glass trick is a great idea - any imperfections in one are cancelled out by the others; by the way there's no need to do both sides of the glass!

This wouldn't work with just two pieces, as although they'd be pretty flat, if one piece was slightly concave, and the other slightly convex they'd still grind well but the surface wouldn't be flat. Introduce a third piece and keep switching them around would ensure flatness.
 
Actually, if anyone is interested I'd be willing to grind some glass if someone needed one for their camera (although you'd have to cover my costs!). Since I've learnt a couple of new things about grinding glass and 1) I don't need anymore ground glass right now, but it might help someone out, and 2) I'd be interested to see what other people think about it.

If you might be interested, PM me.

Cheers,
David.
 
I agree the three glass idea seems like a good one! In my case I used an 8x10 piece for the grinding glass and a 4x5 for the ground glass for my camera. I used the fine end of Wurth valve grinding paste, stock number 089199. I don't know what the grit is, 600, 800?
The 8x10 grinding glass gave me a lot of surface area to make sure I kept the ground glass flat and the "fine" paste gave me a very bright screen. I had originally thought of buying a ground glass but in the end used the one I made.
 

Attachments

  • IMG_0566.jpg
    IMG_0566.jpg
    72.5 KB · Views: 100
That three pieces of glass trick is a great idea - any imperfections in one are cancelled out by the others; by the way there's no need to do both sides of the glass!

This wouldn't work with just two pieces, as although they'd be pretty flat, if one piece was slightly concave, and the other slightly convex they'd still grind well but the surface wouldn't be flat. Introduce a third piece and keep switching them around would ensure flatness.

I'm still confused. If you are grinding a three-layer sandwich, wouldn't the glass in the middle be worked on both sides? It just sounds wrong. I've used enough cameras which employ a GG, and none of them had frosting on the outer side. How would you know which side of the glass is displaying your image? You want your plane of focus to be precisely where your film plane will be when you place your film holder.

Seriously, I'm not being difficult, I just don't understand how this could work. Is there something I'm not understanding about the process here?

Cheers,
 
The idea for me is even pressure, thus a sandwich (but not necessary). The grinding paste is only ever used on one side of the ground glass that is to be used in the camera. The surfaces one grinds against need to be flat, but can be many.
 
The main thing is to randomize the contact between the plates as much as possible. You can get excellent results with two surfaces if you do that. But if you do it the wrong way, you'll wind up with a ground circle in the middle which will of course then be concave.
 
Toffle: I can see your 'problem' - it's not a sandwich! You still only grind one piece against another (i.e. two pieces of glass involved at any one time). It's just that you swap the pieces around - so you could grind A and B, then B and C, then A and C, then B and A, and so on...

Does that help you?

... so you're saying I'm not insane? :D Wait till I tell the guys!!!

(that means I finally get it... :smile: )
 
Yes, there is. The traditional method uses hydrofluoric acid, something you do not want at home. There are other methods, though.

Hydrofluoric acid isn't so bad. You only need a very small quantity for a project like this, probably less than an ounce. Just make sure to wear heavy, heavy rubber gloves (not disposables) as hydrofluoric acid does nasty things to bone.

It's commonly used in the "security etching" done on car windows.
 
I've used an acid etch technique - I think it was hydrofluoric suspended in a manageable paste ...

Bright enough :wink:

That's what the window etch stuff is like. Comes in a small tube with a sponge applicator on one end. Some kind of pink stuff with a slightly thicker consistency than Elmers glue.
 
Hydrofluoric acid isn't so bad.
It IS so bad. It's one of the most dangerous substances to handle. Even a small amount on your skin will absorb through your skin and dissolve the calcium out of your bones. I handle many dangerous chemicals daily and out of all of the HF is the most terrifying. It's used in semiconductor processing to selectively dissolve silicon dioxide.
 
I agree completely. HF is the only chemical I refuse to have anything to do with. We use it at work and handle it only with a fully protective suit and respirator.
 
If you have a 1% body-surface area (~ palm-print sized area) of contact with pure HF then you are likely dead. And you won't feel much pain from it when the first contact begins... nor will any amount of emergency care help you, once you do realize that you've made contact with it. It will simply bind all the calcium in your body and give you a heart attack.

So... it is that bad. And somehow the idea of working with gloves on big pieces of glass with HF doesn't make me feel very comfortable!

There are plenty of other, much safer methods. The grinding method works very well and, again, it works well on plexiglas too... whereas HF and similar etchants do not.
 
Last edited by a moderator:
Photrio.com contains affiliate links to products. We may receive a commission for purchases made through these links.
To read our full affiliate disclosure statement please click Here.

PHOTRIO PARTNERS EQUALLY FUNDING OUR COMMUNITY:


Ilford ADOX Freestyle Photographic Stearman Press Weldon Color Lab Blue Moon Camera & Machine
Top Bottom