Hypocheck for TF-5 fixer?

Agawa Canyon

A
Agawa Canyon

  • 2
  • 2
  • 48
Spin-in-in-in

D
Spin-in-in-in

  • 0
  • 0
  • 32
Frank Dean,  Blacksmith

A
Frank Dean, Blacksmith

  • 13
  • 8
  • 227
Woman wearing shades.

Woman wearing shades.

  • 1
  • 1
  • 154

Recent Classifieds

Forum statistics

Threads
198,860
Messages
2,782,081
Members
99,733
Latest member
dlevans59
Recent bookmarks
0
Joined
Feb 25, 2020
Messages
29
Location
New York
Format
35mm
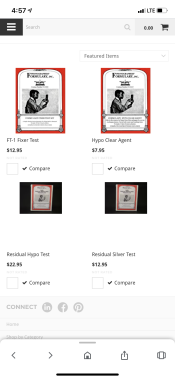
I started using TF-5 fixer recently using a two bath method (2000ml in each tray) - previously was using Kodak fixer and have a bottle of Edwal Hypocheck for testing fixer exhaustion.

Ever since using TF-5 i haven't seen the cloudy precipitate that normally appears when you test with hypocheck. I'm always testing the first tray of fixer that the print is put into since it will exhaust quicker and there were certain cases where I must've ran at least 30-35 11x14" prints through it and still didn't see any reaction when testing with hypo check

Am i underestimating the capacity for this fixer or is hypocheck not the correct product to be using for TF-5? I wouldn't think it would matter since its reacting to silver saturation
 

Rudeofus

Member
Joined
Aug 13, 2009
Messages
5,081
Location
EU
Format
Medium Format
TF-5 is a very advanced fixer, and it may be much less sensitive to silver and iodide than other products. On the other hand, Edwal Hypocheck is basically concentrated Potassium Iodide, which is prone to aerial oxidation over time.

So it could be either one. How old is your Hypocheck?
 

MattKing

Moderator
Moderator
Joined
Apr 24, 2005
Messages
52,967
Location
Delta, BC Canada
Format
Medium Format
It will be at times like these that we will most acutely miss Ron Mowrey (PE) :sad:
 

jim appleyard

Subscriber
Joined
Nov 21, 2004
Messages
2,413
Format
Multi Format
What happened to Ron?

You can always run a film clip test in your fixer. The clip should completely clear in about 1 minute with fresh fixer. Not a terribly scientific test, but will let you know if fix is really bad.
 

MattKing

Moderator
Moderator
Joined
Apr 24, 2005
Messages
52,967
Location
Delta, BC Canada
Format
Medium Format
Joined
Mar 3, 2011
Messages
1,513
Location
Maine!
Format
Medium Format
Capacity per liter of TF-5 is 30 fiber based 8x10s. So for your 2L solution you should be able to get 15-20 11x14 sheets. Personally I find fixer cheap enough, and easy enough to mix, that it's not worth trying to push the mixture to get a few more sheets. I keep a dry erase board next to my sink to count prints that go in solution.
 

Saganich

Subscriber
Joined
Nov 21, 2004
Messages
1,274
Location
Brooklyn
Format
35mm RF
What happened to Ron?

You can always run a film clip test in your fixer. The clip should completely clear in about 1 minute with fresh fixer. Not a terribly scientific test, but will let you know if fix is really bad.

My experience with TF-5 and film is the listed capacity of 15-20 35mm equivalent rolls is a little conservative where I routinely process 30-35 rolls per liter without issue. I think your question is a good one. It is always good to know how far you can safely push a process for those times when you have to improvise.
 
Joined
Sep 10, 2002
Messages
3,590
Location
Eugene, Oregon
Format
4x5 Format
For fiber-base prints, use two-bath fixation and then check for residual silver after washing to confirm proper fixation. Use the Kodak ST-1 test or use Kodak Rapid Selenium Toner 1+9 for the test. After washing, place a drop of the solution on an unexposed area of the print, wait three minutes and rinse. Any tint other than a slight cream-colored discoloration indicates inadequate fixing (Kodak used to make a color-comparison chart for this... Maybe you can find on in an old Darkroom Dataguide or on the Internet somewhere.) For testing the efficiency of your washer, i.e., if the edges and centers of the prints get washed evenly, use a blank sheet of paper run through exhausted fixer and test many different spots on the print.

As far as fixer capacity is concerned; I have not found a method of testing the fixer solution itself that is convenient and sensitive enough to indicate when the fixer has reached a dissolved-silver level that is consistent with archival processing. Neither the Edwal Hypo-Check nor film-clip tests are sensitive enough to give a positive when the dissolved silver in the fix for fiber-base prints has reached the levels when the fix needs to be discarded or changed (i.e., 2g/l for bath one and max. 0.5g/l for bath two).

I like to use throughput and then the above test to establish a reliable workflow and then regularly test the last print through the fixer. As for capacity, I like 36 8x10s or equivalent per liter for bath one. This has a built-in safety factor and gives me three batches in my 12-print washer too. Bath two is fresh and replaces bath one when its throughput capacity has been reached. This cycle gets repeated 4-5 times before I mix both baths fresh. I encourage you to test for yourself.

Hope this helps,

Doremus
 
OP
OP
Joined
Feb 25, 2020
Messages
29
Location
New York
Format
35mm
For fiber-base prints, use two-bath fixation and then check for residual silver after washing to confirm proper fixation. Use the Kodak ST-1 test or use Kodak Rapid Selenium Toner 1+9 for the test. After washing, place a drop of the solution on an unexposed area of the print, wait three minutes and rinse. Any tint other than a slight cream-colored discoloration indicates inadequate fixing (Kodak used to make a color-comparison chart for this... Maybe you can find on in an old Darkroom Dataguide or on the Internet somewhere.) For testing the efficiency of your washer, i.e., if the edges and centers of the prints get washed evenly, use a blank sheet of paper run through exhausted fixer and test many different spots on the print.

As far as fixer capacity is concerned; I have not found a method of testing the fixer solution itself that is convenient and sensitive enough to indicate when the fixer has reached a dissolved-silver level that is consistent with archival processing. Neither the Edwal Hypo-Check nor film-clip tests are sensitive enough to give a positive when the dissolved silver in the fix for fiber-base prints has reached the levels when the fix needs to be discarded or changed (i.e., 2g/l for bath one and max. 0.5g/l for bath two).

I like to use throughput and then the above test to establish a reliable workflow and then regularly test the last print through the fixer. As for capacity, I like 36 8x10s or equivalent per liter for bath one. This has a built-in safety factor and gives me three batches in my 12-print washer too. Bath two is fresh and replaces bath one when its throughput capacity has been reached. This cycle gets repeated 4-5 times before I mix both baths fresh. I encourage you to test for yourself.

Hope this helps,

Doremus

Appreciate all this info Doremus!

I guess I’m trying to find the least time consuming method to test something like that - I’ve tested my archival washer and usually wash about an hr per print so testing the actual fix once in a while seems the most simple route

Would the FT-1 fixer test sold by Photographers formulary (screenshot attached) be any more accurate or still not a reliable measure?

Also of the bottom two products, which would be used for the test method you mentioned above?
 

Attachments

  • 28E949CE-A065-442B-99A6-0AF6ED734CE0.png
    28E949CE-A065-442B-99A6-0AF6ED734CE0.png
    493.8 KB · Views: 90
Joined
Sep 10, 2002
Messages
3,590
Location
Eugene, Oregon
Format
4x5 Format
JV,
The Formulary fixer test FT-1 is just potassium iodide, like Rudeofus mentioned above and similar, if not identical, to the Edwal Hypo Check. It's fine for testing film fixer, but not sensitive enough for testing fixing baths for fiber-base prints when archival processing. (The same problem as the film clip tests). There are some test strips available from chemical supply houses, etc. that are sensitive enough, but they're harder to get and rather more expensive. I've never found then necessary.

The other products from the Formulary are the same as the analogous Kodak formulas, i.e., Hypo Clearing Agent, Residual Silver Test, ST-1 and Residual Hypo Test HT-2. I discussed those above.

If you're looking for a quick test, don't test the fixer itself, rather test a print with selenium toner. It's easy to mix a test solution and store it; it keeps indefinitely. You have to use it on a fully washed print, but it's really just a check on your workflow, not an indicator of when to toss the fix. Just a drop on the border, wait 3 minutes and see how your fix is doing. Really, if you use two-bath fixation and limit bath one to 40 8x10s or equivalent per liter, you should be more than fine. Just test the last print through the used first bath with the selenium test to ensure that you haven't overused the fixer.

Here are the details for the selenium test. This is for the Kodak Rapid Selenium Toner, but Ilford and other toners should work too.

Using Kodak Rapid Selenium Toner as a Residual-Silver Test

(according to Tech Pub. J-1, 1973, p.41.)
Kodak Rapid Selenium Toner 1+9 with water [You can keep this as a stock solution so all you need is an eyedropper to test.]
1. Place a drop of the diluted solution on a squeegeed, white margin of a print or a clear part of film.
2. Wait two to three minutes; then wipe off the drop with a clean blotter or cloth. Any discoloration other than a slight cream tint indicates the presence of silver. Refix.

That's it.

If you decide to look for the test strips, you need strips that will resolve down to 0.5 g/l of retained thiosulfate or less in order to have it be worthwhile. You need to toss the first fix before it reaches 2 g/l according to Ilford. Grant Haist liked much less, about 0.8 g/l IIRC. The second bath need to never exceed 0.5 g/l ; Haist likes less here too.

I understand your reluctance to spend a lot of time testing; I'm like that too. That's why I've settled on the selenium test and a workflow with a built in safety factor. I test once per every 35-40 prints and it only takes three minutes.

Best,

Doremus
 
OP
OP
Joined
Feb 25, 2020
Messages
29
Location
New York
Format
35mm
JV,
The Formulary fixer test FT-1 is just potassium iodide, like Rudeofus mentioned above and similar, if not identical, to the Edwal Hypo Check. It's fine for testing film fixer, but not sensitive enough for testing fixing baths for fiber-base prints when archival processing. (The same problem as the film clip tests). There are some test strips available from chemical supply houses, etc. that are sensitive enough, but they're harder to get and rather more expensive. I've never found then necessary.

The other products from the Formulary are the same as the analogous Kodak formulas, i.e., Hypo Clearing Agent, Residual Silver Test, ST-1 and Residual Hypo Test HT-2. I discussed those above.

If you're looking for a quick test, don't test the fixer itself, rather test a print with selenium toner. It's easy to mix a test solution and store it; it keeps indefinitely. You have to use it on a fully washed print, but it's really just a check on your workflow, not an indicator of when to toss the fix. Just a drop on the border, wait 3 minutes and see how your fix is doing. Really, if you use two-bath fixation and limit bath one to 40 8x10s or equivalent per liter, you should be more than fine. Just test the last print through the used first bath with the selenium test to ensure that you haven't overused the fixer.

Here are the details for the selenium test. This is for the Kodak Rapid Selenium Toner, but Ilford and other toners should work too.

Using Kodak Rapid Selenium Toner as a Residual-Silver Test

(according to Tech Pub. J-1, 1973, p.41.)
Kodak Rapid Selenium Toner 1+9 with water [You can keep this as a stock solution so all you need is an eyedropper to test.]
1. Place a drop of the diluted solution on a squeegeed, white margin of a print or a clear part of film.
2. Wait two to three minutes; then wipe off the drop with a clean blotter or cloth. Any discoloration other than a slight cream tint indicates the presence of silver. Refix.

That's it.

If you decide to look for the test strips, you need strips that will resolve down to 0.5 g/l of retained thiosulfate or less in order to have it be worthwhile. You need to toss the first fix before it reaches 2 g/l according to Ilford. Grant Haist liked much less, about 0.8 g/l IIRC. The second bath need to never exceed 0.5 g/l ; Haist likes less here too.

I understand your reluctance to spend a lot of time testing; I'm like that too. That's why I've settled on the selenium test and a workflow with a built in safety factor. I test once per every 35-40 prints and it only takes three minutes.

Best,

Doremus

Amazing info Doremus!!

I guess my preference would've been to directly test the fixer without other variables involved (washing method in case of ST-1 test) but in the end having a accurate way of testing the workflow is what's most important

I have a bunch of Kodak Selenium Toner so i will mix a batch to that dilution and give it a try. Just to clarify though, are you saying that the print i test (between #35-40) should only be fixed through the 1st bath (so instead of 30sec in each bath w/ TF-5 i do a full minute in bath one)? The way you worded in above post i'm not sure

Also for testing the efficiency of the washer (mentioned in your original reply), running through exhausted fixer means that each drop on the blank sheet will produce a stain I assume. So am i comparing the amount of discoloration from center to edge in order to judge how evenly the paper is getting washed?

Thanks!
-Justin
 
Joined
Sep 10, 2002
Messages
3,590
Location
Eugene, Oregon
Format
4x5 Format
Amazing info Doremus!!

I guess my preference would've been to directly test the fixer without other variables involved (washing method in case of ST-1 test) but in the end having a accurate way of testing the workflow is what's most important

I have a bunch of Kodak Selenium Toner so i will mix a batch to that dilution and give it a try. Just to clarify though, are you saying that the print i test (between #35-40) should only be fixed through the 1st bath (so instead of 30sec in each bath w/ TF-5 i do a full minute in bath one)? The way you worded in above post I'm not sure

Also for testing the efficiency of the washer (mentioned in your original reply), running through exhausted fixer means that each drop on the blank sheet will produce a stain I assume. So am i comparing the amount of discoloration from center to edge in order to judge how evenly the paper is getting washed?

Thanks!
-Justin

Justin,

First, keep in mind that there are two tests for two different things in play here. There's a test for adequate fixing, which tests the print for residual silver complexes that have not been fixed out. These are the ST-1 test and its substitute, the test with selenium toner. Then there's the test for adequate washing, which tests for "hypo," or residual fixer in the print that hasn't been washed out. That's the HT-2 test. Note that you need to have adequate washing before you test for residual silver, which means that ideally, you should do the HT-2 test first. That test, however, doesn't address fixation; only washing.

To test for adequate fixation (ST-1 or the selenium toner drop tests), you should process the print fully (both fixing baths) and wash thoroughly before testing (test with HT-2 if your not sure of your washing). You don't need much of a "batch" of the selenium test solution. An eydropper-bottleful lasts a long time. Mix your toner 1+9 and save it for testing only.

Start with recommended throughput, which for TF-5 is ~40 8x10s per liter. I never exceed that and am happy with not squeezing the very last bit of capacity out of my fixer. Personally, I shoot for 36 8x10s per liter. Test the last print through both fixing baths after it has been adequately washed.

If you want to test your regime to exhaustion, keep going after those 40 8x10s (knowing you'll have to refix some prints later). Test at 45, 50, 55. 60... till you find a print that tests positive (keep in mind, you need both baths and a good wash). Once you find that point, evaluate the prints that you've been printing: are they of average density (e.g., equal/normal amounts of light and dark areas) or primarily high or low key? If they're low key or rather dense, there will be overall less unexposed silver compounds to wash out (i.e., less of a load on the fixer) and vice-versa. Take this into account when deciding what your fixer capacity should be. Now, take the last 5-10 prints you made and refix them in fresh fixer to be sure everything is fixed properly.

To establish a workable capacity, take the point at which you get a positive reading and add a generous safety factor (for those times when you process a lot of high-key prints, etc.). If your positive is at, say, 55 prints, then the 40 8x10s number looks pretty good. If you get significantly more prints than that, then you can up the number if you like. I've found that the manufacturers' recommendations, while maybe a bit conservative, are quite good.

Then, keep an eye on your process by testing the last print through a batch of fixers every time by simply doing the drop test. If you get positives more than once, you should revise your capacity downward (and refix prints back down the line when you do get a positive).

Or, you can skip the whole workflow test and just use the 40 8x10s as a starting point and just testing the last print through. If it's okay, you're good to go. You've left the testing to the manufacturer, who has come up with a conservative capacity number and a generous safety factor.

Best,

Doremus
 
OP
OP
Joined
Feb 25, 2020
Messages
29
Location
New York
Format
35mm
Justin,

First, keep in mind that there are two tests for two different things in play here. There's a test for adequate fixing, which tests the print for residual silver complexes that have not been fixed out. These are the ST-1 test and its substitute, the test with selenium toner. Then there's the test for adequate washing, which tests for "hypo," or residual fixer in the print that hasn't been washed out. That's the HT-2 test. Note that you need to have adequate washing before you test for residual silver, which means that ideally, you should do the HT-2 test first. That test, however, doesn't address fixation; only washing.

To test for adequate fixation (ST-1 or the selenium toner drop tests), you should process the print fully (both fixing baths) and wash thoroughly before testing (test with HT-2 if your not sure of your washing). You don't need much of a "batch" of the selenium test solution. An eydropper-bottleful lasts a long time. Mix your toner 1+9 and save it for testing only.

Start with recommended throughput, which for TF-5 is ~40 8x10s per liter. I never exceed that and am happy with not squeezing the very last bit of capacity out of my fixer. Personally, I shoot for 36 8x10s per liter. Test the last print through both fixing baths after it has been adequately washed.

If you want to test your regime to exhaustion, keep going after those 40 8x10s (knowing you'll have to refix some prints later). Test at 45, 50, 55. 60... till you find a print that tests positive (keep in mind, you need both baths and a good wash). Once you find that point, evaluate the prints that you've been printing: are they of average density (e.g., equal/normal amounts of light and dark areas) or primarily high or low key? If they're low key or rather dense, there will be overall less unexposed silver compounds to wash out (i.e., less of a load on the fixer) and vice-versa. Take this into account when deciding what your fixer capacity should be. Now, take the last 5-10 prints you made and refix them in fresh fixer to be sure everything is fixed properly.

To establish a workable capacity, take the point at which you get a positive reading and add a generous safety factor (for those times when you process a lot of high-key prints, etc.). If your positive is at, say, 55 prints, then the 40 8x10s number looks pretty good. If you get significantly more prints than that, then you can up the number if you like. I've found that the manufacturers' recommendations, while maybe a bit conservative, are quite good.

Then, keep an eye on your process by testing the last print through a batch of fixers every time by simply doing the drop test. If you get positives more than once, you should revise your capacity downward (and refix prints back down the line when you do get a positive).

Or, you can skip the whole workflow test and just use the 40 8x10s as a starting point and just testing the last print through. If it's okay, you're good to go. You've left the testing to the manufacturer, who has come up with a conservative capacity number and a generous safety factor.

Best,

Doremus

Thank you again Doremus, this has been so informative!

I built my darkroom a few months ago and have a Versalab 11x14 print washer. Never took the time to test it properly but I tend to over wash prints....although that isn't necessarily the best policy and might be a reason why I get such a strong curl during drying (also very low humidity in my space)

I will perform the HT-2 test to get a better idea of suitable wash time and then start using the selenium toner test moving forward

Since I print 11x14 it works out to about 20 sheets per liter of working solution so I will keep that as a maximum and then test the 20th print just for precaution

I do use split grade and my prints tend to be rather dense with deep blacks/lots of midtones so depending on the results of the 20th print I might need to bring that number down a bit

Thanks!

-Justin
 
Joined
Sep 10, 2002
Messages
3,590
Location
Eugene, Oregon
Format
4x5 Format
Justin,

I tend to like long wash times - 60 minutes or more - and I don't have excessive problems with prints curling. In my experience, it's the drying speed that affects the print curl more: faster drying = more curl.

The HT-2 test originally had a color-comparison strip to compare the color of the stain on the test print with. I think you can find them in old Kodak Darkroom Dataguides as well as online in places. Edit: Found it here on Ed Buffaloe's site: https://unblinkingeye.com/Articles/Archival/archival.html . It's at the bottom of the page with the formula. The whole page is worth reading too.

I don't know about you, but when I print 11x14, I use two liters of solution in my trays. In 12x16 trays that's still just barely enough to cover the print well. If you can get by with just one liter of solution, then fine, your 20 11x14 prints per liter throughput is fine. For me, it's 36 11x14s per 2 liters :smile:

Just so you know, the more black in the image, the less the fixer has to work. It's the lighter prints (with less developed-out silver) that works the fixer harder. Nevertheless, you should be well under capacity either way with 20 11x14s per liter.

Best,

Doremus
 
OP
OP
Joined
Feb 25, 2020
Messages
29
Location
New York
Format
35mm
Yes I’ve noticed that as well, leaving the ventilation running seems to increase the effect but even with it off the curl is significant. I have considered mixing a solution of glycerin and using after final wash to remedy - even with 1-2 minutes in a dry mount press @ 150F I still do not have a truly flat print. Makes scanning a little cumbersome which I do for the majority of images because I’m shooting mostly fashion editorial

Thank you for the link, will look into it once I get the solution and start testing.

I also use 2L per tray! Was just referencing 1L as the unit of measure. I guess 36 is more conservative so I will start using the selenium test at that point

That makes total sense, I assume it’s the opposite for developer however? Denser prints exhaust it quicker?

Thanks Doremus!
 
Joined
Sep 10, 2002
Messages
3,590
Location
Eugene, Oregon
Format
4x5 Format
Yes I’ve noticed that as well, leaving the ventilation running seems to increase the effect but even with it off the curl is significant. I have considered mixing a solution of glycerin and using after final wash to remedy - even with 1-2 minutes in a dry mount press @ 150F I still do not have a truly flat print. Makes scanning a little cumbersome which I do for the majority of images because I’m shooting mostly fashion editorial
Fiber-base prints never get really flat till you dry-mount them. It's one of the reasons I dry mount. Still, you should be able to get a fairly flat print with the mounting press. Maybe a little hotter or a little longer?

I also use 2L per tray! Was just referencing 1L as the unit of measure. I guess 36 is more conservative so I will start using the selenium test at that point
I use 36 prints per liter mostly because my final sessions are toning sessions and 36 prints is exactly three batches in my 12-slot print washers. 40 would likely be fine.

That makes total sense, I assume it’s the opposite for developer however? Denser prints exhaust it quicker?
Yep!

Have fun,

Doremus
 

removed account4

Subscriber
Joined
Jun 21, 2003
Messages
29,832
Format
Hybrid
Most people don’t use hypocheck as directed .. one needs to extract about -1oz - put the drops in and mix it, most folks put the drops in a tray and get a false read. it’s not too accurate with speed.fixers clip tests on the other hand might be your friend YMMV
 

Sirius Glass

Subscriber
Joined
Jan 18, 2007
Messages
50,366
Location
Southern California
Format
Multi Format
Most people don’t use hypocheck as directed .. one needs to extract about -1oz - put the drops in and mix it, most folks put the drops in a tray and get a false read. it’s not too accurate with speed.fixers clip tests on the other hand might be your friend YMMV

That sounds like a good practice. I will adopt it. Thank you.
 
OP
OP
Joined
Feb 25, 2020
Messages
29
Location
New York
Format
35mm
Most people don’t use hypocheck as directed .. one needs to extract about -1oz - put the drops in and mix it, most folks put the drops in a tray and get a false read. it’s not too accurate with speed.fixers clip tests on the other hand might be your friend YMMV

I just learned that recently! Have always seen people just drop into tray - also prevents from contaminating fixer

I think Doremus point is that its not as accurate a method compared to St-1 for archival purposes

Overall i think keeping track of print throughput and establishing a conservative baseline is easiest, considering cost per print for fixer is relatively low
 
OP
OP
Joined
Feb 25, 2020
Messages
29
Location
New York
Format
35mm
I use 36 prints per liter mostly because my final sessions are toning sessions and 36 prints is exactly three batches in my 12-slot print washers. 40 would likely be fine.

Are you saying that you do a toning session every 12 prints or you're keeping three prints in each slot and then toning all 36 together?

Fiber-base prints never get really flat till you dry-mount them. It's one of the reasons I dry mount. Still, you should be able to get a fairly flat print with the mounting press. Maybe a little hotter or a little longer?

When I go hotter I tend to see crease marks along the edges - i will more often go longer at the 150F temp setting. Neither method gets them to what i would consider flat. Even after leaving them under a piece of heavy glass for 2-3 days its noticeable (overall curvature of print and then mild ripples along the edges)

I also notice a huge variance in curl between prints that have all been put out on the drying screens at the same time which leads me to believe there's another variable involved. Some do sit in the wash for considerably longer than others during a session but I still haven't been able to correlate the wash times to the variance in curling
 
Joined
Sep 10, 2002
Messages
3,590
Location
Eugene, Oregon
Format
4x5 Format
Justin,

My work flow is as follows: I do printing sessions (doing the usual test strips, test prints, attempts, etc. etc.) which consists of developer, stop and first fix. The printing sessions consist of a lot of evaluating, experimenting, deciding on contrast, manipulations, bleaching, etc., etc. At the end of a day's printing session, I might have four or five prints total, sometimes fewer that I want to keep. I wash and dry the keepers for a later toning session. As I work, I keep track of the number of prints through the first fix (including test strips) so I can toss the fix when I reach 35-40 prints. Often, I'll print for five or six days, accumulating prints as I go and mixing new fixer as needed for bath one.

When I've accumulated 30-36 keepers, I'll do a toning session.

To prepare for the toning session, I toss my first fix and mix a fresh fix for bath two. My workflow for the toning session is:
Water soak - fix two - selenium toner - wash aid - wash.
I like to keep my throughput through bath two to 36 prints because it's exactly three batches in my 12-slot washers. I have several, so at times I'll have two washers running. Sometimes, however, I'll just do three separate washes. After toning the first 12, I'll fill the washer and then start in on the other prints. The wash for the first batch is done before I've got 12 more prints toned (I tone one-at-a-time, so fixing time plus 3-6 minutes in the toner times 12 is almost always more than an hour), so I'll empty the washer and get the prints on drying racks and then fill it again with the next batch, which is waiting in the wash-aid tray. Then I'll resume toning the rest of the prints. Toning 36 prints is enough work for a light day for me; usually four to six hours total.

I usually tone once a week when I'm printing. I print for four or five days, tone one day and do other stuff on the other days :smile: If I print again right after the toning session, I'll use the fixing bath two from the toning session as bath one for the next printing session. Hope all that's clear.

As for print curl: The only real solution I have found is to dry mount the prints. I never display or show prints formally without having mounted them. All my portfolios are mounted on 4-ply board with overmats. Only my close friends see unmounted prints. I'd never hang a print on hinges and then hope that the overmat would hold it flat; I hate wavy prints mounted this way. My personal preference is to trim the print exactly to the borders I want, mount it, and then overmat it with a window opening slightly larger than the print itself.

Best,

Doremus
 
OP
OP
Joined
Feb 25, 2020
Messages
29
Location
New York
Format
35mm
Justin,

My work flow is as follows: I do printing sessions (doing the usual test strips, test prints, attempts, etc. etc.) which consists of developer, stop and first fix. The printing sessions consist of a lot of evaluating, experimenting, deciding on contrast, manipulations, bleaching, etc., etc. At the end of a day's printing session, I might have four or five prints total, sometimes fewer that I want to keep. I wash and dry the keepers for a later toning session. As I work, I keep track of the number of prints through the first fix (including test strips) so I can toss the fix when I reach 35-40 prints. Often, I'll print for five or six days, accumulating prints as I go and mixing new fixer as needed for bath one.

When I've accumulated 30-36 keepers, I'll do a toning session.

To prepare for the toning session, I toss my first fix and mix a fresh fix for bath two. My workflow for the toning session is:
Water soak - fix two - selenium toner - wash aid - wash.
I like to keep my throughput through bath two to 36 prints because it's exactly three batches in my 12-slot washers. I have several, so at times I'll have two washers running. Sometimes, however, I'll just do three separate washes. After toning the first 12, I'll fill the washer and then start in on the other prints. The wash for the first batch is done before I've got 12 more prints toned (I tone one-at-a-time, so fixing time plus 3-6 minutes in the toner times 12 is almost always more than an hour), so I'll empty the washer and get the prints on drying racks and then fill it again with the next batch, which is waiting in the wash-aid tray. Then I'll resume toning the rest of the prints. Toning 36 prints is enough work for a light day for me; usually four to six hours total.

I usually tone once a week when I'm printing. I print for four or five days, tone one day and do other stuff on the other days :smile: If I print again right after the toning session, I'll use the fixing bath two from the toning session as bath one for the next printing session. Hope all that's clear.

As for print curl: The only real solution I have found is to dry mount the prints. I never display or show prints formally without having mounted them. All my portfolios are mounted on 4-ply board with overmats. Only my close friends see unmounted prints. I'd never hang a print on hinges and then hope that the overmat would hold it flat; I hate wavy prints mounted this way. My personal preference is to trim the print exactly to the borders I want, mount it, and then overmat it with a window opening slightly larger than the print itself.

Best,

Doremus

Hey Doremus,

Hope you've been safe and well the past months.

I've been using a throughput of 35 11x14s for my fixing and did an ST-1 test the other day. Attached is an image of the spot, would this be considered a "slight cream discoloration"? Its my first time actually giving this a try

-Justin

IMG_0072.JPG IMG_0072 2.jpg
 
Photrio.com contains affiliate links to products. We may receive a commission for purchases made through these links.
To read our full affiliate disclosure statement please click Here.

PHOTRIO PARTNERS EQUALLY FUNDING OUR COMMUNITY:


Ilford ADOX Freestyle Photographic Stearman Press Weldon Color Lab Blue Moon Camera & Machine
Top Bottom