How to use a light meter in the darkroom?

about to extinct

D
about to extinct

  • 0
  • 0
  • 12
Fantasyland!

D
Fantasyland!

  • 9
  • 2
  • 91
perfect cirkel

D
perfect cirkel

  • 2
  • 1
  • 119
Thomas J Walls cafe.

A
Thomas J Walls cafe.

  • 4
  • 6
  • 273

Recent Classifieds

Forum statistics

Threads
198,745
Messages
2,780,255
Members
99,692
Latest member
jglong
Recent bookmarks
0

samhuwyler

Member
Joined
Oct 14, 2015
Messages
52
Location
Switzerland
Format
Multi Format
Hello Everyone

I'm currently working on a Portrait series and have to get a lot of printing done. I do test strips and all but still, I use up a lot of paper before I'm happy with a print.
I remember hearing something about using a light meter in the darkroom to determine density of the film and use this information to calculate printing time. I searched the web but couldn't find any explanation how this actually works.
Does anyone know a good website or such to understand this procedure?

Thank you and
Cheers from Switzerland
sam
 
Last edited:

RSalles

Member
Joined
Aug 29, 2013
Messages
142
Location
RS - Brazil
Format
4x5 Format
I have an enlarger attachment in a Gossen Lunasix light meter, but found it mostly useless as I have to make test strips anyway for fine tunning. Something as the RH designs f-stop timer would be great,

Cheers,

Renato
 

rpavich

Member
Joined
Aug 24, 2015
Messages
1,520
Location
West virginia, USA
Format
35mm
I have an enlarger attachment in a Gossen Lunasix light meter, but found it mostly useless as I have to make test strips anyway for fine tunning. Something as the RH designs f-stop timer would be great,

Cheers,

Renato
Well...I sympathize with the OP and I'll chime in having had the RH Designs Analyzer Pro for one day now. :smile:

It's awesome. Click-measure-shadow.....click-measure-highlight...print.

No test strips necessary to get to a VERY GOOD print (without fine tuning if you choose to) and burning is a breeze also.

I know it's expensive but for what paper costs these days, it will pay for itself in a year or two.
 
OP
OP
samhuwyler

samhuwyler

Member
Joined
Oct 14, 2015
Messages
52
Location
Switzerland
Format
Multi Format
Hi Sam,

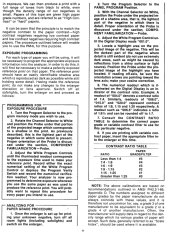
Here is the instruction sheet for the Ilford EM-10. You might be able to do something with it.

Good luck,

Neal Wydra

Thank you, the Ilford EM-10 looks like a handy tool. But I can't convert the Information given by the instruction sheet to work with my light meter.

Well...I sympathize with the OP and I'll chime in having had the RH Designs Analyzer Pro for one day now. :smile:

It's awesome. Click-measure-shadow.....click-measure-highlight...print.

No test strips necessary to get to a VERY GOOD print (without fine tuning if you choose to) and burning is a breeze also.

I know it's expensive but for what paper costs these days, it will pay for itself in a year or two.

That thing looks awesome! Awesome and expensive.
I might consider buying something like that in the future, but since I'm currently a student my budget for awesome photo-gear is limited.
That's why I'm looking for a way to use my light meter. I figured, since it can read the light in incident and reflected both shown in EV, there gotta be a way to use it for printing. But maybe I'm wrong...

Thank you and Cheers
Sam
 

rpavich

Member
Joined
Aug 24, 2015
Messages
1,520
Location
West virginia, USA
Format
35mm
Thank you, the Ilford EM-10 looks like a handy tool. But I can't convert the Information given by the instruction sheet to work with my light meter.


That thing looks awesome! Awesome and expensive.
I might consider buying something like that in the future, but since I'm currently a student my budget for awesome photo-gear is limited.
That's why I'm looking for a way to use my light meter. I figured, since it can read the light in incident and reflected both shown in EV, there gotta be a way to use it for printing. But maybe I'm wrong...

Thank you and Cheers
Sam
Yes...it is a bit but considering what I've spent in test strip paper in the last year, it's going to pay for itself in about 2 years...then it's gravy from then on.
I don't think that there is a way to use a regular light meter for what you want, the only cheap alternative is that ilford meter thing and I think that only gets you close, you still have to use test strips to fine tune.
 
OP
OP
samhuwyler

samhuwyler

Member
Joined
Oct 14, 2015
Messages
52
Location
Switzerland
Format
Multi Format
Yes...it is a bit but considering what I've spent in test strip paper in the last year, it's going to pay for itself in about 2 years...then it's gravy from then on.
I don't think that there is a way to use a regular light meter for what you want, the only cheap alternative is that ilford meter thing and I think that only gets you close, you still have to use test strips to fine tune.

hmm, guess I'll have to stick to test strips till I can get myself a RH Designs Analyzer Pro.

Thanks for your advice.
 

DREW WILEY

Member
Joined
Jul 14, 2011
Messages
13,926
Format
8x10 Format
It's a lot easier, faster, and cheaper just to do simple test strips. Yeah, I do own several enlarging meters, including a very expensive, rare true projection densitometer that is about a hundred times more accurate than any typical light meter, and useful at far lower ranges than they are. But I only use that for very special technical applications. Ordinary light meters aren't going to be very useful for darkroom printing. Yeah, you can find
countless articles and posts about someone jerry-rigging these for enlarger use; but it reminds me of those old Popular Mechanics how-to articles explaining how you can make your own nuclear submarine using recycled washing machine parts.
 

MattKing

Moderator
Moderator
Joined
Apr 24, 2005
Messages
52,873
Location
Delta, BC Canada
Format
Medium Format
Sekonic may not offer an enlarging accessory for your meter.

Enlarging meters allow you to minimize the effect of variables when you change negatives and magnifications. So they can reduce the number of test strips.

The RH Designs equipment is great. But you can achieve a fair bit of its benefit from less expensive options, like the EM-10.
 

Jim Noel

Member
Joined
Mar 6, 2005
Messages
2,261
Format
Large Format
Thank you, the Ilford EM-10 looks like a handy tool. But I can't convert the Information given by the instruction sheet to work with my light meter.


That thing looks awesome! Awesome and expensive.
I might consider buying something like that in the future, but since I'm currently a student my budget for awesome photo-gear is limited.
That's why I'm looking for a way to use my light meter. I figured, since it can read the light in incident and reflected both shown in EV, there gotta be a way to use it for printing. But maybe I'm wrong...

Thank you and Cheers
Sam
You don't need to use your light meter if you have the EM10.
 

ic-racer

Member
Joined
Feb 25, 2007
Messages
16,544
Location
USA
Format
Multi Format
Many, or perhaps most, color analyzers have a gray or b&w channel. This allows them to be used to analyze b&w negatives. I got mine for free.
 

StephenT

Member
Joined
Jan 21, 2014
Messages
309
Location
Carolinas
Format
Multi Format
Ditto the color analyzer on the white channel. Reading the margin for a minimum exposure/maximum black gets you well into the ballpark for more productive test strips (which I still find helpful). So why use a meter and still do test strips? It just gets me a lot closer a lot quicker.
 

ic-racer

Member
Joined
Feb 25, 2007
Messages
16,544
Location
USA
Format
Multi Format
The ratios for paper contrast in this instruction manual can be used with other analyzers.
 

Attachments

  • color analyzer.jpg
    color analyzer.jpg
    746.5 KB · Views: 368

Leigh B

Member
Joined
Jan 17, 2011
Messages
2,059
Location
Maryland, USA
Format
Multi Format
Thank you, the Ilford EM-10 looks like a handy tool.
But I can't convert the Information given by the instruction sheet to work with my light meter.
Hi Sam,

You use the EM-10 instead of your light meter.

- Leigh
 

DREW WILEY

Member
Joined
Jul 14, 2011
Messages
13,926
Format
8x10 Format
All of this approach, including color analyzers, are just ballpark. You get to first base maybe, and then have to generate strips and even work prints to
do anything of serious quality. I used enlarging meters for Cibachrome work because it was so expensive, and I had developed some very predictable
protocols. This did save me overall time and money. Still, it was rare to get a "hole in one" print. I used the Gossen Labosix meter, which was rather
expensive new, though they sometimes turn up cheap nowadays. But even this was not accurate enough for the very critical densities need in complex multiple-mask procedures. So I bought the Rolls Royce of easel densitometers, which did one thing superbly, but was not itself a substitute
for an enlarging meter. I also had to develop my own math program to make sense of all this. No big deal, just needed a high-school log calculator
to convert density reading to time, that is, after a LOT of testing and readings on a conventional transmission densitometer to plot the families of curves, recip failure respective to a dozen different filter, on and on. Utter Hell the first hundred miles of sailing, after that, smooth water.
 
Joined
Dec 10, 2009
Messages
6,297
Format
Multi Format
I've used a Beseler enlarging meter and they work OK. But to me, nothing beats the accuracy of test strips. I think here are 2 approaches. The first approach is to use a diffuser and get an "average" exposure of the print. The more accurate is to take a reading of a highlight that has texture. A lot of meters are prone to "cosine" errors. This means that as the sensor gets further away from the center of the easel, the meter will receive less light unless you angle it towards the enlarger lens. Good luck!
 

MartinP

Member
Joined
Jun 23, 2007
Messages
1,569
Location
Netherlands
Format
Medium Format
You could also use your contact-sheet as a meter, with an adjustment based on each shot, if necessary.

Make the contact-sheet to give just off black (so you can barely discern the plain paper from paper-plus-film-base in the print). That will show you what you negs are really like regarding exposure and development. You can use the size of the projected area of light used to make the contact-sheet, to make a print that looks almost the same (contrast will be slightly off, but consistently so) at the same head-height with the same time.

In theory (hysterical laughter), there is no reason to have differing exposures on your negs but in practice you will quickly see what a small variation looks like, and be able to adjust time accordingly. Changing print-size squirts the same amount of light, ie. from the same enlarger-bulb, over a different number of square inches/cm. Factor in the difference in size by the ratio of the area of the smaller and larger print-areas and there you go -- a rather usefully close test print without a test-strip, unless you count the contact-sheet as a test-strip.
 
Joined
Dec 10, 2009
Messages
6,297
Format
Multi Format
Have anybody heard of this old-timer's trick? It just involves using a very dim light bulb. First you make the "perfect" print. Take note of the enlarger height, and exposure time. This trick involves calibrating the dim bulb in the dark. With the negative still in the enlarger and same F/stop, adjust the dimness of the bulb until a detailed highlight (dark part) on the easel disappears.
So for the next print, use the same enlarging time. But once you've composed your image on your easel, turn the f/stop of the lens until the detailed highlight of the negative disappears on the easel. You're basically using your eye as an enlarging meter. I tried this trick and it does work. It's been a while though. Has anybody else tried this?
 

DREW WILEY

Member
Joined
Jul 14, 2011
Messages
13,926
Format
8x10 Format
Whatever works, works. But I simply don't have time to fuss around with contact sheets, and enlarging meters seem to work way better for chrome
films than negatives. Then there's that six hundred pound gorilla in the room that you need to acknowledge - cosine error, which would require an
awfully expensive instrument to fully correct. If you have money for fancy toys, why not? But in the final analysis, you still have to waste some paper
to get a truly good print.
 

ac12

Member
Joined
Apr 27, 2010
Messages
720
Location
SF Bay Area (SFO), USA
Format
Multi Format
I use a similar device to the EM10.
The idea is to get close on the first try, so you waste less paper narrowing in on the exposure.
And for me who does not print often, it helps me a lot.

It worked great for me in the college darkroom, where I was not guaranteed to get any specific enlarger. I took whatever enlarger was not in use. As a result, I could not get used to the exposure characteristics of any specific enlarger.

All of these devices require the user to calibrate it.
So you have to make a GOOD print, the old fashioned way.
Then use that negative, print and exposure as your reference point to calibrate the device.
 

chriscrawfordphoto

Subscriber
Joined
Mar 12, 2007
Messages
1,887
Location
Fort Wayne, Indiana, USA
Format
Medium Format
It's a lot easier, faster, and cheaper just to do simple test strips. Yeah, I do own several enlarging meters, including a very expensive, rare true projection densitometer that is about a hundred times more accurate than any typical light meter, and useful at far lower ranges than they are. But I only use that for very special technical applications. Ordinary light meters aren't going to be very useful for darkroom printing. Yeah, you can find
countless articles and posts about someone jerry-rigging these for enlarger use; but it reminds me of those old Popular Mechanics how-to articles explaining how you can make your own nuclear submarine using recycled washing machine parts.


Gossen and Minolta sold enlarging attachments for their meters. I had the Minolta one, and it worked well. I didn't use it much though, was easier for me to just make test strips.
 

David Brown

Member
Joined
Feb 16, 2004
Messages
4,049
Location
Earth
Format
Multi Format
I've used both an Ilford EM10 and a Gossen with the enlarging attachment in the past. Nothing beats test strips, practice, and experience. Ultimately, there is no automation that will make up for the subjectivity of making a print look like one wishes it to look!
 
Photrio.com contains affiliate links to products. We may receive a commission for purchases made through these links.
To read our full affiliate disclosure statement please click Here.

PHOTRIO PARTNERS EQUALLY FUNDING OUR COMMUNITY:


Ilford ADOX Freestyle Photographic Stearman Press Weldon Color Lab Blue Moon Camera & Machine
Top Bottom