manfrominternet
Member
Hi all,
My experience with Photoshop (Photoshop 2022 to be precise) is beginner-intermediate. I shoot medium format (6x9) and large format (4x5) film, and I scan via my mirrorless camera. Since I try to get as much detail as possible I take, for example, 3 photos of a 6x9 negative (left side of the negative, middle, and finally the right side) and stitch them together with Photoshop's Photomerge tool. However, because of the natural vignetting with my mirroless camera (even when I use the Lens Profile Correction), I get these splotchy-looking skies that I can't quite fix. I've tried the Healing Brush Tool, the Patch Tool, the Clone Stamp Tool, and even the Color Replacement Tool. None of these tools are able to fix this problem, and actually make the sky look even more splotchy. There's a natural film grain that gets erased too if I try to over edit.
I've included a screenshot so you guys can see what I mean. Is there any way to quickly fix this problem? Any help from you Photoshop editing pros would be very, very much appreciated.
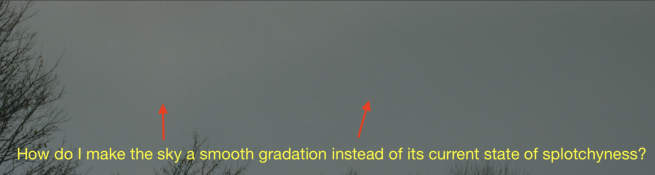