Help me solve this band of light problem? Not a classic light leak

There there

A
There there

  • 3
  • 0
  • 42
Camel Rock

A
Camel Rock

  • 7
  • 0
  • 154
Wattle Creek Station

A
Wattle Creek Station

  • 9
  • 2
  • 144

Forum statistics

Threads
198,960
Messages
2,783,798
Members
99,758
Latest member
Ryanearlek
Recent bookmarks
0

Camerarabbit

Member
Joined
May 7, 2020
Messages
131
Location
NYC
Format
35mm
Hello all. I've tried googling for the answer but this light leak I've been experiencing seems to be unique/less talked about. I bought a Yashica SLR (FX-D, lovely little machine) camera about a year ago and have recently started using it more often. About a month ago, I noticed a vertical light leak running through a lot of my photos, and the sprockets showing a leak as well. So I figured I just had to replace the seals. After replacing the seals, I shot with the camera outside, and the leak happened less often (and didnt hit the brackets anymore) but still happened, and seemed to be at random. I'd shoot a roll in an hour and the band would be on photo #3 and #27. So two days ago I taped up where the chamber door meets the camera and am STILL experiencing the problem. Did a test roll today and shot 20 photos, and the band appeared only once, but right AFTER the frame where I shot directly into the sun.
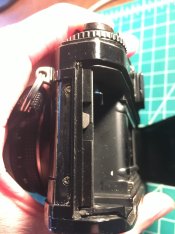
A photo of the light leak from today and my cam's horizontal shutter are at https://www.dropbox.com/sh/enqo08u1hv8j4i6/AADJwTFqpk2SZKD53C0pb_3Ga?dl=0
I'm guessing the problem is with the shutter - I've seen that it could maybe mean that the shutter isnt firing/opening correctly all the time- but would really appreciate any help you can provide before . PLease note that I havent seen this problem when I've shoot with the camera only indoors but if that is the case then it couldnt just be a problem with the shutter, could it?! And the band appears in the same position ever time. I've held a flashlight up to the shutter and no light comes through.
 

shutterfinger

Member
Joined
Feb 25, 2013
Messages
5,020
Location
San Jose, Ca.
Format
4x5 Format
In your sample photo the sun is to your right slightly in front of your shoulder. The left side of the frame has more exposure than the right with a sharp edge that you see as a light leak. The shutter in your camera is a vertical travel not horizontal travel.
When you view the negative to determine the problem area turn the negative upside down with the emulsion side facing away from you or lay the film in the camera in this orientation with the frame over the image opening. There is a slight light bleed into the sprockets at the top when in the camera.
Does the back sit flush to the body across the width of the camera? Does the camera back latch align with the body correctly? Did you replace the light seal around the mirror? If not, what condition is it in? Do you have an eye cup on your viewfinder eye piece?

How was the film processed?
 
Last edited:
OP
OP

Camerarabbit

Member
Joined
May 7, 2020
Messages
131
Location
NYC
Format
35mm
Thanks for taking a look! Light leak at the edge only appeared in these three frames, when I pointed the camera straight at the sun and fired. Yes, I replaced the light seal around the mirror. Back of cam seems flush. No eye cup on viewfinder eye piece. Do you think this was caused by some slight fogging leaking into the frame to the left of the shot of the sun? Looking at the negative again, it seems like the line appears in 10 as well, just more subtly. AhhHH!
 

reddesert

Member
Joined
Jul 22, 2019
Messages
2,416
Location
SAZ
Format
Hybrid
It's leaking somewhat on several frames (note the light strike on the edge of film), but is worst on the frame 11 before you shot into the sun on frame 12. I don't think it's coming from the sun in the frame, nor is it a shutter problem, but is from the sun striking the camera from outside.

Check the felt strip on the body next to the door hinge. It is probably totally dried up. IMO that is one place where you can get the vertical band a few mm across as seen in frame 11. When you wind the film on from frame 11, it sits next to the hinge for a while before you shoot frame 13, and that could be when it gets light struck.
 

shutterfinger

Member
Joined
Feb 25, 2013
Messages
5,020
Location
San Jose, Ca.
Format
4x5 Format
Many times a user will let the back swing open and bounce on the stop. This will bend the back causing it to be uneven when closing. Its easy to reform the back so that it sits flush across the back. Such a bend/warpage can cause the back to be higher on the hinge side or the latch side and can be hard to detect. If the back aligns with the body at the latch perfectly then its likely the back is not warped or bent. I have replaced light seals only to find they were not in the precise position they needed to be in to prevent a light leak. Side and back of the photographer lighting is where most light leaks come from. Side light cam enter the view finder eyepiece and fog the film but its unlikely it will bleed into the rebate/sprocket hole area.

Place a strip of film in the camera as it will be when making an exposure or load a scrapable roll of film and advance to frame 1 (back closed). Remove the lens, open the shutter on B with a locking cable release. Check the film for flatness across the full frame. Check the edges for even tightness all around the frame. Shine a bright light such as a MiniMag flashlight set to spot at 2 inches into the view finder eyepiece at various angles while observing the film at the film plane. Continue shinning the light around the perimeter of the back while observing the film plane. This will be best done in total darkness or a very dimly lit room. Anything other than total black on the film is a light leak.
 

petrk

Subscriber
Joined
Nov 30, 2017
Messages
119
Location
Prague
Format
Multi Format
My son has the FX-D which does the same light strikes. It comes from the back as shutterfinger has described in a previous post.
 
OP
OP

Camerarabbit

Member
Joined
May 7, 2020
Messages
131
Location
NYC
Format
35mm
It's leaking somewhat on several frames (note the light strike on the edge of film), but is worst on the frame 11 before you shot into the sun on frame 12. I don't think it's coming from the sun in the frame, nor is it a shutter problem, but is from the sun striking the camera from outside.

Check the felt strip on the body next to the door hinge. It is probably totally dried up. IMO that is one place where you can get the vertical band a few mm across as seen in frame 11. When you wind the film on from frame 11, it sits next to the hinge for a while before you shoot frame 13, and that could be when it gets light struck.

oh, duh, of course 11 comes before 12! just uploaded a photo of the foam near the door hinge, which i just replaced, but maybe it's not long enough? https://www.dropbox.com/sh/enqo08u1hv8j4i6/AADJwTFqpk2SZKD53C0pb_3Ga?dl=0 image named doorhinge.jpg. Also, uploaded some photos of these strange recessed areas above the seals. If anything else comes to mind please let me know!
 
OP
OP

Camerarabbit

Member
Joined
May 7, 2020
Messages
131
Location
NYC
Format
35mm
Many times a user will let the back swing open and bounce on the stop. This will bend the back causing it to be uneven when closing. Its easy to reform the back so that it sits flush across the back. Such a bend/warpage can cause the back to be higher on the hinge side or the latch side and can be hard to detect. If the back aligns with the body at the latch perfectly then its likely the back is not warped or bent. I have replaced light seals only to find they were not in the precise position they needed to be in to prevent a light leak. Side and back of the photographer lighting is where most light leaks come from. Side light cam enter the view finder eyepiece and fog the film but its unlikely it will bleed into the rebate/sprocket hole area.

Place a strip of film in the camera as it will be when making an exposure or load a scrapable roll of film and advance to frame 1 (back closed). Remove the lens, open the shutter on B with a locking cable release. Check the film for flatness across the full frame. Check the edges for even tightness all around the frame. Shine a bright light such as a MiniMag flashlight set to spot at 2 inches into the view finder eyepiece at various angles while observing the film at the film plane. Continue shinning the light around the perimeter of the back while observing the film plane. This will be best done in total darkness or a very dimly lit room. Anything other than total black on the film is a light leak.
Will try this this weekend and get back with you, thank you!
 
OP
OP

Camerarabbit

Member
Joined
May 7, 2020
Messages
131
Location
NYC
Format
35mm
Does anyone know someone who I could send this to for repair if I cant figure this out myself?
 

reddesert

Member
Joined
Jul 22, 2019
Messages
2,416
Location
SAZ
Format
Hybrid
oh, duh, of course 11 comes before 12! just uploaded a photo of the foam near the door hinge, which i just replaced, but maybe it's not long enough? https://www.dropbox.com/sh/enqo08u1hv8j4i6/AADJwTFqpk2SZKD53C0pb_3Ga?dl=0 image named doorhinge.jpg. Also, uploaded some photos of these strange recessed areas above the seals. If anything else comes to mind please let me know!

Slow down, because you need to think this through. Your "doorhinge.jpg" picture is actually of the latch end of the back, not the hinge.

At the latch end, the film is (mostly) safely inside the cassette. After you take an exposure and wind the film on, the last couple of exposed frames are near the hinge end and wound around the takeup spindle. These are vulnerable to light leaks from the back/body near the hinge end. On the body next to the hinge, there should be a strip of felt/foam. Often this has gotten dry or gummy and some of it is sticking to the back. This is what I am suggesting you check.

Some of the other pictures in your folder are things that are normal - for example, the photo labeled "May 07, 10 28 46 PM" shows the catch recessed into the light trap channel, which resets the film counter when the back is opened.
https://www.dropbox.com/sh/enqo08u1...gj9au35cEa/Photo May 07, 10 28 46 PM.jpg?dl=0
 

shutterfinger

Member
Joined
Feb 25, 2013
Messages
5,020
Location
San Jose, Ca.
Format
4x5 Format
Some of the other pictures in your folder are things that are normal - for example, the photo labeled "May 07, 10 28 46 PM" shows the catch recessed into the light trap channel, which resets the film counter when the back is opened.
When I replaced the seals on a Spotmatic I had a leak due to the seal not being close enough to the counter reset lever. The cutout in the trap is wider than the lever in the top of the camera and the plunger protrusion on the back that pushes it in.

In total darkness, back closed with no film in the camera, lens removed, shutter locked open on B, shine a light in through the lens opening and observe the camera back for hints of light coming out. Shine the light at different angles and edges of the image frame.
This is in addition to the light test in post 5.

The hinge, counter reset, latch, and ISO window if equipped are the usual suspects for light leaks.
 

petrk

Subscriber
Joined
Nov 30, 2017
Messages
119
Location
Prague
Format
Multi Format
Thanks! Do you just deal with it or is there a fix?
Well, yours camera has three sources of the leaks, it is more complicated then in our case. I think shutterfinger has some good advise, but I would probably simply tape the back on all sides and check the next film, if it helps. Then move the position of the tape around with next film and see what happens. This way you can find your the leak too.
 
OP
OP

Camerarabbit

Member
Joined
May 7, 2020
Messages
131
Location
NYC
Format
35mm
Well, yours camera has three sources of the leaks, it is more complicated then in our case. I think shutterfinger has some good advise, but I would probably simply tape the back on all sides and check the next film, if it helps. Then move the position of the tape around with next film and see what happens. This way you can find your the leak too.
Thanks, Petrk. I've tried taping twice and it didnt solve the problem. Maybe I need to use a better tape, I've been using a black tape but maybe need to go with someone like gaffers
 
OP
OP

Camerarabbit

Member
Joined
May 7, 2020
Messages
131
Location
NYC
Format
35mm
When I replaced the seals on a Spotmatic I had a leak due to the seal not being close enough to the counter reset lever. The cutout in the trap is wider than the lever in the top of the camera and the plunger protrusion on the back that pushes it in.

In total darkness, back closed with no film in the camera, lens removed, shutter locked open on B, shine a light in through the lens opening and observe the camera back for hints of light coming out. Shine the light at different angles and edges of the image frame.
This is in addition to the light test in post 5.

The hinge, counter reset, latch, and ISO window if equipped are the usual suspects for light leaks.
will try that, thank you!!!
 
OP
OP

Camerarabbit

Member
Joined
May 7, 2020
Messages
131
Location
NYC
Format
35mm
Slow down, because you need to think this through. Your "doorhinge.jpg" picture is actually of the latch end of the back, not the hinge.

At the latch end, the film is (mostly) safely inside the cassette. After you take an exposure and wind the film on, the last couple of exposed frames are near the hinge end and wound around the takeup spindle. These are vulnerable to light leaks from the back/body near the hinge end. On the body next to the hinge, there should be a strip of felt/foam. Often this has gotten dry or gummy and some of it is sticking to the back. This is what I am suggesting you check.

Some of the other pictures in your folder are things that are normal - for example, the photo labeled "May 07, 10 28 46 PM" shows the catch recessed into the light trap channel, which resets the film counter when the back is opened.
Thanks, reddesert. Uploaded two more to the dropbox. In b.jpg, you'll see the the door hinge (I think!) with the new felt that I added a few weeks ago. Do you think there should be felt anywhere on the metal in a.jpg?
 

Attachments

  • a.jpg
    a.jpg
    736.1 KB · Views: 73

shutterfinger

Member
Joined
Feb 25, 2013
Messages
5,020
Location
San Jose, Ca.
Format
4x5 Format
I downloaded your "hinge" photo. The red circles is where the felt is too short. The red arrows are where the felt/foam should flush fit snugly to
. 28O1ZloA.jpeg

Light will bend 90° easily, 180° frequently, and 270° on occasion even on flat black surfaces.
 
Last edited:

reddesert

Member
Joined
Jul 22, 2019
Messages
2,416
Location
SAZ
Format
Hybrid
Is that new felt? It looks sort of like deteriorated lumpy felt, but I appreciate that it is hard to get it on factory-straight, and I don't think the straightness matters much, but the coverage does.

I am holding a Yashica FX-D (whose felt is a little rotten). The felt belongs on the body side. There isn't originally any felt on the door side of the hinge. A lot of cameras of this era are set up like that. Often, some of the old gummy felt winds up on the door; this can be gently scraped off. I agree with shutterfinger that the felt on the body side of the hinge should go all the way to the end.
 
OP
OP

Camerarabbit

Member
Joined
May 7, 2020
Messages
131
Location
NYC
Format
35mm
Is that new felt? It looks sort of like deteriorated lumpy felt, but I appreciate that it is hard to get it on factory-straight, and I don't think the straightness matters much, but the coverage does.

I am holding a Yashica FX-D (whose felt is a little rotten). The felt belongs on the body side. There isn't originally any felt on the door side of the hinge. A lot of cameras of this era are set up like that. Often, some of the old gummy felt winds up on the door; this can be gently scraped off. I agree with shutterfinger that the felt on the body side of the hinge should go all the way to the end.
Thank you! Yes, felt is new but will try again and let you know is that fixes it.
 
OP
OP

Camerarabbit

Member
Joined
May 7, 2020
Messages
131
Location
NYC
Format
35mm
I ordered foam on eBay, but wasnt too impressed with the quality. Is there a kind at Home Depot that someone can recommend?
 

shutterfinger

Member
Joined
Feb 25, 2013
Messages
5,020
Location
San Jose, Ca.
Format
4x5 Format

Kino

Subscriber
Joined
Jan 20, 2006
Messages
7,766
Location
Orange, Virginia
Format
Multi Format
A comprehensive light seal kit is available from Jon Goodman for $11 shipped. I have used about 10 of his kits and found everyone to be properly cut, of the right length and with instructions on how to install the seals properly.

jon_goodman@yahoo.com

Just email him; very easy!
 

removed account4

Subscriber
Joined
Jun 21, 2003
Messages
29,832
Format
Hybrid
A comprehensive light seal kit is available from Jon Goodman for $11 shipped. I have used about 10 of his kits and found everyone to be properly cut, of the right length and with instructions on how to install the seals properly.

jon_goodman@yahoo.com

Just email him; very easy!
I was just going to suggest this exact remedy ! :smile: !
Jon is one of the nicest people to wander this planet. his light seal kits are top notch too !
cameronrabbit good luck fixing your leak ..
John
 
Photrio.com contains affiliate links to products. We may receive a commission for purchases made through these links.
To read our full affiliate disclosure statement please click Here.

PHOTRIO PARTNERS EQUALLY FUNDING OUR COMMUNITY:


Ilford ADOX Freestyle Photographic Stearman Press Weldon Color Lab Blue Moon Camera & Machine
Top Bottom