Fiber Print Frilling

Kildare

A
Kildare

  • 0
  • 0
  • 100
Sonatas XII-27 (Homes)

A
Sonatas XII-27 (Homes)

  • 0
  • 1
  • 133
From the Garden

D
From the Garden

  • 1
  • 0
  • 788
Kildare

A
Kildare

  • 8
  • 2
  • 1K
Sonatas XII-26 (Homes)

A
Sonatas XII-26 (Homes)

  • 3
  • 2
  • 1K

Recent Classifieds

Forum statistics

Threads
199,311
Messages
2,789,490
Members
99,867
Latest member
jayhorton
Recent bookmarks
0

MattKing

Moderator
Moderator
Joined
Apr 24, 2005
Messages
53,326
Location
Delta, BC Canada
Format
Medium Format
KRST with hypo clearing agent?

KRST has sodium thiosulfate (aka sodium hyposulfate) in it.
I wonder what year the "hyposulfate" designation stopped being current?
 

mshchem

Subscriber
Joined
Nov 26, 2007
Messages
14,810
Location
Iowa City, Iowa USA
Format
Medium Format
KRST has sodium thiosulfate (aka sodium hyposulfate) in it.
I wonder what year the "hyposulfate" designation stopped being current?

I think hypo was common up through the 50's 60's, I started in the 60's with my Dad and it was always Fixer. Kodak F-5 fix came in a yellow cardboard box with waxed paper liner. The good old days.
I was referencing the common practice of using KHCA as a diluant for KRST.
 

MattKing

Moderator
Moderator
Joined
Apr 24, 2005
Messages
53,326
Location
Delta, BC Canada
Format
Medium Format
I think hypo was common up through the 50's 60's, I started in the 60's with my Dad and it was always Fixer

I was referring to the fact that the name of the constituent chemical actually was hyposulfate - not thiosulfate. That is where the shorthand "hypo" reference for fixer actually came from.
 

mshchem

Subscriber
Joined
Nov 26, 2007
Messages
14,810
Location
Iowa City, Iowa USA
Format
Medium Format
I was referring to the fact that the name of the constituent chemical actually was hyposulfate - not thiosulfate. That is where the shorthand "hypo" reference for fixer actually came from.

Yep, I realize that. I don't know if Kodak ever stopped referring to sodium thiosulfate as (hypo) in brackets, always referred to residual hypo test solution etc. It's just a nice bit of analogue colourful history 😊
 

Carnie Bob

Member
Joined
Nov 5, 2023
Messages
383
Location
Toronto , Ont Canada
Format
4x5 Format
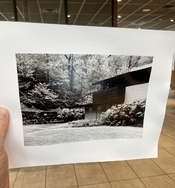
Depending on the ambient heat and humidity, my prints can look anywhere from like a shallow tray to a piece of bacon when they come off the drying screens. I need to be especially careful with the severely scalloped ones when they go into the dry mount press, they can crease if I'm not careful.

I find that when the humidity is low in my space we get those kind of edges, I keep my space now at 50% RH and this is now not an issue for us
 

MarkS

Member
Joined
Mar 12, 2004
Messages
506
I'll describe my own practice- perhaps it may be of some use. When I take a wet print out of the washer, I place it face down against a sheet of plexi (which is standing up in the sink). Then I squeegee the back of the print; pick it off the plexi, turn it over, and repeat the process on the print's face. Then transfer it to a window screen, face up. I have 24x30" screens, they rest on a folding laundry rack. Everything is shut down and cleaned up already; so when all the prints are on the screens, I step out of the darkroom, close the door, and go back the next day to retrieve them. Dry prints spend time in the mount press, then under a flat steel plate.
I used this method when I lived in damp NY State, and it works about the same in desert Tucson.
Best of luck!
 

Philippe-Georges

Subscriber
Joined
Apr 11, 2005
Messages
2,680
Location
Flanders Fields
Format
Medium Format
I think it's around pH6.5 as color fixers usually are. That's neutral to very slightly acidic. It is a perfectly fine fixer for general purpose use. It won't help with the wavy edges, though.

On page 14 in the "Fuji Hunt Technical Bulletin Fixing Systems / E4 / 04-06" brochure, the work solution at 1+4, when fresh, is marked as pH7.5 +/- 0.2, and when seasoned it's pH6.7 +/- 0.5, all at 25°C.

That was what I measured at the time when my pH meter still worked and I was processing my own colour films (+ and -).
 

koraks

Moderator
Moderator
Joined
Nov 29, 2018
Messages
23,599
Location
Europe
Format
Multi Format
/ E4 / 04-06

That one I can't find, but what you say is possible - that the type you use is intended to become very slightly acidic (still pretty much neutral) due to bleach carry-over.
I use CN16 N3-R, which is pH7.10 fresh and 6.85 in a seasoned tank, so also neutral and leaning towards acidic - again, due to carryover. If you use your fix for prints, you will probably have an acidic stop bath before it (you really should), and the fixer will be slightly acidic due to this as well. The same in a film development process.
 
OP
OP
Joined
Jul 1, 2006
Messages
875
Location
Oklahoma, US
Format
Multi Format
I have one print session of being hyper careful on wash temps and drying the print. I fixed the print, Ilford WT FB, in TF-5. Prewash of one print was 30 min 3 water exchanges. I toned and skipped the wash aid cycle. The print was tray washed with 6 exchanges over 30 min period. My thoughts are the frilling was related to the wash or more likely the drying cycle.

I held the print up until it no longer dripped. Blotted the print with 3 blotters. Dried the print flipping it over several time. No sign of frilling.
 

Attachments

  • IMG_9194.jpeg
    IMG_9194.jpeg
    367.7 KB · Views: 41
Last edited:

Philippe-Georges

Subscriber
Joined
Apr 11, 2005
Messages
2,680
Location
Flanders Fields
Format
Medium Format
Last week I had the frilling syndrome attacking only 4 of the 12 prints, all were 24x24cm cut out of 24x30,5cm sheets and all coming out the same box FOMABROM FB III gloss.
These were not the first nor the last prints I made during that session, so it would not be due to staying in the water waiting bath till the final treatment.
Developed, stopped (citric acid), fixed (2 bath), rinsed, 2% Sodium sulphite prior to Selenium 1+9, rinsed, water waiting bath, K.H.C.A, washed (running water), Sistan, dried on insect screen during 2 days and pressed under marble plates for an other 2 days, all the same way as usual.

It was a long time a go it happend, but why only 4 of the 12 prints?
 

Saganich

Subscriber
Joined
Nov 21, 2004
Messages
1,280
Location
Brooklyn
Format
35mm RF
I'll describe my own practice- perhaps it may be of some use. When I take a wet print out of the washer, I place it face down against a sheet of plexi (which is standing up in the sink). Then I squeegee the back of the print; pick it off the plexi, turn it over, and repeat the process on the print's face. Then transfer it to a window screen, face up. I have 24x30" screens, they rest on a folding laundry rack. Everything is shut down and cleaned up already; so when all the prints are on the screens, I step out of the darkroom, close the door, and go back the next day to retrieve them. Dry prints spend time in the mount press, then under a flat steel plate.
I used this method when I lived in damp NY State, and it works about the same in desert Tucson.
Best of luck!

Same squeegee drying process also. I make sure surface water is removed. Once I was in a rush and didn't squeegee very well and frilling was abundant.
 
OP
OP
Joined
Jul 1, 2006
Messages
875
Location
Oklahoma, US
Format
Multi Format
Today printed (2) 8x10 Ilford FB WT prints. I washed as normal but paid more attention to even drying. Starts with letting the print drip all excess water off the surface. Than double the blotting sheets and flipped the prints several times as they dried. Half way to dry I placed a dry blotter under each print. Prints have no curl or edge frilling.

My issue was the drying phase. House temp was 69 degrees with AC on. Outside temps 64 - 79. Dry time 6-7 hours.
 
Last edited:

Maris

Member
Joined
Jan 17, 2006
Messages
1,576
Location
Noosa, Australia
Format
Multi Format
Years ago when I started making enlargements I used to get 100% frilled edges on my fibre based prints. Why? Because I was in a hurry and dried squeegeed (but still damp) prints in a flat bed print drier at high heat
I soon realised that a wet print was a different size to a dry print. Paper stretches less in the machine direction and more than the cross direction when soaking wet. My accelerated drying method was shrinking the paper unevenly, edges first - middle last, and the unequal rate of change in dimensions meant that the paper had to frill.

Getting rid of the flat bed print dryer was step one. Drying over night on screens was step two. No more hurry, no more frills.
 

Philippe-Georges

Subscriber
Joined
Apr 11, 2005
Messages
2,680
Location
Flanders Fields
Format
Medium Format
Years ago when I started making enlargements I used to get 100% frilled edges on my fibre based prints. Why? Because I was in a hurry and dried squeegeed (but still damp) prints in a flat bed print drier at high heat
I soon realised that a wet print was a different size to a dry print. Paper stretches less in the machine direction and more than the cross direction when soaking wet. My accelerated drying method was shrinking the paper unevenly, edges first - middle last, and the unequal rate of change in dimensions meant that the paper had to frill.

Getting rid of the flat bed print dryer was step one. Drying over night on screens was step two. No more hurry, no more frills.

Wat you call "machine direction" is the way the paper's (cellulose-) fibers are oriented during manufacturing, and you made a fair point by bringing this up.
This orientation follows the longest side which is parallel to the roll out when the fibers are 'laid' overlong by the raking during the couché.

About this matter, I had a very awful experience long time ago.
The printing of a sculptor's monographie, for which I committed the photography, turned out into a nightmare when the first chosen printing company went bankrupt and, in all haste, an other one had to take over the printing of that (B&W-) book.
The first printer had A0 size (841mm x 1189mm) machines and the second only had half that size machines.
But the paper (on demand made fine art printing paper from the UK) was already manufactured and out for delivery. It could be redirected, but that wasn't the problem.
The second printing company cut the sheets in half (=A1) and fed the paper in the machine to be printed perpendicular to the direction of the paper's fibers!
This resulted in to an atrocity of a frilling and gaping book!

This shows how important it is to be careful with FB paper, it is a nearly living product (cotton rag cellulose), but this is not so obvious because how to find the fiber's direction and what and how to do good?
 
Photrio.com contains affiliate links to products. We may receive a commission for purchases made through these links.
To read our full affiliate disclosure statement please click Here.

PHOTRIO PARTNERS EQUALLY FUNDING OUR COMMUNITY:


Ilford ADOX Freestyle Photographic Stearman Press Weldon Color Lab Blue Moon Camera & Machine
Top Bottom