Exposing a Carbon Tissue question

Flying Lady

A
Flying Lady

  • 3
  • 0
  • 30
Wren

D
Wren

  • 0
  • 0
  • 24
Not a photo

D
Not a photo

  • 1
  • 0
  • 38

Recent Classifieds

Forum statistics

Threads
199,035
Messages
2,785,048
Members
99,784
Latest member
Michael McClintock
Recent bookmarks
0

jaimeb82

Member
Joined
Nov 27, 2008
Messages
329
Format
Multi Format
I have the tissue sensitize and a 4x5 negative. Can someone tell me if the black part of the tissue is supposed to touch the emulsion side of the neg? How do I make this sandwich and how do I put the sandwich on a UV light? My rational tells me tissue down black part facing up, and negative emulsion down on top of the tissue and from there to the UV light in that position, like on Pt/Pl?

Thanks if someone can send some direction my way.

Jaime.
 

banana_legs

Member
Joined
Jan 9, 2010
Messages
48
Location
Wiltshire, U
Format
4x5 Format
Jaime,

Yes, mate the negative onto the black side of the tissue. If you are doing single transfer, then if you mate the emulsion side to the tissue, the image will come out reversed on the final support. I only worry if there is lettering in the image that would reverse; in that case I mate the black side of the tissue to the non-emulsion side of the negative, although it does cause a slight loss of sharpness.

A wise precaution is to place the tissue black side up, then put a thin piece of plastic film (I use cling-film for wrapping sandwiches) and then place the negative. I find that just occasionally I may get a little bit of tissue that was not fully dry and if place directly on the negative, it may stick and cause significant swearing.

Put the stack of tissue and film into a contact frame to squash it all together and then expose to UV light. I used an old picture frame for a while - one of the cheap board/glass 'clip frames', but made a decent wood contact frame eventually to save on plasters for the cuts on my hands.

Best regards,

Evan
 
OP
OP
jaimeb82

jaimeb82

Member
Joined
Nov 27, 2008
Messages
329
Format
Multi Format
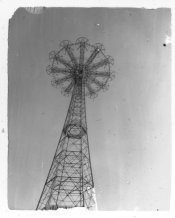
Hi Evan, thanks for explaining, I have a NUARC unit that I have never used before and the vacum doesn't seem to work. The light is in working condition. So I ended up finding glass around the house and clipping them together with 4 clips and putting that on the NUARC unit. It did the work and yes, I printed a 6x7 negative of Coney Island and it came out reverse. It was my first try at carbon, do you do Carbon back there in the old country?

Best,

Jaime.
 

Andrew O'Neill

Moderator
Moderator
Joined
Jan 16, 2004
Messages
12,046
Location
Coquitlam,BC Canada
Format
Multi Format
Hi Jaime,
The black part of the tissue is actually called "the tissue". This area must be in contact with the negative. Sometimes I place the negative on the tissue with its emulsion side facing away from the tissue if there is text in the image, otherwise it will transfer backwards (for single transfer work). Placing the emulsion against the tissue runs the risk of damage (tissue can stick if you expose too long with halogen system, etc, or tissue hasn't dried after sensitizing). If you are concerned about damaging a negative, a thin piece of mylar between neg and tissue will prevent them from sticking.
If you are into carbon transfer printing, check out the bostick & sullivan forum:
http://bostick-sullivan.invisionzone.com/index.php?/forum/68-carbon/
as well as Sandy King's carbon group on yahoo: Dead Link Removed
Many carbon printers hang out there, including myself.
 
Joined
Aug 6, 2005
Messages
1,798
Location
Ventura, Ca
Format
ULarge Format
Jaime, all sound advice that you have received. Always put some Mylar or other type of clear plastic between the tissue and the negative. The NuArc develops quite a bit of heat and can suck out any left over moisture in the tissue and possibly damage your negative. This can and will happen with very long exposures. The glass on the Nuarc is heavy and should not cause you problems holding the sandwich down with 4x5 images without the vacuum.
 

nworth

Member
Joined
Aug 27, 2005
Messages
2,228
Location
Los Alamos,
Format
Multi Format
If the sensitized tissue is at all damp, it will bleach the silver in a negative in contact with it. There is also the possible problem of getting flakes from the tissue adhered to the negative. Most people use inkjet negatives, so this is only a minor problem. Dick Sullivan suggests putting a silver negative into a 1 mil transparent sleeve for making a carbon print exposure. I've done it, and it works without significant loss of sharpness.
 
OP
OP
jaimeb82

jaimeb82

Member
Joined
Nov 27, 2008
Messages
329
Format
Multi Format
Thanks for all the advice and recomedations, I got my first image!
 

Attachments

  • first-carbon-b.jpg
    first-carbon-b.jpg
    65.8 KB · Views: 161

Hexavalent

Member
Joined
Nov 19, 2009
Messages
592
Location
Ottawa, Onta
Format
Multi Format
Congratulations Jaime! Nice print.

My first carbon looked wonderful, just before it slid off the paper and went down the drain :smile:
 
Joined
Aug 6, 2005
Messages
1,798
Location
Ventura, Ca
Format
ULarge Format
Ian, sorry to hear that. What type of tissue did you use? I find that if you make your own thick tissue it can eliminate this. Well, there are many other things that can cause the image to slide away. I've never had one do that yet!
 

Hexavalent

Member
Joined
Nov 19, 2009
Messages
592
Location
Ottawa, Onta
Format
Multi Format
Jim, the 'sliding image' fiasco happened years ago :smile: IIRC, the Yupo I used for the final support was dusty or oily.
I'm happy to say, it only happened the once!
 
Last edited by a moderator:
OP
OP
jaimeb82

jaimeb82

Member
Joined
Nov 27, 2008
Messages
329
Format
Multi Format
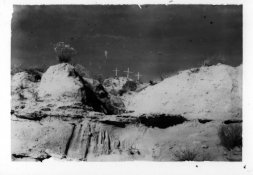
Thanks for the feedback, definitely the sliding and the frilling is my next thing to learn, in none of the prints so far I used the safe edge, I am worried about putting tape into the negative. Here is the third try at carbon, the second one was really dark and didn't stick well to the YUPO.
 

Attachments

  • Scan-110202-0002-b.jpg
    Scan-110202-0002-b.jpg
    77 KB · Views: 135

Vaughn

Subscriber
Joined
Dec 13, 2006
Messages
10,104
Location
Humboldt Co.
Format
Large Format
There are several ways to make safe edges without actually putting tape on the negative. The tissue should be about a half inch bigger than the negative all the way round -- and then the tape can go on the mylar between the neg and the tissue, on the glass of the vacuum frame, or cut a hole out of a larger piece of rubylith, etc.

Congrats on getting images!

I lost a few of my first images by trying to transfer to the back side of photopaper instead of the emulsion side.
 
OP
OP
jaimeb82

jaimeb82

Member
Joined
Nov 27, 2008
Messages
329
Format
Multi Format
Thanks Vaughn, I didn't think about that way of doing it, I will try tonight. I will try putting it between the mylar and the tissue since my NUARC vacum doesn't work at all. I've been reading about carbon for the past 6 months and finally put all the dots together and I am happy to see images coming my way. Thanks for teaching this technique via online APUG comments and other online resources.

Jaime.
 

Vaughn

Subscriber
Joined
Dec 13, 2006
Messages
10,104
Location
Humboldt Co.
Format
Large Format
Jaime, please feel free to contact me on-line or directly at any time with any questions about the process. I also have a pdf of my carbon printing instructions that I use for workshops, if you do not have a copy (free). I can't remember who I have sent them to.

email: Vaughn.Hutchins "at" humboldt.edu
 

Curt

Member
Joined
Sep 22, 2005
Messages
4,618
Location
Pacific Nort
Format
Multi Format
Jaime, it's exciting to see your prints. Remember when Mark asked me to explain why a safe edge was meeded? Espanola seems like years ago now. I've tried several ways to do it. One way is Ruby lith tape, another is electrical tape, I've even used magnetic strips placed on the glass.

When you start making digital negatives you can add the safe edge in. If you follow Vaughn's procedures you can't miss. I'll pm you and try to call later in the week. I received the package and will be sending it to a place Mark recommended for a checkup.

What size negative was the last print made from?

Curt
 
OP
OP
jaimeb82

jaimeb82

Member
Joined
Nov 27, 2008
Messages
329
Format
Multi Format
Hi Curt, glad to know you got the 7II. I already did 3 4x5 prints, the last one is nice but definitely need to start using a safe edge. It made a huge difference after I tried one print, then the process became a bit more accessible to do. I stayed late 3 or 4 nights and made a total of 8 prints, that way I can remember the steps, :smile:. I am almost finish developing all my 4x5 from Barcelona so I can convert them into carbon. Thanks for your advice on carbon.

Jaime.
 

Jim Graves

Member
Joined
Jul 28, 2007
Messages
37
Location
Sacramento,
Format
Large Format
Jaime ... fabulous first prints. One of the hardest things to do in carbon is lots of sky ... yours came out great.
 
Joined
Aug 6, 2005
Messages
1,798
Location
Ventura, Ca
Format
ULarge Format
Jaime, are you making your own tissue? If you are not I suggest that you give it a go. This is where the art of carbon transfer comes into its own. You control you image tone, no one else. There will be a lot of ups and downs with this process but the best way to master the process is to print, print and print. Also KEEP GOOD NOTES!! Vaughn was very insistent about this when he taught me. Follow the guide that Vaughn has. But it is all about printing over and over. Good luck and if you have any questions I'd be glad to help.
 
OP
OP
jaimeb82

jaimeb82

Member
Joined
Nov 27, 2008
Messages
329
Format
Multi Format
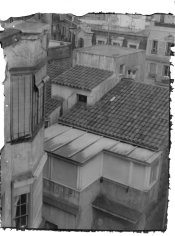
Not making my own tissue right now, bought it from Bostick & Sullivan. I think when I run out of the two tubes that I have I will try to make my own because I've been told by others that you can make the tissue thicker or with different colors. The thing is that at this point I want to keep it simple and build from that. Good point about the notes, I should be more organize about my times etc...I think what I would do is to keep notes for every print I do. You guys are very inspirational. Here is one of my 4x5. View of roofs from another roof in Barcelona, taken two months ago.
 

Attachments

  • Untitled_Panorama1b.jpg
    Untitled_Panorama1b.jpg
    256.6 KB · Views: 127

Curt

Member
Joined
Sep 22, 2005
Messages
4,618
Location
Pacific Nort
Format
Multi Format
Now that's a view to behold! I'd be up there all day long taking pictures, are there more of these? You picked up carbon quickly and on your own, that's the way I did at first, after a workshop or two I expanded enough to get a more complete handle on it but at the same time the Internet is a great place to connect with some of the few people who actually make carbon prints. The interesting thing about carbon printing is that it seems more like printmaking than silver printing to me. It's hard to define but the process is very satisfying in a personal way. Carbon is slower and in a way more relaxing.

You have a lot of tissue to use before you will run out and then the fun begins all over again. It's interesting how some, like myself, proclaim that they will never make their own tissue only to suddenly decide to give it a try and then find out it's not that hard and is another part of the process that's relaxing and satisfying.

I like the composition of this photo, what film did you use there? Nice printing Jaime.

Curt
 
OP
OP
jaimeb82

jaimeb82

Member
Joined
Nov 27, 2008
Messages
329
Format
Multi Format
Thanks Curt, that was Efke100, I also have few more with Delta100 from the same roof, my primary location when I go to Barcelona, it is the deal when traveling with little ones. The process is really relaxing, I sometimes forget what negative I am printing towards the end of the process!
 
Photrio.com contains affiliate links to products. We may receive a commission for purchases made through these links.
To read our full affiliate disclosure statement please click Here.

PHOTRIO PARTNERS EQUALLY FUNDING OUR COMMUNITY:


Ilford ADOX Freestyle Photographic Stearman Press Weldon Color Lab Blue Moon Camera & Machine
Top Bottom