• Welcome to Photrio!
    Registration is fast and free. Join today to unlock search, see fewer ads, and access all forum features.
    Click here to sign up

Effect of Hydrogen Peroxide on RA4 Archival Stability.

Recent Classifieds

Forum statistics

Threads
202,816
Messages
2,845,843
Members
101,544
Latest member
johnsaigon0
Recent bookmarks
1

Jacobcr99

Member
Allowing Ads
Joined
Dec 21, 2025
Messages
10
Location
Boston
Format
35mm
Adding 1-2 Tablespoons of Hydrogen Peroxide 3% to 100ml of developer is getting me some great results darkroom printing color on Fuji DPII. Does anyone have any idea if this might have negative effects on the archival stability of the resulting prints and if so how much ?
 
Last edited:
Is this for contrast control?

Answer to your question, I don't know.

Good washing after blix and marvelous modern Fuji paper should yield long lasting prints.
 
Thank you! Yes it adds a big pop of contrast and a small split tone effect
 
Does anyone have any idea if this might have negative effects on the archival stability of the resulting prints and if so how much ?
Yes, but not by how much. The peroxide will likely destroy the compounds within the paper that act as antioxidants, protecting the dyes. It will render the prints more susceptible to chemical deterioration over time. The extent to which will depend on storage conditions, but also whatever means used to stabilize or seal the prints. So it's virtually impossible to say what the net effect will be, other than that it's a step backwards in terms of archival stability. If you sell your prints or otherwise expect/need them to last as long as possible, it's really not a good idea. For hobby prints with no particular sentimental or economic value, or prints that only need to 'live' for a limited period of time, of course do as you please!

What improvements do you get from adding peroxide to the developer? There may (will) be other ways to get similar effects while not compromising the paper or even the developer.

Also, welcome to Photrio!
 
Thank you!! I will try to scan the images to show the difference, it’s really been quite remarkable for me on some photos. A bit of a silly analogy, but the standard dev looks more like a Noritsu scan to me, while the HP3% looks like a contrasty frontier scan to my eye, adding contrast but also a bit of coolness to the shadows. I’ll upload my results later. What do you think is the safest way to add contrast? Would redevelop method or even pushing the negatives a stop be better? Obviously that wouldn’t help my current printer but thinking ahead.
 
What do you think is the safest way to add contrast?
I'd work on the negative side. Use a film with more saturation if that's what you look for (Ektar), and/or give more development to boost contrast. You can get a pretty decent boost without running into color problems; in fact, too much contrast is much more often a problem with today's RA4 paper than too little.
 
For me it is strange that contrast needs any boost using DPII. Last time I used hydrogen peroxide was with a low contrast snowy landscape wrongly expose. I would recommend to review your workflow if you need to boost the contrast of your prints too often.
 
Hello! Yes I believe you are right that there is something strange about my need to add contrast. I’ve had good results with my prints thus far but I just tried to print an image that I already had hand printed at Carmencita film lab—the difference could not be more stark. The contrast is low because there is a lens flare over the image but the contrast I’m attaining is not even close to that from Carmencita. See the image below of my test strip next to their print. Any guesses? I’m using Bellini chemicals, they’re using Calbe Chemicals. I also haven’t replaced the bulb since I got the enlarger from a professor. Or could it be an enlarging lens difference? Appreciate anyone’s thoughts here!
 
Last edited:
Ok here's my test strip next to the final from carmencita. As far as development goes, I'm keeping things very consistent in terms of temperature (with a Cinestill TCS1000), and using one shot development, so the developer is always fresh.
 

Attachments

  • IMG_2734.jpeg
    IMG_2734.jpeg
    463.7 KB · Views: 71
Also—I want to demonstrate that for images without a lens haze/flare over them, my set up is producing completely acceptable levels of contrast. They just appear to be lower than the standard, and I've never had any issues with TOO much contrast.
 

Attachments

  • Aletsch.jpg
    Aletsch.jpg
    364.2 KB · Views: 52
Well, your test strip could do with a fair bit of additional print exposure time.
 
Also—I want to demonstrate that for images without a lens haze/flare over them, my set up is producing completely acceptable levels of contrast. They just appear to be lower than the standard, and I've never had any issues with TOO much contrast.

Great portrait. Keep printing, you're doing great.
 
I think I heard of this in a Greg Davis video a while back where he showed a before and after example of the same RA4 print . It seemed to work but as far as I can recall he made no reference to the downsides that koraks has mentioned

pentaxuser
 
Well, your test strip could do with a fair bit of additional print exposure time.

Yeah possibly so—only thing is the whites in the image are already lower in level than the reference print
 
Other than testing out that alleged contrast tweak for myself on Fuji paper, which really didn't do anything well in terms of image enhancement, I have no interest in introducing peroxide into the workflow. And I don't know what effect it will have on the long-term condition of the dyes, though I suspect it will be deleterious. Why gamble?
 
I think solving the low contrast issue I’m having will replace the need for hydrogen peroxide. After the holidays , I’ll plan to try:

1. Resealing all the possible light sources
2. Changing the bulb
3. Changing the lens
4. Changing chemicals

Hopefully with all of those, somethings gotta give
 
I think that's a good plan.

If you constantly have the need to increase contrast in your RA-4 prints... there is probably something wrong in your setup. Unless you regularly overexpose your film by many stops...
 
1. Resealing all the possible light sources
You're right to put that on #1. Add to that "1a": also ensure there are no light leaks on/around the enlarger head. A real head-scratcher would be a small light leak around the lens mount/plate, which will basically fog the paper, decreasing contrast. The problem may come and go as you change lenses. Until you figure it out!

Fogging is the first thing to look into in cases of surprisingly low contrast. Since the fogging in your case appears to be close to neutral color balance, it would logically be fog from stray light emanating from below the negative carrier. Fog from white light produces yellow to red color casts. Blue status led on equipment in the darkroom LEDs produce a yellow cast, red LEDs fog cyan, etc.

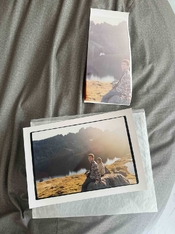
In any case, something's definitely very much out of order for contrast to be so low in the test strip shown. The print below it looks normal and since it's from the same negative, it's a good indicator that the problem is in the workflow or environment.

2. Changing the bulb
3. Changing the lens
4. Changing chemicals
It's not the bulb or the lens. I don't think it's the chemistry either since the fogged edge on the left side of the strip has developed normally. If the strip had been underdeveloped, that black corner/edge would have been navy blue instead of black if the rest of the print ended up so low in contrast.

In short, if it's not 1 or 1a as I mentioned above, skip to #5: an as of yet unidentified factor. But I'm fairly sure you'll find that it's a light leak on the enlarger.
 
Yeah possibly so—only thing is the whites in the image are already lower in level than the reference print

Still, I'd first try getting some more density into the main subject to match the reference print. Once you have that, consider that it would be very easy for the lab operator to employ some dodging in the sky (less so in the bright reflections in the lake, but those are still less dense in your print than in the lab print).

Are you using the same paper type?

Makes sense, I’ll give it a shot. Yep, both DPII, in fact I got mine from them
 
Photrio.com contains affiliate links to products. We may receive a commission for purchases made through these links.
To read our full affiliate disclosure statement please click Here.

PHOTRIO PARTNERS EQUALLY FUNDING OUR COMMUNITY:


Ilford ADOX Freestyle Photographic Stearman Press Weldon Color Lab Blue Moon Camera & Machine
Top Bottom