NortheastPhotographic
Advertiser
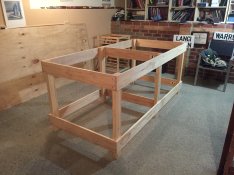
I have a small Kreonite sink at the moment, and it's great! But it will really only accommodate 3 11x14 trays, even then a tight fit. I'd like to expand my tray capability with a 5' sink that will sit next to my Kreonite and run along the corner of the room. This sink does not need plumbing save the drain as my Kreonite has a hose system and a Thermostatic mixer built in.
Does anyone have plans that a relative amateur could handle? I have a good screw gun plus impact driver, and access to a Miter Saw. I have built a few fairly primitive things like a wood shed, compost bin, that kind of thing.
It looks like the offerings from Delta aren not so bad until you add the supports, then you're near $1k. I'd like to keep my costs down.
Thanks!
 E3 Fully Renovated 2
 Darkroom Sink Base 2
 Eagle Drain Tubs
 Poor Mans JOBO Film Processor