Darkroom Diary

Flow of thoughts

D
Flow of thoughts

  • 3
  • 1
  • 50
Rouse st

A
Rouse st

  • 5
  • 3
  • 72
Plague

D
Plague

  • 0
  • 0
  • 52
Vinsey

A
Vinsey

  • 4
  • 1
  • 88

Recent Classifieds

Forum statistics

Threads
199,164
Messages
2,787,296
Members
99,829
Latest member
Taiga
Recent bookmarks
1
Joined
Mar 3, 2011
Messages
1,513
Location
Maine!
Format
Medium Format
I have my darkroom built out, my Analyser Pro calibrated, and a working solution of Ansco 130 has been sitting in my slot processor for about 2 months now. However I've been neglecting printing while I've been distracted by other things, so I wanted to pop in for a quick print tonight.

I went to Jay Peak last weekend for a much needed mini-vacation. The slopes were great and some lifelong friends joined us. I decided to try out the Harmon Reusable Camera for the trip. Simple enough for skiing and cheap enough that's it's hard to say no. I used one of the included rolls of Kentmere 400. I processed the film in my seasoned XTol. Frankly I thought the images are quite bad from my Fuji Frontier scans. It was almost like the film was not perfectly flat, which it may not have been since I had some trouble loading it. It's a very simple mechanism, and not all that well thought out.

Scans are scans and prints are prints though so I wanted to try it at 4x6 size. Viewing a Frontier scan on a 27" monitor is quite different from a 4x6 enlargement which is what disposable cameras were really meant to do.

I wanted to stick to the 'banish the test strip' moto from RH, so I just jumped right in.

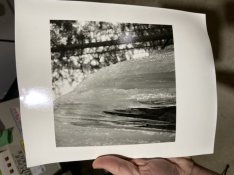
Print 1: I placed the meter on the sun spot, a mistake. It's a very dense negative so with the sun as my highlight reading and a rock as my shadow it indicated grade 2, way too low.

Print 2: Damn it! I forgot to make my reading in 'focus' mode (using my Heiland LED cold light). The print is vastly over exposed. Interesting look though!

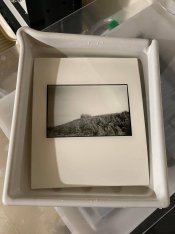
Print 3: Much better! I think I could now move to doing some dodging and burning. But now I'm tired and it's time to have a drink. (I started printing at 10pm).

It's a dense negative from a plastic lens, photographed inside a cloud... The contrast is low. I'm already at grade 5! When I take another crack at it I'll have to find a way to add a little snap. I may try split printing this or toning it after doing some dodge or burn work...

Really just 'thinking' like the Analyser Pro is the trick. I need to do better at placing my readings, and then understanding the dodge and burn modes. That zone scale is really handy. This particular negative only achieved a range about 2-3 light placements from the edges even on grade 5. I should have remembered to adjust exposure to get my true black, and then checking the time needed for my Zone VIII highlight for a dodge.

Also the tray life of Ansco 130 is amazing. When the 2L seems low I do top it off with about 3oz of working solution, so you can say it's getting replenished. Pretty slick!
89109748_10104571098529077_6895476303311405056_o.jpg
 
Joined
Sep 10, 2002
Messages
3,596
Location
Eugene, Oregon
Format
4x5 Format
SAVE THE TEST STRIP!

I still prefer the low-tech methods over analyzers and such... Here's what I do:

Make a proper proof. Decide from it what contrast to start with. Make a test strip. Decide what exposure I want from the highlight tonalities. Make a print. If the contrast isn't right, make another test strip at a different contrast setting/grade. Decide what exposure I want. Make a print. When I get the contrast right, make another print with manipulations, tweaks, etc. Print three or four will be way close; sometimes print two is a keeper. Spend the money I've saved not buying an analyzer on more paper :smile:

More seriously, deciding what highlight value to use as a benchmark seems to be your first issue. Specular highlights, light sources, etc. aren't good choices as they are often many stops more exposed than the tonality you want as a textured highlight. Same for the low value, but reversed. Don't just measure a clear area of the film, find a shadow value with texture.

Plus, it sounds like you have a fairly difficult negative to work with. The learning curve for your analyzer might be easier with a more "normal" scene.

You won't get more contrast split-printing than you can from the #5 setting alone. If that's not enough contrast, you'll have to use other tricks to build contrast. I find a #47B blue filter gives me more contrast than using the maximum magenta setting on my color heads. There are lots of other tricks too.

Best,

Doremus
 
OP
OP
NortheastPhotographic
Joined
Mar 3, 2011
Messages
1,513
Location
Maine!
Format
Medium Format
Back in the darkroom tonight! The Analyser really lets you roll though prints. My batch of Ansco 130 is still good! Though I'm still not doing very much in the way of elaborate dodging and burning. Really that's never been my printing style anyway.

I stuck with the very dense negatives from the Harmon Reusable camera. I just decided to 'go with it' as far as the contrast is concerned. I think they look look pretty decent.

My printing space is still pretty cold and I'm getting a little tired of using the Nova. I only have one clip so I can only process 1 print at a time. I really want to get a tray warmer of some kind. I think I'll keep the Nova for color of course, which I why I originally bought it.
 

mmerig

Member
Joined
Oct 9, 2012
Messages
212
Location
Teton Valley
Format
Medium Format
Doremus provides great guidance (as usual).

I use an Analyzer Pro, and it usually gets me to a very useable print on the first try, but I often need to fine-tune the next print or two. I had to do the same thing when using test strips. But it was worth doing many, many test strips to learn the process, and I got the Analyzer Pro to go more quickly from an RC print to a fiber-base print (a current project requires both for hundreds of scenes).

Is your developer too cold maybe?

Did you end up calibrating your Analyzer Pro?
 
OP
OP
NortheastPhotographic
Joined
Mar 3, 2011
Messages
1,513
Location
Maine!
Format
Medium Format
Doremus provides great guidance (as usual).

I use an Analyzer Pro, and it usually gets me to a very useable print on the first try, but I often need to fine-tune the next print or two. I had to do the same thing when using test strips. But it was worth doing many, many test strips to learn the process, and I got the Analyzer Pro to go more quickly from an RC print to a fiber-base print (a current project requires both for hundreds of scenes).

Is your developer too cold maybe?

Did you end up calibrating your Analyzer Pro?

Yep, I finally nailed down my calibration for Ilford Multigrade Classic in Ansco 130. My developer is at a consistent temp, I'm not having any issues there. I'm just printing from very dense negatives made in the fog with a plastic camera.
 
OP
OP
NortheastPhotographic
Joined
Mar 3, 2011
Messages
1,513
Location
Maine!
Format
Medium Format
Spent another night in the darkroom. I developed some Delta 400 and Catlabs X 80 in 510 Pyro today and printed from that.

I think I'm over the analyser. I can't say that it doesn't work, it does. I can basically get to a decent print using just readings from the probe. But it's making me darkroom stupid. I just fiddle with the meter instead of making strips and dialing in the look I want. Plus it's not super well set up for splitgrade printing which I should definitely be doing.

The 510 Pyro negs had reasonable density but my exposure times were extremely short. 3-7 seconds generally. This is with a 2 stop ND on my enlarging lens, the Heiland controller 2 stops down, and at F11 on my Schneider 80/4 lens. I think I'm going to purchase a 5 stop ND since the LED is so bright.

I'll also be buying a Stopclock Pro. I can't say I'm upset that I went with the Analyser first since I have always been curious about them, but it's just not for me. I want to use multiple paper types, do split grade printing, and not have to worry about calibration. Does anyone want to trade?

Oh I should also say that I tried a seed warming mat to keep my chemicals at temp, this did not work. It just isn't warm enough vs the relatively cold room that I'm in. I was printing at about 65F. I'd like to be at 70F for Ansco 130.

510-Pyro is very nice! Delta 400 is a weird film but the Pyro developer really brought out nice tones and rendered it pretty grainless. Though these are 6x6 negatives enlarged to 6x6" so not a big ask for 120. The Catlabs flim is also nice but I think it could use a bit more exposure than ISO 64. I might try 50 next time.
 

mmerig

Member
Joined
Oct 9, 2012
Messages
212
Location
Teton Valley
Format
Medium Format
Good luck with your efforts, and if my comments are not valuable or welcome, I apologize in advance.

Based on my own experience, I think you are setting yourself up for more frustration, more wasted paper, and less quality prints per time in the darkroom.
This is especially so for using multiple paper types and split-grade printing. You'll come sort of close with a traditional test strip, but if complex dodging/burn-in is required, you may still need a full-enlargement to judge what needs to be done. And if you change contrast, the exposure has to be adjusted too (there are tables for this). I guess you know all this already. What you may gain in split-grade printing ease with the Stop Clock, you may lose on the front-end of getting to a decent working print by losing the calibrated exposure and contrast readings of the RH AP.

Maybe I am missing something, but I always wonder why people routinely split-grade print, unless they want in-between contrast grades (using filters), or dodge or burn-in most every print and a constant contrast filter does not work. Otherwise, split-grade printing does not add anymore capability than using filters and MG paper. It just adds more time and complexity. But some say split-grade printing is more intuitive for them, so there you go.

A huge plus for me, in terms of time and paper costs, was the RH Analyzer Pro's allowance for switching from one paper type to another without having to re-read the exposure and contrast again. The calibration of three papers took a few hours, but it was totally worth it. At heart, I am a Luddite, and the RH AP was an expensive thing for me, but it was efficient from a business stand-point. If I printed a few prints a week, and spent hours fine-tuning each one, I would not need or want an RH AP, as it's time-saving would be negligible. I still use traditional test prints when I need to split-grade print (very rare).

I still have to do some mental adjustments to what the RH AP gives me, and I don't feel "dark room stupid". To me, going from the working print (a rough draft that the RH Pro gives me quickly) to something more fine-tuned is the interesting part. Often I wait a day or so to re-print the trickier prints after thinking about them awhile. It also took several prints to learn what the RH AP test strip lights really mean for a real, dried-down print, despite an accurate calibration.

Maybe I sound like a shill for RH Designs, but I would not recommend anything they make for casual printers on a tight budget. Used meters, timers, and test prints would more than suffice. The same goes for those that put a ton of time into each print to get it just right.

As for the very short exposure times, I am baffled.
 

markbau

Member
Joined
Apr 16, 2009
Messages
867
Location
Australia
Format
Analog
I love my AP, whilst it does not “banish test strips” like the adverts say it does get me very close to both grade and time in much less time than my old methods. Most of the “errors” it makes are due to me reading inappropriate areas of the neg. it is a big time saver in my darkroom.

As for routinely split printing every print I just have one question, why? It is a very rare neg that prints best in between filters. If you have a colour head there is no reason at all to split print as the contrast is infinitely variable, but if you prefer it as your working method, go for it. What gets up my goat are the split filter disciples that claim they get prints unobtainable with other methods, it reminds me of the nonsense Fred Picker used to sprout, “developers that don’t dump high values” “fixer is heavier than water” all nonsense that some people actually believed.
 
OP
OP
NortheastPhotographic
Joined
Mar 3, 2011
Messages
1,513
Location
Maine!
Format
Medium Format
As for the very short exposure times, I am baffled.

The Heiland LED cold light is exceedingly bright, that accounts for the short exposure times.

As for the Analyser it is a nice product and basically does what it says on the tin, but I'm just not sure it's right for my printing style. I'm not chucking it out the window yet so perhaps I'll grow into it. But even RH acknowledge that it's not for everyone:

"Our answer to this one is another question - 'what sort of printer are you?' For people who are interested in getting high quality prints with a minimum of effort and material wastage we recommend the Analyser Pro. Those who like to wring the last drop out of the negative by making several exposures, perhaps at different grades, on the same print will prefer the StopClock Professional. Fine Art printers typically fall into this category."

I like that the AP can get me to a nice baseline print, but after that I wish it had the extra features of the SC to really work the print.

If the Maya was available I'd look into that as well. I like that it can alternate between normal and F-stop printing, and it has some very advanced automations for burning and dodging.

One thing I need to do is make a test-strip 'maker' like the one they demo in the video. I like that you can do full exposures on 7 patches and pick the best one.

I've also seen methods of split grade printing with the AP using it's 'dodging and burning at different grades' feature.

I did try the automated contact print exposure method and that worked well.
 

markbau

Member
Joined
Apr 16, 2009
Messages
867
Location
Australia
Format
Analog
I like that the AP can get me to a nice baseline print, but after that I wish it had the extra features of the SC to really work the print.

One thing I need to do is make a test-strip 'maker' like the one they demo in the video. I like that you can do full exposures on 7 patches and pick the best one.
.

What are the extra features of the SC over the AP? There are only two controls, at the enlarger, that you can do on a print, contrast and time and the AP does these well.

Here is a pic of my low tech test printer with a print from it. Some sturdy cardboard and some tape are all it takes. (disregard the numbers at the bottom)

test_printer.jpg
 

Peter Schrager

Subscriber
Joined
Jul 19, 2004
Messages
4,172
Location
fairfield co
Format
Large Format
use one paper one developer and you will understand how that works....after that get your negatives in line to print well and it will become second nature
honestly the Zone VI workshop book (Fred picker) is the easiest and best source for making a fine print....
if you actually do the work in the book you will know more about photography than 99% of all people doing this....
all the hit and miss techniques are BS in my opinion...I know my materials i.e. paper developer enlarger settings....film development and exposure
you can't cheat sensitomertry...it's a fixed number!!
oh and have fun!!
best, Peter
 
OP
OP
NortheastPhotographic
Joined
Mar 3, 2011
Messages
1,513
Location
Maine!
Format
Medium Format
use one paper one developer and you will understand how that works....after that get your negatives in line to print well and it will become second nature
honestly the Zone VI workshop book (Fred picker) is the easiest and best source for making a fine print....
if you actually do the work in the book you will know more about photography than 99% of all people doing this....
all the hit and miss techniques are BS in my opinion...I know my materials i.e. paper developer enlarger settings....film development and exposure
you can't cheat sensitomertry...it's a fixed number!!
oh and have fun!!
best, Peter

Even when I'm frustrated I'm definitely having fun! You are right of course about sticking to one paper/developer/film. Buttttt I've never been great at that. I like to try out new things from time to time.
 

Luis-F-S

Member
Joined
Sep 19, 2013
Messages
774
Location
Madisonville
Format
8x10 Format
use one paper one developer and you will understand how that works....after that get your negatives in line to print well and it will become second nature honestly the Zone VI workshop book (Fred picker) is the easiest and best source for making a fine print.... if you actually do the work in the book you will know more about photography than 99% of all people doing this....all the hit and miss techniques are BS in my opinion...I know my materials i.e. paper developer enlarger settings....film development and exposure you can't cheat sensitomertry...it's a fixed number!!

Totally agree! and Fred's book is only around $5 used! So many make this harder than it has to be. They prefer "technology" over sensitometry. I have an RH AP which I use. I've never bothered to calibrate it, and just use it as is. Works for me and does save me some paper, but it is not the panacea some expect.
 
Last edited:
OP
OP
NortheastPhotographic
Joined
Mar 3, 2011
Messages
1,513
Location
Maine!
Format
Medium Format
Totally agree! and Fred's book is only around $5 used! So many make this harder than it has to be. They prefer "technology" over sensitometry. I have an RH AP which I use. I've never bothered to calibrate it, and just use it as is. Works for me and does save me some paper, but it is not the panacea some expect.

I don't mind the calibration after I figured it out, but I made too many dumb mistakes along the way. The Heiland LED makes it necessary. For example in it's default mode it gave an exposure of 90 seconds on RC MV IV, where in reality the print time was about 8-10 seconds. The cold light source is just very different from the default halogen.
 
OP
OP
NortheastPhotographic
Joined
Mar 3, 2011
Messages
1,513
Location
Maine!
Format
Medium Format
9A90F8B4-27C8-4E5C-98C4-D3B48A328D0E.jpeg


I’m pretty happy with this one. Delta 400 is not always a film I love but the 510-Pyro and Ansco 130 really do good work here.

9A90F8B4-27C8-4E5C-98C4-D3B48A328D0E.jpeg
 

Luis-F-S

Member
Joined
Sep 19, 2013
Messages
774
Location
Madisonville
Format
8x10 Format
I don't mind the calibration after I figured it out, but I made too many dumb mistakes along the way. The Heiland LED makes it necessary. For example in it's default mode it gave an exposure of 90 seconds on RC MV IV, where in reality the print time was about 8-10 seconds. The cold light source is just very different from the default halogen.

I have no experience with the RC MV IV because I don't print on plastic. I've never gotten a 90 sec exposure with my LP. I printed with a cold light head for some 20 years before I got the halogen enlargers, so I am not unfamiliar with cold light printing.
 
OP
OP
NortheastPhotographic
Joined
Mar 3, 2011
Messages
1,513
Location
Maine!
Format
Medium Format
I have no experience with the RC MV IV because I don't print on plastic. I've never gotten a 90 sec exposure with my LP. I printed with a cold light head for some 20 years before I got the halogen enlargers, so I am not unfamiliar with cold light printing.

Ohhhhhkayyyyyyy
 

logan2z

Subscriber
Joined
Jan 11, 2019
Messages
3,727
Location
SF Bay Area, USA
Format
Multi Format
Works for me and does save me some paper, but it is not the panacea some expect.

That's my experience as well. I can usually get a pretty decent print on the first shot, but it will take another 3-4 sheets of paper before I'm happy with the print. Maybe I could save even more paper by making a test strip or two, but I've never found test strips particularly useful unless they're in an area of the print that's fairly uniform in density eg. when finding the burn in time for the sky in a landscape photo.
 

Lachlan Young

Member
Joined
Dec 2, 2005
Messages
4,954
Location
Glasgow
Format
Multi Format
I don't mind the calibration after I figured it out, but I made too many dumb mistakes along the way. The Heiland LED makes it necessary. For example in it's default mode it gave an exposure of 90 seconds on RC MV IV, where in reality the print time was about 8-10 seconds. The cold light source is just very different from the default halogen.

I'd be inclined to say that this is likely because the head is delivering a very high light output (in terms of paper emulsion sensitivity) at a very narrow bandpass & that the sensor on the analyser isn't able to understand this.

What gets up my goat are the split filter disciples that claim they get prints unobtainable with other methods

I'm in general agreement, however I have seen dichroic enlargers where the effective grades 'bunch' towards the extremes (for example, instead of G3.5 being where it is marked on the dial, it actually ends up being about where 4-4.5 is marked etc) & the grade numbers on the head may not bear entirely accurate relationships to what Ilford etc intended. In those circumstances people might think they are getting an improvement via split-grade, even though all they're ending up with is what could have been achieved more painlessly on a better calibrated enlarger...
 
OP
OP
NortheastPhotographic
Joined
Mar 3, 2011
Messages
1,513
Location
Maine!
Format
Medium Format
I'd be inclined to say that this is likely because the head is delivering a very high light output (in terms of paper emulsion sensitivity) at a very narrow bandpass & that the sensor on the analyser isn't able to understand this.

We’re that true would not my readings be incorrect? According to my calibration my offsets are right on.
 
OP
OP
NortheastPhotographic
Joined
Mar 3, 2011
Messages
1,513
Location
Maine!
Format
Medium Format
Tonight I shall attempt to fully or at least start my calibration of Ilford MG V glossy in Ansco 130.

I also would like to create more advanced contrast curves for FB Classic. I might place the step wedge in my glass carrier and see about enlarging it a bit to create bigger targets.

MG V is such a nice paper I realized I was throwing money away by doing all my work prints on FB Classic.
 
OP
OP
NortheastPhotographic
Joined
Mar 3, 2011
Messages
1,513
Location
Maine!
Format
Medium Format
Almost have my offsets nailed minus some last second errant readings from the 4 and 5 strips. I will say based on what I see here the offsets are going to be very very close to Ilford MG Classic. That's going to make it even easier to jump from one stock to another, doing full proofs and work prints on RC before final printing on FB. Really gotta hand it to Ilford the new line up is fantastic. Now they just gotta make Delta 400 in sheets!

I'm printing in Ansco 130 at 75 degrees. That temp comes from the fact that my Nova won't go any lower so my original offsets are based on that temp, and I hear glycin likes to work warm. I wanted to move to tray processing though so I needed a warmer of some kind. I ordered a seed warmer with a thermostat from Amazon. First I placed it under the tray, which proved ineffective. Given that it's a flexible waterproof mat I simply formed it into a U shape within the tray, and that worked well! I may try an aquarium heater at some point but this will work for now.

Overall a good night in the dork room! My feet hurt. I need a comfort mat. :smile:
 

adelorenzo

Member
Joined
Mar 10, 2012
Messages
1,421
Location
Whitehorse, Yukon
Format
4x5 Format
I will say based on what I see here the offsets are going to be very very close to Ilford MG Classic. That's going to make it even easier to jump from one stock to another, doing full proofs and work prints on RC before final printing on FB. Really gotta hand it to Ilford the new line up is fantastic.

Good to know, that is the plan for me too. I do the majority of my printing on the MG Classic fiber paper. Once I use up my remaining MGIV RC paper I'll start proofing on the new RC paper.
 

markbau

Member
Joined
Apr 16, 2009
Messages
867
Location
Australia
Format
Analog
Almost have my offsets nailed minus some last second errant readings from the 4 and 5 strips. I will say based on what I see here the offsets are going to be very very close to Ilford MG Classic. That's going to make it even easier to jump from one stock to another, doing full proofs and work prints on RC before final printing on FB. Really gotta hand it to Ilford the new line up is fantastic. Now they just gotta make Delta 400 in sheets!

I'm printing in Ansco 130 at 75 degrees. That temp comes from the fact that my Nova won't go any lower so my original offsets are based on that temp, and I hear glycin likes to work warm. I wanted to move to tray processing though so I needed a warmer of some kind. I ordered a seed warmer with a thermostat from Amazon. First I placed it under the tray, which proved ineffective. Given that it's a flexible waterproof mat I simply formed it into a U shape within the tray, and that worked well! I may try an aquarium heater at some point but this will work for now.

Overall a good night in the dork room! My feet hurt. I need a comfort mat. :smile:
There are mats made for home brewing that work well, you put the probe in the developer and once adjusted they work brilliantly. I’ve also used a waterbed heater which did work but not as well as the home brew mat. I tried a fish tank heater
 
OP
OP
NortheastPhotographic
Joined
Mar 3, 2011
Messages
1,513
Location
Maine!
Format
Medium Format
There are mats made for home brewing that work well, you put the probe in the developer and once adjusted they work brilliantly. I’ve also used a waterbed heater which did work but not as well as the home brew mat. I tried a fish tank heater

I think the seed mat is the same basic principle as the brewing mat, just a different shape. I'm still looking for just the right heater...it's surprisingly hard to find.
 
Photrio.com contains affiliate links to products. We may receive a commission for purchases made through these links.
To read our full affiliate disclosure statement please click Here.

PHOTRIO PARTNERS EQUALLY FUNDING OUR COMMUNITY:


Ilford ADOX Freestyle Photographic Stearman Press Weldon Color Lab Blue Moon Camera & Machine
Top Bottom