Darkroom Construction

Farm to Market 1303

A
Farm to Market 1303

  • 0
  • 0
  • 438
Sonatas XII-51 (Life)

A
Sonatas XII-51 (Life)

  • 0
  • 2
  • 712
Lone tree

D
Lone tree

  • 3
  • 0
  • 591
Sonatas XII-50 (Life)

A
Sonatas XII-50 (Life)

  • 2
  • 1
  • 3K
Tower and Moon

A
Tower and Moon

  • 4
  • 0
  • 3K

Recent Classifieds

Forum statistics

Threads
199,740
Messages
2,795,972
Members
100,020
Latest member
oinkmoo32
Recent bookmarks
2

rbarker

Member
Joined
Oct 31, 2004
Messages
2,218
Location
Rio Rancho,
Format
Multi Format
Hmmm. 38°. Toasty. :wink:

Keep at it, Troy.
 
OP
OP
Troy Hamon

Troy Hamon

Member
Joined
Nov 25, 2004
Messages
290
Location
Alaska
Format
Medium Format
Thanks guys,

In the realm of shocking news (or perhaps Valentine presents?), I got a call at work today...from the electrician! Said he would be sending a guy out to hook me up at the meter! I couldn't believe it. Two months ago we talked and then nothing (but I had lots of other stuff to do anyway before I was ready to go, but today out of the blue here comes the cavalry!

Well, he did come, didn't have all the stuff he needed to make it work, and will have to come back tomorrow (I hope he does...), but still... Wow! I hope to report functioning lights and ventilation fans tomorrow...

I'm happy to say that the linoleum top to the wet surface is cured and ready for action! Bring on the weekend...I'll get this thing DONE! (maybe...after the way things have gone I should be a bit cautious about using such grand terms...).
 
OP
OP
Troy Hamon

Troy Hamon

Member
Joined
Nov 25, 2004
Messages
290
Location
Alaska
Format
Medium Format
The electrician didn't make it back out yesterday...here's hoping that we see him today to finish the job, or at least in the next week...
 

Wade D

Member
Joined
Feb 15, 2006
Messages
897
Location
Jamul, CA
Format
Multi Format
My current darkroom is also my home office. It's only 10' x 12' and there is no running water but it works out ok for now. The bathroom is just a few steps down the hall for washing negs and prints. I use a blackout curtain over the window. Fresh air is supplied through the central house fan. This is the only setup I could manage in a rented house. Hopefully that will change by the end of the year.
 
OP
OP
Troy Hamon

Troy Hamon

Member
Joined
Nov 25, 2004
Messages
290
Location
Alaska
Format
Medium Format
Well, as usual, everything has gone slow...but there is some GREAT news! I'll put it in its proper context...

I'm a runner and am working on a running-related photography project (that has yet to see the light of day...you won't find any images on my web site from this project yet...but maybe after the darkroom is operational...). I was at the Tampa Marathon and then in Miami for a week for business and got back last Sunday, March 5. I went out and started just trying to clean up the darkroom, sweeping up sawdust and getting boxes moved around so I could clean better. Then the week got away from me and I didn't make it back out to do anything else all week.

Yesterday, after having been home a week, I was talking with an artist friend about the darkroom, and my wife pipes up with..."oh by the way, the electricians were here three times last week..."

"WHAT!?"

I ran to the window, and sure enough there is a new conduit line going from the ground up to the meter base... I ran out to the darkroom, flipped on some breakers, and turned on the ventilation system...the sweet sound of nearly silent humming as the ventilation kicked in. Oh, how sweet it is...

I then proceeded to drill a starter hole in the floor to connect the sink to the drain and siliconed all the countersunk screw heads in the dry-side counter and the counter joints. I also siliconed the edges of the linoleum on my sink, where the linoleum curls up against rough-cut wood. The drain is the last remaining item and then I'm fully functional. Unfortunately, the way it looks right now, I'll be lucky to get to that before the weekend...

I'm still in shock over the electricity, though. Pretty fantastic.
 

glbeas

Member
Joined
Sep 25, 2002
Messages
3,950
Location
Marietta, Ga. USA
Format
Multi Format
Heck, treat it like a dry darkroom and you can play NOW! I've run enough dry darkrooms at home with nothing more than a blacked out area for the equipment and processing and it can be just as satisfying as a wet darkroom, just not as convenient. Now, your other problem with the time....there was a guy a while back that built a time machine......oh sorry, that was fictional.
 
OP
OP
Troy Hamon

Troy Hamon

Member
Joined
Nov 25, 2004
Messages
290
Location
Alaska
Format
Medium Format
Hi Gary,

You're right, I could set up and play now...but I want it all...and after waiting 14 months since my last darkroom session I can wait a few more days or a couple weeks...

And that really is all I'll have to wait! I had the most favorable trip to the hardware store ever on Saturday. This is good news, as you can read above about my normal frustrations on going to the store. First, I made a very careful and comprehensive list of what I wanted. This showed greater than average determination on my part. Second, I remembered to take it with me. This was far more than above average, this was absolutely shocking (there that word is again...must be the electricity...). Third, I carried relevant parts and pieces that I need to connect into. I've intended to do this a number of times, but the superlatives necessary to compliment myself on accomplishing it for real elude me at present. Probably because I'm still reeling from the electricity. And fourth, I didn't put myself up against a time constraint, meaning I could sit in the hardware store for a couple hours and have the clerk help me solve my problems...which he did! It was really great.

Most of this trip involved plumbing the drain. My intent is to have my sink drain into a silver recovery chamber which then drains into the french drain. I have a Kodak silver recovery chamber, which is just a big 5 gallon bucket with inlet and outlet fittings. The fittings take a flexible tube, which I already had. But the sink trap ends in a slip-joint plastic pipe fitting. So I needed to go from that to the flexible tube somehow. We finally accomplished it by finding a slip-joint to pvc connection in the sink plumbing section, then found some reducing fittings for pvc and finally a pvc to tube fitting. Amazing.

The drain coming from the ground is 2" ABS. I originally had intended to plumb straight onto this from the silver recovery chamber, but this greatly limits my options... I read comments from an impassioned and experienced in-the-darker the critical importance of a floor drain. I wasn't real excited about putting a joint below the shed for two pipes to join, as this is a classic place to have freezing problems. So I finally opted to extend the ABS from the ground up to the floor and put in a floor drain. Rather than anything special, I just got a 2" fitting that goes right in the pipe.

So, this leaves me with a floor drain...what about the sink effluent? I took the floor drain and cut out a hole big enough to fit the flexible tubing from the silver recovery chamber. So now I can run the flexible tubing down the drain to let the sink drain out. But I still have a floor drain. It also allows me to fairly easily put a heat tape down the drain to keep the above-ground portion from freezing in winter. I hope it works.

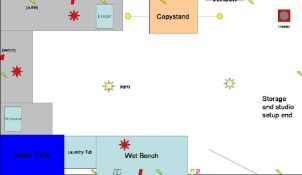
Now I really could start playing in earnest. But I noticed that my wet-side stuff was too big to fit on the shelves, so I installed a shelf under the wet bench and put the last big piece of linoleum on it last night. I also bought some paint at the store, and will be painting all the exposed wood on the wet side before I start working. I will eventually paint all the dry side as well, but I will grant myself the luxury of waiting on that.

That's the progress. And it really is progress. Next weekend, I should be done...
 
OP
OP
Troy Hamon

Troy Hamon

Member
Joined
Nov 25, 2004
Messages
290
Location
Alaska
Format
Medium Format
Haven't painted yet, but wanted to attach a floor layout in case people are interested...I should have posted it months ago since it was done last summer, but hadn't thought to do so.
 

Attachments

  • darkroom layout.jpg
    darkroom layout.jpg
    40 KB · Views: 195
OP
OP
Troy Hamon

Troy Hamon

Member
Joined
Nov 25, 2004
Messages
290
Location
Alaska
Format
Medium Format
Almost done painting. The wet bench frame is painted and the dry counter support frame has a primer coat. My list of things to do is to install another shelf on the wet side, cut a countertop insert for the sink hole (the dry side counters have a hole where there was formerly a kitchen sink...eventually I'm going to put in an in-counter light-box, but for now I just want it to be functional...), and notice that is different than sinkhole, install lines for hanging film and prints to dry, and finish painting. I really could just go in and develop film quite easily now...but I think I'm going to make myself finish. So close...so sweet...
 

rbarker

Member
Joined
Oct 31, 2004
Messages
2,218
Location
Rio Rancho,
Format
Multi Format
Painting? Are you telling us the counters aren't solid black walnut (most appropriate for a darkroom)? :wink:
 
OP
OP
Troy Hamon

Troy Hamon

Member
Joined
Nov 25, 2004
Messages
290
Location
Alaska
Format
Medium Format
Actually...yes. I am telling you that! Sad isn't it. In point of fact the dry side counter is castoff kitchen countertop sitting on a frame of...2x4's. Which could be black walnut, since I wouldn't know how to tell, but...it's not. The wet side bench is a huge wooden door sitting on its side...on a frame of...2x4's. Again. I wonder when 2x4's will become the vogue for internal decorating? Maybe...NEVER? Oh well.
 
OP
OP
Troy Hamon

Troy Hamon

Member
Joined
Nov 25, 2004
Messages
290
Location
Alaska
Format
Medium Format
Wet side is done. Last night I put water in the tank, tonight I finished filling it up. The little shelf behind the laundry tub is in, the painting is all done (on the wet side), and I mixed up chemicals to develop a year's worth of film tomorrow...

Then, since I was in high gear anyway, I laid out all the developing tanks I have, pulled out exposed film that needed developed, laid the reels in front of the tanks with the film in front of them...I actually crack myself up sometimes. I have to have everything laid out just so, to facilitate being able to find what I want in the dark. Or so I tell myself. But I have this horrible habit of squeezing my eyes shut tight while loading film in the pitch black...and I usually end up turning the light on a number of times in between tank loadings. Tonight was no different.

As usual, the first time back loading 35mm is painful. I really don't like it compared to 120, but I love my Widelux so it is a fair trade. I loaded 14 rolls of film and put them in tanks. Tomorrow, I'll develop them and load another 14...and on it goes until I finish all the film I've backlogged. I really can barely believe it...it's finally happening!

Still some work to do on the finish for the dry side, but that is minor work at this point. In case the message didn't come through above...I can't believe it, I'm working in my darkroom!!!!!!
 

wilsonneal

Member
Joined
Feb 14, 2006
Messages
598
Location
Northern NJ
Format
8x10 Format
Name of sheet metal shop/contact info?

Regarding Photobum's message: Can you provide the name of the shop that made your sink? I am in Northern NJ and it sounds like a much better option than others I am considering.
Thanks
Neal Wilson

photobum said:
Do you have a basement to build in? If it is below sewer drainage level a pump is easy to install. A shed in Alaska sounds kind of harsh. I rebuilt my darkroom last year. The best up-grades were a 9 foot 1 1/2" stainless steel sink to replace my 8 foot homemade plywood sink. I had a 9"3" wall for a sink and I framed it out with 2x4's. I found a sheet metal shop that could work with a 12' brake. I ordered a 30"x108" sink with a 3/4" lip all around by 5" deep. The extra large sink is wonderful to work with. Cost $600. Lots of extras lights, safe lights and 4 gang outlets. To top it all off was a Bose CD radio. Now I sometimes hang out in the darkroom just to fool around and hear the CD player.
 
OP
OP
Troy Hamon

Troy Hamon

Member
Joined
Nov 25, 2004
Messages
290
Location
Alaska
Format
Medium Format
Developed the film that I had loaded in tanks yesterday...came out great, which feels wonderful after so long away from the game...but have reached the point where now I am reminded why construction projects should be finished before you put them to work.

I have the negatives drying, but I haven't cleaned up or arranged the dry side for work, it is still full of tools because I keep adding things to do...so I now have to clear out a place to work with the negatives to sleeve and store them...without creating dust...hmmmmmm. Oh well. It is magic to see photos showing up on the film after all this time.

I also worked some on lightproofing the door and the wall/ceiling joints today. The bottom of the door is the biggest problem at this point, but I didn't have a solution for that yet...
 

glbeas

Member
Joined
Sep 25, 2002
Messages
3,950
Location
Marietta, Ga. USA
Format
Multi Format
Theres a product made called a door sweep. Just a rubber flap mounted on an aluminum bar that mounts to the base of the door. Use this in conjunction with a floor mounted sill that firmly contacts the sweep when the door closes and all you need to deal with is the corners, which foam weatherstripping blocks packed in judiciously will practically do a perfect fit.
 

Jim Jones

Subscriber
Joined
Jan 16, 2006
Messages
3,740
Location
Chillicothe MO
Format
Multi Format
Troy Hamon said:
. . . I also worked some on lightproofing the door and the wall/ceiling joints today. The bottom of the door is the biggest problem at this point, but I didn't have a solution for that yet...

A light trap can be improvised from black fabric held to the bottom of the door with a batten. Better yet is a door sill with a small step, and a matching step on the door bottom. With close tolereances those two right-angle turns block almost all light. Foam rubber can block light around the sides and top of the door, and provides an air seal so the only air entering the darkroom can be efficiently filtered. Painting the door sill and frame and all edges of the door black helps. Black tape works if you don't want a permanent fix.
 
OP
OP
Troy Hamon

Troy Hamon

Member
Joined
Nov 25, 2004
Messages
290
Location
Alaska
Format
Medium Format
Hi Gary and Jim, I appreciate your input.

On the bottom of the door there is a mounted fitting that has a bunch of rubber sweeps that are to contact the sill. The problem seems to be that the sill is not high enough and the sweep is translucent. In combination, that lets in a lot of light. In fact, the door is not quite straight, so the side with hinges is a little better fit (but light still comes through the translucent rubber flaps) while the side with the knob has an actual gap beneath it.

I bought a threshold to put down and solve the problem. I tested it out and it sealed the light out very well...so I cut it down and fitted it in and then discovered that the result was that the door was pushed up too high in the frame. As a result, it was tearing itself apart at the top...

If I could shave half the wood off the new threshold, it might work, and I think it amounts to what you are suggesting, Gary. If not, please help me understand what you are suggesting. I could also go get a smaller threshold, which would probably be smarter than trying to reduce this one.

Jim, I have blackout fabric and black tape, so I could also devise a light trap on the bottom of the door. I will probably do that, but I really want to do a bit more than that because I don't like the small gap and the air passage through there. Although that is probably not materially important since I leave a fan on almost all the time anyway...

I did use foam to seal the sides of the door where there was light intruding, which is why it's just the bottom now...
 

johnnywalker

Subscriber
Joined
Sep 23, 2002
Messages
2,323
Location
British Colu
Format
Multi Format
What I did was close the door and nail a batten down on the floor adjacent to the door. Put foam on the batten and push the batten into the door, and screw it down. Then the door has something to close into, just like the sides.
 
OP
OP
Troy Hamon

Troy Hamon

Member
Joined
Nov 25, 2004
Messages
290
Location
Alaska
Format
Medium Format
I took a friend who actually knows something about construction out there with me...and he said the sill is adjustable! So we raised it up a ways, but not enough to totally solve the problem. When it gets to that point, the door raises too high in the frame and the top of the door starts tearing itself apart.

The threshold is high enough now that there is no air leaking, but the translucence of the material on the rubber flaps is letting in just the faintest of glimmers. I am going to try to put some blackout tape on the outermost rubber flanges to see if that will do it...

And I really need to add in shelves for the dry side underneath the counters, put a surface over the hole where the kitchen sink was in the counter, and get all the construction materials and tools out of there...I think I better go get busy...I also have some convenience plumbing to do (it's functional now, but I'd like to improve on 'functional'), and I need to do the exterior electrical, both a porch light and an exterior socket fitting are just wires hanging and waiting for attention...
 

glbeas

Member
Joined
Sep 25, 2002
Messages
3,950
Location
Marietta, Ga. USA
Format
Multi Format
Troy I think you have the gist of what I was describing. The sweep I got was of black rubber material from Home Depot. I had little trouble with the sill as I was setting it on a concrete floor. All I did was close the door and position it under the edge in the best position and sink some concrete nails. If your sill is built into your door frame you probably need to do a little creative engineering like you've decribed. You might try putting a sweep on both front and back of the door, adjusting it so the sweep in front gets trapped under against the sill as you close it, or you could make a cylinder of felt and tack it to the botom edge of the door so it hangs down against the sill, the object being to make a multilayered baffle for the light. Hope you get something going that works well.
 

Kino

Subscriber
Joined
Jan 20, 2006
Messages
7,830
Location
Orange, Virginia
Format
Multi Format
Troy Hamon said:
I also worked some on lightproofing the door and the wall/ceiling joints today. The bottom of the door is the biggest problem at this point, but I didn't have a solution for that yet...

The doors we have at work in our darkrooms have an automatic lowering device so that when the door closes, a black rubber seal is lowered to make contact with the floor. This is accomplished by a button that protrudes from the sill area and hits the interior of the door frame as the door is closed and a cam lowers the seal on the sill.

Can check for you tomorrow if interested...


Frank
 
Photrio.com contains affiliate links to products. We may receive a commission for purchases made through these links.
To read our full affiliate disclosure statement please click Here.

PHOTRIO PARTNERS EQUALLY FUNDING OUR COMMUNITY:


Ilford ADOX Freestyle Photographic Stearman Press Weldon Color Lab Blue Moon Camera & Machine
Top Bottom