I asked this over on lfphoto.info.... but thought I would try it here also
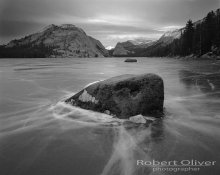
I have a 4x5 negative that has one little area I would love to be able to print with detail. The negative is pretty easy to print with the exception of the super bright Mt. Connesss in the background. I tried burning but had trouble not over burning the surrounding areas.
Attached is a scan of the neg with some contrast control done in photoshop... (sorry for the digital image, I'm weaning myself off Photoshop and back into the darkroom)
Flash the paper? Mask? Split Grade printing?
Any other ideas?
I marked this negative N+1, but I guess I didn't see that Mt. Conness had slipped into full sun when I pushed the plunger.
I will process the other neg at N or N-1 that I shot at the same time, but was just curious about this situation.
Thanks in advance
Robert