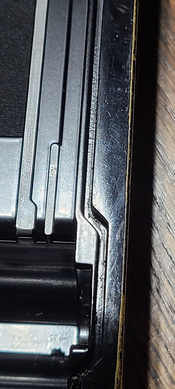
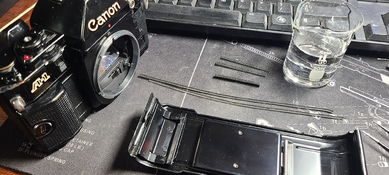
In January of 2024, I picked this camera up for use as a parts donor. It was inexpensive enough that I could rob the finger grip and drive plug for less money than I would spend buying and shipping those parts separately. The seller described it as not functional with a stuck mirror and missing battery door. When I received it, I found that it still had a roll of film in it. After robbing the needed parts, I decided to see what might be wrong with it.

I did a quick 4 corners inspection and found no significant damage. No signs of being dropped or soaked. It showed signs of heavy use though, with some abrasion from the strap loops and lots of brassing on the bottom cover. The battery door was missing as well.
A function test showed that all seemed to work to some degree but it was very sluggish in operation. The display switch would not turn but the display seemed to be working correctly. There was a single top screw missing on the back of the camera. The viewfinder was free of any debris, which is surprising given the dry crumbling nature of the light seals. Those seals were totally shot and even non-existent in some spots.
The plan for this camera will be to clean it up, lube it where possible without removing the mirror box and replace the battery door and light seals. This is not a true CLA, which is why I’m calling it an RTS instead. The goal is to simply return this one to service and if it works reasonably well, a full CLA will eventually follow.
Disassembly:
Bottom cover – There are just 2 screws holding the bottom cover in place. Be careful when reinstalling these screws as they sit next to alignment pin receptacles and it can be tough getting the screw back out of the recepticle if you stick it in there by mistake.

With the bottom cover removed, things look pretty good. I’ve worked on A-1s that have had corrosion in this area but this one is pretty clean. An operation test shows the magnets are functioning as they should.

While the bottom cover was off, I lubed what I could reach. Lube was done with a very light oil using the tips of needle nose tweezers. Once done, I replaced the bottom cover.
Front Cover – There are 4 screws on the A-1 front cover. All appear to be identical. When removing the front cover, take care with the two switches located on the rewind side of the camera. These are a friction fit into the front cover and can come free if not careful.
Remove the top left bayonet mount screw to provide access to the mirror lift mechanism. If this screw is very tight, try putting a swap soaked in acetone on the screw head to loosen the adhesive used to prevent screws from coming loose. The source of the Canon Cough comes from a flywheel located near this screw mount.
The process that I’ve had luck with to lube that flywheel is to take a syringe with a blunt needle and carefully bend the tip to about a 45 degree curve. With the syringe completely empty, draw the plunger back to about the halfway point to fill it with a air. Then put the tip in a drop of oil and draw it back ever so slightly. The plunger should barely move when you do this. Then , pull the tip out of the drop of oil and draw the plunger back another 1/8 inch. This puts a tiny amound of oil about halfway up the needle. When you quickly depress the plunger, you will get a tiny spray of oil kind of like a sneeze.
Practice this several times until you can repeat it easily. Now, prep the syringe and insert the needle. The area that you are trying to get oil to is just inside of the screw hole, to the left and down. It sits behind the side of the mirror box frame in the area where the needle is pointing towards in the picture below.

Spray the droplet of oil into the hold and then cycle the camera shutter a couple of times. If there’s no immediate improvement, try a second time. If still no improvement after about 10 shutter cycles, let it sit for a day to let the oil migrate. If it still is no better repeat the process. Be careful here though, as you don’t want to over do it. A little be of oil sprayed in the right direction is all that’s needed.
I will continue with documenting the top cover removal and replacement of the battery door tomorrow.
I did a quick 4 corners inspection and found no significant damage. No signs of being dropped or soaked. It showed signs of heavy use though, with some abrasion from the strap loops and lots of brassing on the bottom cover. The battery door was missing as well.
A function test showed that all seemed to work to some degree but it was very sluggish in operation. The display switch would not turn but the display seemed to be working correctly. There was a single top screw missing on the back of the camera. The viewfinder was free of any debris, which is surprising given the dry crumbling nature of the light seals. Those seals were totally shot and even non-existent in some spots.
The plan for this camera will be to clean it up, lube it where possible without removing the mirror box and replace the battery door and light seals. This is not a true CLA, which is why I’m calling it an RTS instead. The goal is to simply return this one to service and if it works reasonably well, a full CLA will eventually follow.
Disassembly:
Bottom cover – There are just 2 screws holding the bottom cover in place. Be careful when reinstalling these screws as they sit next to alignment pin receptacles and it can be tough getting the screw back out of the recepticle if you stick it in there by mistake.
With the bottom cover removed, things look pretty good. I’ve worked on A-1s that have had corrosion in this area but this one is pretty clean. An operation test shows the magnets are functioning as they should.
While the bottom cover was off, I lubed what I could reach. Lube was done with a very light oil using the tips of needle nose tweezers. Once done, I replaced the bottom cover.
Front Cover – There are 4 screws on the A-1 front cover. All appear to be identical. When removing the front cover, take care with the two switches located on the rewind side of the camera. These are a friction fit into the front cover and can come free if not careful.
Remove the top left bayonet mount screw to provide access to the mirror lift mechanism. If this screw is very tight, try putting a swap soaked in acetone on the screw head to loosen the adhesive used to prevent screws from coming loose. The source of the Canon Cough comes from a flywheel located near this screw mount.
The process that I’ve had luck with to lube that flywheel is to take a syringe with a blunt needle and carefully bend the tip to about a 45 degree curve. With the syringe completely empty, draw the plunger back to about the halfway point to fill it with a air. Then put the tip in a drop of oil and draw it back ever so slightly. The plunger should barely move when you do this. Then , pull the tip out of the drop of oil and draw the plunger back another 1/8 inch. This puts a tiny amound of oil about halfway up the needle. When you quickly depress the plunger, you will get a tiny spray of oil kind of like a sneeze.
Practice this several times until you can repeat it easily. Now, prep the syringe and insert the needle. The area that you are trying to get oil to is just inside of the screw hole, to the left and down. It sits behind the side of the mirror box frame in the area where the needle is pointing towards in the picture below.
Spray the droplet of oil into the hold and then cycle the camera shutter a couple of times. If there’s no immediate improvement, try a second time. If still no improvement after about 10 shutter cycles, let it sit for a day to let the oil migrate. If it still is no better repeat the process. Be careful here though, as you don’t want to over do it. A little be of oil sprayed in the right direction is all that’s needed.
I will continue with documenting the top cover removal and replacement of the battery door tomorrow.


